Last winter, I was sitting on my kitchen floor at 11 PM, staring into the open freezer of my fridge like it held the secrets to the universe. My husband was asleep upstairs. The kids were asleep. And I was alone with a tub of “keto” ice cream that tasted like frozen chalk and regret. It was sweet, sure. It had the right texture, mostly. But it lacked soul. It lacked that deep, gooey, salted caramel goodness that makes your brain stop thinking about macros and start thinking about happiness.
I was tired of spending $8 on tiny pints of ice cream that melted into a watery mess within ten minutes of taking it out of the freezer. I was tired of recipes that required a candy thermometer, a double boiler, and a degree in chemistry just to get a decent scoop. I wanted something rich. Something creamy. Something that tasted like I’d spent hours making it, but actually took less time than it takes to watch a Netflix episode.
That night, I improvised. I didn’t have a recipe. I had heavy cream, sweetener, and a jar of homemade caramel sauce I’d been hoarding for a special occasion. I whipped the cream, folded in the caramel, and threw it in the freezer. I went to bed telling myself, “If this is bad, I’m ordering Domino’s tomorrow.”
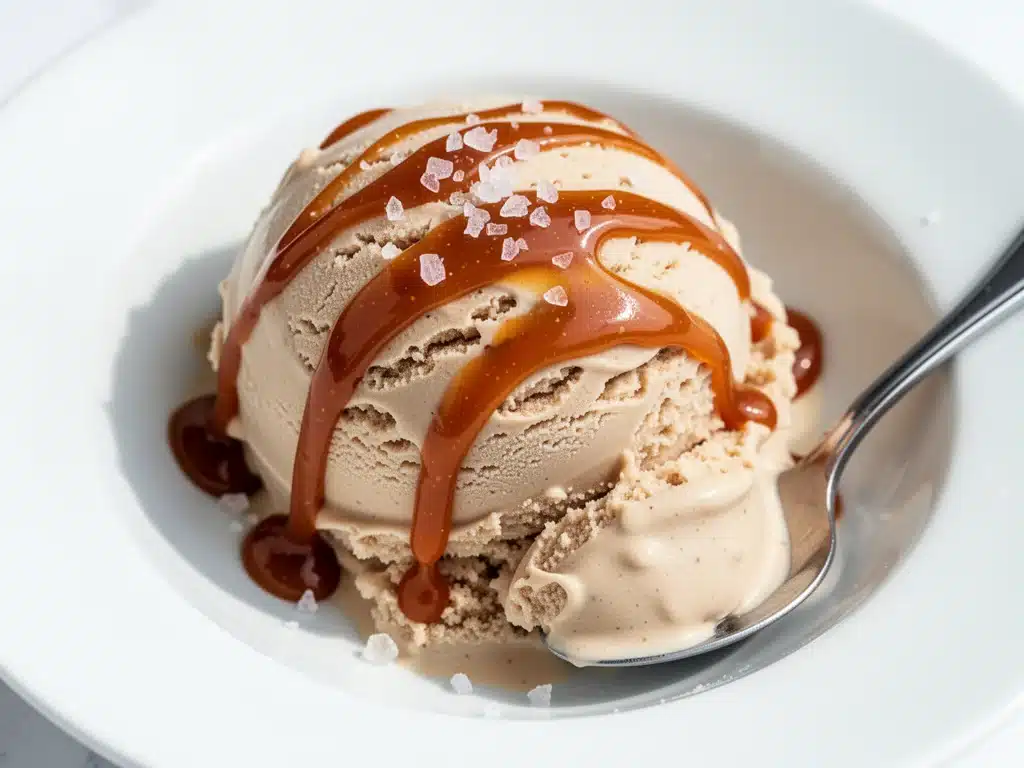
When I woke up, I dug in. And honestly? I cried a little. It was creamy. It was sweet but not cloying. It had those little shards of flaky sea salt that made every bite an event. It was, without a doubt, the best keto dessert I had ever made. Not just the best *keto* dessert—the best dessert, period.
That was two years ago. Since then, I’ve made this keto no-churn salted caramel ice cream probably fifty times. I’ve tweaked the sweetness. I’ve tried different salts. I’ve even made it for my non-keto friends, who refused to believe it wasn’t loaded with sugar. It’s become my secret weapon for dinner parties, my go-to comfort food on bad days, and the reason I never buy store-bought ice cream again.
If you’re on keto, low-carb, or just trying to cut back on sugar but refuse to give up dessert, you need to make this. It’s three ingredients. Well, technically four if you count the salt. But the magic is in the ratio. And once you taste it, you’ll understand why I’m obsessed.
Why This Keto No-Churn Salted Caramel Ice Cream Wins
I’ve tried a lot of keto ice cream recipes. Some are too icy. Some are too eggy. Some taste like they’re trying too hard to be something they’re not. This one? It just works. Here’s why it’s now permanently parked in my mental rotation of favorite recipes:
It’s Actually Creamy (No Ice Crystals!)
The biggest complaint about keto ice cream is the texture. Sugar does a lot of heavy lifting in regular ice cream—it prevents crystallization. Without it, you get ice shards. This recipe uses heavy whipping cream, which is high in fat and low in water. That fat creates a smooth, luxurious mouthfeel that mimics traditional ice cream almost perfectly. No crunch. No ice. Just smooth, velvety goodness.
Three Ingredients. Seriously.
I’m not exaggerating. You need heavy cream, a keto-friendly sweetener, and caramel sauce. That’s it. You don’t need a churning machine. You don’t need a food processor. You don’t need gelatin or eggs. If you can whisk, you can make this. I’ve made it while multitasking, while on the phone, while watching TV. It’s stupidly simple.
It Tastes Like a Cheat Day
This keto no-churn salted caramel ice cream hits all the right notes. The sweetness from the erythritol or monk fruit blends balances the richness of the cream. The caramel adds depth—a buttery, toffee-like flavor that feels indulgent. And the sea salt? That’s the finisher. It cuts through the sweetness and makes you crave just one more bite. It’s the kind of dessert that makes you close your eyes and sigh.
It’s Ready When You Need It
I know, “no-churn” doesn’t mean “instant.” You still need to freeze it. But it’s passive time. You spend maybe 15 minutes active prep. Then you let the freezer do the work. I often make this on Sunday night for Wednesday night cravings. Or I make it the morning of a dinner party, and it’s ready by the time dessert is served. It’s flexible enough for your chaotic life.
It’s Naturally Gluten-Free and Low-Carb
If you’re watching carbs, this is a lifesaver. One scoop is roughly 2-3 net carbs, depending on your sweetener and caramel choice. It’s paleo-friendly if you use a paleo sweetener. It’s dairy-free adaptable if you swap the cream for coconut cream (though the texture changes slightly). It fits so many diets, which means I can share it with everyone at the table.
Ingredients You’ll Need
Here’s the thing about this recipe: the quality of your ingredients matters more than the quantity. Since there are only three main components, each one shines. You can’t hide bad butter behind a wall of sugar here. So, let’s talk about what to buy.
Heavy Whipping Cream
Amount: 2 cups (480ml)
Why it matters: This is the base. You need heavy cream with at least 36% fat. Light cream won’t whip. Half-and-half won’t whip. You need the good stuff. I buy the carton from the grocery store, but if you have a local dairy that sells raw or high-quality cream, even better. The higher the fat, the richer the ice cream. Don’t skimp.
Tip: Keep it cold. If your cream is warm, it won’t whip up to stiff peaks. Take it out of the fridge right before you start. If it’s too warm, put it in the freezer for 10 minutes.
Keto-Friendly Sweetener
Amount: ½ cup (100g)
Why it matters: This is where people get it wrong. Regular sugar melts differently. On keto, we use alternatives. I recommend a blend of erythritol and monk fruit. Erythritol provides bulk and that crunchy texture if it doesn’t fully dissolve, while monk fruit provides intense sweetness without the aftertaste. Pure erythritol can have a cooling effect (like mint), so blending it with monk fruit or allulose balances it out.
My Pick: I use Lakanto Classic Blend or Swerve Brown (if you want a caramel-like depth). Avoid sucralose-based sweeteners if you can—they can have a metallic aftertaste in frozen desserts.
Substitution: Allulose works great too and dissolves more smoothly, but it can make the ice cream softer. If you use allulose, you might want to add a teaspoon of xanthan gum to help it hold its shape.
Homemade or High-Quality Keto Caramel Sauce
Amount: ½ cup (120ml)
Why it matters: This is the star. You can’t use regular caramel sauce—it’s all sugar. You need a keto version. You can make your own (I’ll give you a quick method below), or you can buy a high-quality store-bought keto caramel. Look for ones made with butter, cream, and keto sweeteners. Avoid ones with corn syrup or maltodextrin.
Homemade Quick Fix: If you don’t have keto caramel on hand, you can make a quick batch. Melt 2 tablespoons of butter, stir in 2 tablespoons of almond butter, 1 tablespoon of heavy cream, and 1 tablespoon of keto sweetener. Heat until smooth. It’s not as complex as a slow-cooked caramel, but it works in a pinch.
Tip: The caramel should be room temperature or slightly warm when you fold it in. Cold caramel will clump. Warm caramel will melt the cream. Aim for room temp.
Flaky Sea Salt
Amount: ½ teaspoon
Why it matters: This isn’t just for garnish. Salt enhances sweetness. It makes the caramel taste more like caramel and less like sweet cream. Use flaky sea salt (like Maldon) for the best texture and flavor burst. Regular table salt will dissolve too much and make it salty rather than savory-sweet.
Vanilla Extract (Optional but Recommended)
Amount: 1 teaspoon
Why it matters: A little vanilla adds warmth and rounds out the flavors. It’s not strictly necessary, but it makes the ice cream taste more “bakery-style.” Use pure vanilla extract, not imitation.
Equipment You’ll Need
You don’t need much. In fact, the beauty of this keto no-churn salted caramel ice cream is how little equipment it requires.
Large Mixing Bowl
I use a stainless steel bowl. Glass works too. Just make sure it’s large enough to hold the cream when it doubles in volume. I usually use a 4-quart bowl.
Electric Hand Mixer or Stand Mixer
You *can* whip cream by hand, but why would you? It takes forever and your arms will hurt. A hand mixer is perfect. A stand mixer with a whisk attachment is even better. I use my KitchenAid for this.
Spatula
A rubber or silicone spatula is essential for folding. You need to gently incorporate the caramel without deflating the whipped cream. A spoon will work in a pinch, but a spatula is much easier.
Loaf Pan or Ice Cream Container
A standard 9×5 inch loaf pan works beautifully. It makes slicing easy. Or you can use any airtight container you have. Just make sure it’s freezer-safe.
Parchment Paper
Line the pan with parchment paper. This makes it easy to lift the ice cream out later if you want to slice it, and it prevents sticking.
How to Make It: Step-by-Step
Alright, let’s get into the kitchen. This process is straightforward, but there are a few tricks to ensure that perfect texture. I’m going to walk you through it, including the little mistakes I’ve made so you don’t have to.
Step 1: Prep Your Pan
Line your loaf pan or ice cream container with parchment paper. Leave an overhang on the sides so you can lift the ice cream out later if needed. Set it aside in the freezer. This helps keep everything cold from the start.
Step 2: Whip the Cream
Pour your cold heavy whipping cream into your mixing bowl. Start beating on medium speed. As it begins to thicken, increase to high speed. You’re looking for “stiff peaks.” What does that look like? When you lift the beaters, the cream should stand up straight without drooping. It should look glossy and hold its shape. This usually takes 3-5 minutes. Don’t over-whip! If you whip it too long, it’ll turn into butter. Watch it closely near the end.
Pro Tip: If your kitchen is warm, put the bowl in the freezer for 5 minutes before whipping. It helps the cream whip faster and hold its structure.
Step 3: Sweeten and Flavor
Once your cream is whipped, sprinkle in your keto sweetener and vanilla extract. Beat on low speed just until combined. You don’t want to deflate the cream here, so go gentle. The sweetener might still have a few tiny grains—that’s okay. It’ll dissolve a bit more as it freezes.
Step 4: Fold in the Caramel
This is the critical step. Pour in your room-temperature keto caramel sauce. Using your spatula, gently fold the caramel into the cream. Don’t stir in circles. Use a cutting motion: cut down through the center, scrape the bottom, and fold over the top. Rotate the bowl and repeat. You want ribbons of caramel visible, not a uniform brown color. If you mix it too much, you’ll lose the air and the beautiful swirl effect.
Visual Cue: You should see swirls of white cream and darker caramel. It should look marbled, like a cloud with storm centers.
Step 5: Add the Salt
Sprinkle your flaky sea salt over the top. Gently fold it in once or twice. You want some salt in every bite, but you also want those nice salty spots.
Step 6: Freeze
Scrape the mixture into your prepared pan. Smooth the top with your spatula. Cover tightly with plastic wrap or a lid. Place in the freezer for at least 6 hours, but ideally overnight. The longer it freezes, the firmer it gets.
Timing Note: If you’re in a hurry, you can eat it after 4 hours, but it will be softer, more like soft-serve. For scoopable ice cream, wait 6-8 hours.
Step 7: Serve
When you’re ready to eat, let the ice cream sit on the counter for 5-10 minutes to soften slightly. This makes scooping much easier. Scoop it into bowls. Sprinkle with a few extra flakes of sea salt. Enjoy immediately.
Expert Tips for Perfect Keto Ice Cream
I’ve made this dozens of times, and I’ve learned a few things the hard way. Here’s how to guarantee success.
Keep Everything Cold
Fat and cold go hand in hand. If your cream is warm, your ice cream will be icy. If your bowl is warm, your cream won’t whip. Cold bowl, cold cream, cold kitchen. It’s the golden rule of no-churn ice cream.
Don’t Over-Mix the Caramel
I know, it’s tempting to make it uniform. But the swirls are part of the appeal. And more importantly, over-mixing deflates the whipped cream. Less air = denser, icier ice cream. Be gentle.
Choose the Right Sweetener
Erythritol crystallizes when cold. This can give your ice cream a slight crunch. If you hate that, use allulose or a blend with monk fruit. Allulose stays softer and doesn’t crystallize as much. It’s worth the extra cost for the texture alone.
Use High-Quality Caramel
If your caramel sauce is watery, your ice cream will be icy. If it’s too thick, it won’t fold well. Aim for a sauce that’s pourable but viscous, like honey. If your homemade caramel is too thick, warm it slightly before folding.
Let It Rest Before Scooping
Straight out of the freezer, keto ice cream can be rock hard. It needs 5-10 minutes on the counter to soften. If you try to scoop it straight away, you’ll struggle. If you let it sit too long, it’ll melt. Find that sweet spot.
Variations and Substitutions
Once you master the base, you can play around. Here are some variations I’ve tried:
Chocolate Swirl
Instead of caramel, fold in sugar-free chocolate sauce or melted dark chocolate (85% cocoa or higher). Create swirls just like the caramel.
Mint Chocolate Chip
Add 1 teaspoon of peppermint extract to the cream. Fold in chopped sugar-free dark chocolate chips at the end. Fresh and refreshing.
Peanut Butter Cup
Fold in ¼ cup of sugar-free peanut butter. Drizzle with sugar-free chocolate sauce. It’s like a Reese’s Cup in ice cream form.
Dairy-Free Version
Swap heavy cream for full-fat coconut cream (chilled overnight, scoop the solid part). Use coconut-based caramel sauce. The flavor will be coconutty, which pairs beautifully with caramel.
Lower Fat Version
You can use half heavy cream and half Greek yogurt, but the texture will be less creamy and more tangy. It’s a trade-off. I prefer full fat.
Serving and Storage
How to Serve:
This ice cream is best enjoyed on its own, but it pairs well with a few things. I love it with a sprinkle of crushed pecans or almonds. It’s great with a drizzle of warm (keto) caramel sauce. It also goes well with a cup of black coffee or tea.
Storage:
Store in an airtight container in the freezer for up to 2 weeks. After that, it might start to develop ice crystals or absorb freezer odors. It’s best eaten within the first week.
Reheating:
You don’t really “reheat” ice cream. But if it’s too hard, let it sit at room temperature for 5-10 minutes. That’s it.
Nutrition Information
I’m not a nutritionist, but here’s the breakdown if you’re tracking. This is approximate, as it depends on your specific sweetener and caramel brand.
Per Serving (1 scoop, approx ½ cup):
- Calories: 280
- Total Fat: 26g
- Net Carbs: 3g
- Total Carbs: 4g
- Fiber: 1g
- Sugar: 1g (natural lactose from cream)
- Protein: 2g
It’s high in fat, moderate in protein, and very low in carbs. Perfect for keto. Just remember, portion control is key. It’s delicious, but it’s calorie-dense.
Final Thoughts
This keto no-churn salted caramel ice cream has changed my relationship with dessert. It’s proof that you don’t need sugar to have something delicious. It’s proof that simplicity often wins. And it’s proof that you can indulge without guilt.
I hope you try it. I hope you love it as much as I do. And I hope it becomes a staple in your kitchen, just like it has in mine. Make it on a Tuesday night. Make it for a party. Make it just because you feel like it. You deserve it.
If you make this, let me know how it turns out! Drop a comment below with your tips or variations. I love hearing from you.
Frequently Asked Questions
Can I use a different sweetener?
Yes! You can use erythritol, monk fruit, allulose, or a blend. Erythritol can be crunchy, allulose is softer, and monk fruit is very sweet so you may need less. Just taste your sweetener first, as potency varies by brand.
Why is my ice cream icy?
This usually happens if the cream wasn’t whipped enough (not enough air), or if the caramel was too watery. Make sure you whip to stiff peaks, and use a thick, high-quality caramel sauce. Also, ensure your cream is very cold before whipping.
Can I make this ahead of time?
Yes! In fact, it’s better if you make it ahead. It needs at least 6 hours to set. You can make it up to 2 weeks in advance. Just keep it covered to prevent freezer burn.
Is this recipe Paleo-friendly?
If you use a Paleo-friendly sweetener (like honey or maple syrup, though that changes the keto status) and dairy-free butter/cream, yes. For strict keto, it’s not Paleo due to the dairy and artificial sweeteners, but it fits many other diets.
Can I use light cream?
No. Light cream doesn’t have enough fat to whip into stiff peaks. You need heavy whipping cream (36% fat or higher). The fat is what creates the creamy texture.
How do I fix a sauce that’s too runny?
If your caramel sauce is too thin, simmer it on the stove for a few minutes to reduce it. Let it cool completely before folding it into the cream. You want it thick enough to hold its shape.
Can I freeze this in ice cream trays?
You can, but the texture might be less smooth. A loaf pan allows for a thicker mass that freezes more evenly. If you use trays, expect a softer, softer-serve-like texture.
Pin This Recipe!
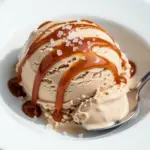
Keto No-Churn Salted Caramel Ice Cream
- Total Time: 6 hours 15 minutes
- Yield: 8 servings 1x
Description
A rich, creamy, and indulgent keto-friendly ice cream made with just three main ingredients: heavy cream, a keto sweetener, and caramel sauce. This no-churn dessert requires no special equipment and delivers a smooth texture with flaky sea salt.
Ingredients
- 2 cups (480ml) heavy whipping cream (cold, at least 36% fat)
- ½ cup (100g) keto-friendly sweetener (e.g., erythritol/monk fruit blend)
- ½ cup (120ml) keto caramel sauce (room temperature)
- ½ teaspoon flaky sea salt
- 1 teaspoon vanilla extract (optional)
Instructions
- Line a 9×5 inch loaf pan or ice cream container with parchment paper and place it in the freezer to chill.
- Pour the cold heavy whipping cream into a large mixing bowl. Whip on medium speed, then increase to high, until stiff peaks form (about 3-5 minutes). Do not over-whip.
- Sprinkle the keto sweetener and vanilla extract over the whipped cream. Beat on low speed just until combined.
- Pour the room-temperature keto caramel sauce into the cream. Gently fold the caramel in using a spatula with a cutting motion until ribbons of caramel are visible. Avoid over-mixing to maintain airiness.
- Sprinkle the flaky sea salt over the mixture and gently fold it in once or twice.
- Scrape the mixture into the prepared pan, smooth the top, and cover tightly.
- Freeze for at least 6 hours, or ideally overnight, until firm.
- Before serving, let the ice cream sit on the counter for 5-10 minutes to soften slightly for easier scooping. Garnish with extra sea salt if desired.
Notes
Ensure all ingredients, especially the cream and bowl, are very cold for best whipping results. Use high-quality keto caramel sauce; if homemade, ensure it is thick and room temperature. If using allulose, the texture will be softer. For a dairy-free version, substitute heavy cream with chilled coconut cream and use coconut-based caramel.
- Prep Time: 15 minutes
- Cook Time: 0 minutes
- Category: Dessert
- Cuisine: American
Nutrition
- Serving Size: 1 scoop (approx. ½ c
- Calories: 280
- Sugar: 1
- Sodium: 15
- Fat: 26
- Saturated Fat: 16
- Carbohydrates: 4
- Fiber: 1
- Protein: 2
Keywords: keto ice cream, no-churn ice cream, salted caramel, low carb dessert, gluten-free dessert, paleo dessert, dairy-free option, easy dessert