
For three years, I lived in a state of quiet despair around cookie time. You know the feeling. It’s that moment when you’re scrolling through Pinterest at 10 PM, seeing these golden, chewy, gooey-looking chocolate chip cookies, and you feel that pang of envy. Not just because you want cookies, but because you want them to taste like real cookies. The kind that have a crisp edge, a soft center, and a deep, nutty richness. For me, that was a fantasy. I’m gluten-free, and every attempt at a gluten-free cookie ended in one of two disasters: a dry, crumbly mess that fell apart if I looked at it wrong, or a greasy, flat pancake that tasted like cardboard and regret.
I tried the expensive blends. The ones with xanthan gum and rice flour and a name that sounds like a chemistry experiment. I bought the fancy almond flours that cost more than my weekly grocery budget. I followed recipes from famous food bloggers who claimed their cookies were “indistinguishable” from wheat-based ones. And every single time, I was let down. They were close, but not close enough. They lacked soul. They lacked that specific crunch-and-chew dynamic that makes a chocolate chip cookie worth waking up early for.
The turning point came on a rainy Tuesday in November. I was feeling particularly sorry for myself, staring at a bag of almond flour that had been sitting in my pantry for months, gathering dust. I decided to stop trying to mimic wheat flour and instead lean into what almond flour actually is: pure, ground nuts. No gums. No fillers. Just almonds. I started experimenting with ratios, temperatures, and techniques, treating it less like baking and more like cooking. I burned batches. I underbaked batches. I made cookies that were essentially almond butter patties with chocolate chips.
But then, I hit on the secret. It wasn’t a fancy ingredient. It wasn’t a new technique. It was simplicity. It was about respecting the almond flour, using real butter, and understanding that these cookies need to rest. When I finally pulled that first batch out of the oven, the smell alone made me stop crying. They were golden brown. They spread just enough. And when I took a bite? Crisp on the outside, chewy on the inside, and deeply nutty. My husband, who isn’t even gluten-free, ate three before I could take a photo. That was the moment I knew I had to share this. This isn’t just a “diet” cookie. It’s the best chocolate chip cookie I’ve ever made, period. And it uses simple ingredients you probably already have.
Why You’ll Love This Gluten-Free Almond Flour Chocolate Chip Cookies Recipe
Let’s be real. Most gluten-free baking feels like a compromise. You’re trying to hide the fact that you’re eating something different. But this recipe? It doesn’t feel like a compromise. It feels like an upgrade. Here’s why this almond flour cookie has completely taken over my kitchen and my heart.
Zero Grain, Zero Guilt — Seriously, there is no flour blend here. No rice flour, no tapioca starch, no mysterious powders. Just almond flour, sugar, butter, and eggs. If you’re avoiding gluten, you’ll love that this is naturally gluten-free without needing a specialized $15 blend. If you’re not avoiding gluten, you’ll love that it’s lower carb and higher protein than traditional cookies.
Texture That Actually Works — This is the big one. Almond flour has no gluten, which means it can’t form that elastic network that gives wheat cookies their structure. But it has fat. And that fat, when handled right, creates a tender, melt-in-your-mouth crumb that wheat flour just can’t match. These cookies have a distinct crunch when they first hit the tooth, followed by a soft, chewy center. They don’t crumble. They don’t turn to dust. They hold together perfectly.
Rich, Nutty Flavor — Because almond flour is so concentrated, it brings a deep, toasted almond flavor to the cookie that’s absent in wheat-based versions. It tastes luxurious. It tastes expensive. It tastes like something you’d buy at a high-end bakery, not something you whipped up in ten minutes on a weeknight.
Stupid Simple Ingredients — You need five main ingredients. Almond flour, butter, brown sugar, white sugar, an egg, vanilla, baking soda, salt, and chocolate chips. That’s it. No xanthan gum. No eggs whites separated from yolks. No weird binders. If you can melt butter and mix a bowl, you can make these. I’ve made these for my gluten-eating friends, and they always ask for the recipe, thinking it’s a secret family heirloom.
Make-Ahead Friendly — These cookies freeze beautifully. I often scoop the dough onto a baking sheet, freeze it solid, and then transfer the dough balls to a bag. When I want fresh cookies, I just pull out two dough balls and bake them. It’s like having fresh-baked cookies on demand, even on busy Tuesday nights.
This recipe has saved me from so many disappointing store-bought alternatives. It’s my go-to when I need to impress guests, when I need comfort food, or when I just need to prove to myself that gluten-free doesn’t mean flavor-free. You’ll make these again and again. I promise.
Ingredients You’ll Need
Here’s the best part about this recipe: the ingredient list is short, clean, and recognizable. You don’t need to order anything from a specialty health food store. You likely have most of this in your kitchen right now. I’m particular about a few things here, so let’s talk about what to buy and what to skip.
The Base
Super-fine almond flour (2 cups / 200g) — This is the most critical ingredient. Do not use almond meal. Almond meal has skins in it and is coarser, which will make your cookies gritty. You need super-fine, blanched almond flour. It should feel like powdery sand. I buy mine in bulk from Amazon or a local health food store, but check the label. If it says “meal,” put it back. If it feels gritty, it’s too coarse. Tip: If your almond flour is a bit clumpy, pulse it in a food processor for 30 seconds before measuring.
Unsalted butter (½ cup / 115g) — Use real butter. No margarine, no coconut oil (unless you want a coconut flavor). Real butter gives that classic cookie taste and helps with the spread. Let it soften to room temperature before you start. If it’s too hard, it won’t cream properly with the sugar. If it’s melted, your cookies will spread too much and become flat. Aim for soft, but still cool to the touch.
Brown sugar (½ cup / 100g) — Packed. Brown sugar adds moisture and chewiness, plus that caramel-like depth. Dark brown sugar is even better if you want a deeper molasses flavor, but light brown works fine. This is what makes the centers chewy.
Granulated white sugar (½ cup / 100g) — This helps with the crisp edges. The combination of brown and white sugar is key for that perfect texture contrast. Don’t skip the white sugar, or you’ll lose the crispness.
Egg (1 large) — This binds everything together. Almond flour doesn’t have gluten, so the egg is crucial for structure. Make sure it’s at room temperature. Cold eggs can seize up the butter, making a grainy dough.
Vanilla extract (1 teaspoon) — Use real vanilla, not imitation. It enhances the nutty flavor of the almonds. If you have vanilla bean paste, even better. It adds those tiny specks and extra flavor.
The Dry Mix

Baking soda (½ teaspoon) — This helps the cookies spread and brown. Don’t use baking powder; they’re not the same. Make sure your baking soda is fresh. If it’s old, your cookies won’t rise and will be dense.
Salt (½ teaspoon) — Yes, salt. In a sweet cookie, salt is non-negotiable. It balances the sweetness and makes the chocolate taste more chocolatey. Use fine sea salt or table salt.
The Star
Chocolate chips (1 cup / 170g) — I use semi-sweet chocolate chips, but you can use dark chocolate chunks, milk chocolate, or even white chocolate. For the best flavor, chop up a bar of high-quality chocolate instead of using chips. Chips have stabilizers that keep them from melting completely, so they stay distinct. Chopped chocolate melts into the dough, creating pockets of gooey chocolate in every bite. My favorite brand is Guittard or Ghirardelli.
Optional: Flaky sea salt — For finishing. Sprinkle a little Maldon sea salt on top right after they come out of the oven. It elevates the flavor and makes them look professional.
Equipment Needed
You don’t need fancy gadgets for this. Here’s what I actually use, and what you can swap.
Large mixing bowl — I use a 4-quart stainless steel bowl. It’s big enough to mix everything without making a mess. Glass works too, but metal conducts heat better if you’re doing anything else in the kitchen.
Electric mixer or wooden spoon — I use a hand mixer for creaming the butter and sugars. It takes about 2 minutes and ensures the mixture is light and fluffy. If you’re doing this by hand, you’ll need to be vigorous. A wooden spoon works, but it takes arm strength. Don’t use a fork; it won’t incorporate enough air.
Baking sheets — Two standard 13×18 inch sheets. I prefer dark non-stick sheets because they brown the bottoms better. If you’re using light aluminum sheets, your cookies might spread more and burn less. You might need to rotate them halfway through baking.
Parchment paper — Line your baking sheets. This is non-negotiable for almond flour cookies because they can be sticky. Parchment ensures easy cleanup and prevents sticking. Silicone mats work too, but parchment is cheaper and easier to replace.
Cooling rack — Almond flour cookies are delicate when hot. They need to cool on a rack to stop the cooking process and let the bottoms crisp up. If you leave them on the hot pan, they’ll continue to cook and might burn on the bottom.
Measuring cups and spoons — Accuracy matters with almond flour. It’s dense. If you pack it too much, you’ll use too much flour and get dry cookies. If you don’t pack it enough, you’ll get flat cookies. Use the scoop-and-level method for dry ingredients. For almond flour, spoon it into the cup and level it off. Don’t scoop directly from the bag.
Ice cream scoop or cookie scoop — For uniform sizing. I use a medium scoop (about 1.5 tablespoons). This ensures all cookies bake evenly. If you scoop by hand, try to make them all the same size. Uneven sizes mean uneven baking.
How to Make It: Step-by-Step
Alright, let’s make these cookies. I’m walking you through exactly how I do it, including the little tricks I’ve picked up over dozens of batches.
Step 1: Prep Your Oven and Pan (5 minutes)
Preheat your oven to 350°F (175°C). This is crucial. Almond flour cookies need a moderate heat to cook through without burning the outside. If your oven runs hot, you might need to check them a minute early. Line your baking sheets with parchment paper. Make sure the parchment is flat and smooth. Crinkled parchment can cause uneven baking.
Step 2: Cream the Butter and Sugars (3 minutes)
In your large mixing bowl, combine the softened unsalted butter, brown sugar, and granulated white sugar. Use an electric mixer on medium-high speed, or a wooden spoon if you’re ready for some workout. Beat this mixture for about 2-3 minutes until it’s light, fluffy, and pale in color. This step incorporates air, which helps the cookies rise slightly. If you skip this, your cookies will be dense and flat. Scrape down the sides of the bowl with a spatula to make sure everything is incorporated.
Step 3: Add the Wet Ingredients (1 minute)
Add the large egg and vanilla extract to the butter-sugar mixture. Beat on medium speed until just combined. Don’t overmix here. You want it smooth and creamy. If you overbeat, you might incorporate too much air, which can cause the cookies to spread too much. The mixture should look homogeneous, with no streaks of butter or egg.
Step 4: Mix in the Dry Ingredients (2 minutes)
Add the almond flour, baking soda, and salt to the bowl. Switch to a spatula or mix on low speed. Mix just until the dry ingredients disappear. Do not overmix. Almond flour doesn’t have gluten, so it doesn’t need development. Overmixing can make the dough tough. The dough will look thick and slightly crumbly at first, but it will come together as you mix. It should hold together when you squeeze it in your hand. If it’s too dry, add a teaspoon of milk. If it’s too wet, add a tablespoon of almond flour.
Step 5: Fold in the Chocolate (1 minute)
Stir in the chocolate chips (or chopped chocolate) using your spatula. Distribute them evenly throughout the dough. You want a chocolate chip in every bite. If you’re using chopped chocolate, make sure you get pieces of all sizes for variety.
Step 6: Scoop and Chill (30 minutes – optional but recommended)
Use your cookie scoop to drop mounds of dough onto the prepared baking sheets. Leave about 2 inches between each cookie because they will spread. Here’s the pro tip: If you have time, chill the dough in the fridge for 30 minutes. Almond flour dough is softer than wheat dough, and chilling helps it hold its shape. It also deepens the flavor. If you’re in a hurry, you can bake immediately, but the cookies might spread a bit more. If you chill them, you’ll get thicker, chewier cookies.
Step 7: Bake (10-12 minutes)
Place the baking sheets in the preheated oven. Bake for 10-12 minutes. The cookies are done when the edges are golden brown and the centers look set but still soft. Do not wait for the centers to be firm. They will firm up as they cool. If you bake them until the centers are firm, they’ll be dry. Look for that golden edge and a slightly shiny center. Rotate the pans halfway through baking for even browning.
Step 8: Cool (10 minutes)
Remove the cookies from the oven. Let them cool on the baking sheet for 5 minutes. This is crucial. Almond flour cookies are fragile when hot. If you move them immediately, they’ll break. After 5 minutes, transfer them to a cooling rack to cool completely. This allows the bottoms to crisp up and the flavors to settle. If you eat them hot, they’ll be soft and gooey, which is delicious, but they won’t have that perfect texture yet.
Expert Tips & Tricks
Here’s everything I’ve learned from making these dozens of times. These tips will save you from my mistakes.
Choose the Right Almond Flour
This is the #1 mistake people make. If your almond flour is coarse, your cookies will be gritty. Buy super-fine, blanched almond flour. If you can’t find it, you can pulse almond meal in a food processor until it’s fine, but be careful not to turn it into almond butter. Keep an eye on it.
Don’t Overbake
Almond flour cookies continue to cook on the hot pan after you take them out of the oven. They look underdone when they come out, and that’s okay. The residual heat will finish cooking them. If you bake them until they look done, they’ll be dry and crumbly. Err on the side of underbaking.
Chill the Dough
I know it’s an extra step, but chilling the dough makes a huge difference. It prevents the cookies from spreading too much and gives them a thicker, chewier texture. If you’re impatient, freeze the scoops for 15 minutes instead of chilling in the fridge.
Use Room Temperature Butter
Soft butter creams properly with sugar, creating air pockets that help the cookies rise. Cold butter won’t mix well, and melted butter will make the cookies flat and greasy. Aim for butter that yields to gentle pressure but doesn’t leave a thumbprint.
Measure Almond Flour Correctly
Almond flour is dense. If you scoop it directly from the bag, you’ll pack it too much and use too much flour. Spoon it into your measuring cup and level it off with a knife. This ensures the right ratio of flour to wet ingredients.
Add Flaky Salt
Right after the cookies come out of the oven, sprinkle a little flaky sea salt on top. It contrasts with the sweet chocolate and enhances the nutty flavor. It also makes them look beautiful.
Store Properly
Almond flour cookies stay fresh longer than wheat cookies because of the higher fat content. Store them in an airtight container at room temperature for up to 5 days. They actually taste better on day 2, as the flavors meld together.
Variations & Substitutions
Once you’ve nailed the basic version, here’s how you can mix it up. I’ve tried all of these.
Peanut Butter Cookies
Replace ¼ cup of the almond flour with ¼ cup of creamy peanut butter. Add ½ teaspoon of peanut butter powder for extra flavor. These are incredible, especially with chocolate chips.
Coconut Almond Cookies
Add ½ cup of shredded coconut to the dough. Use white chocolate chips instead of semi-sweet. It’s like a Macadamia Nut Cookie, but with almonds.
Orange Almond Cookies
Add the zest of one orange to the butter-sugar mixture. Use dark chocolate chips. The orange and almond combination is classic and refreshing.
Matcha Almond Cookies
Add 1 teaspoon of matcha powder to the almond flour. Use white chocolate chips. It’s a unique, earthy flavor that’s surprisingly good.
Dairy-Free Option
Replace the butter with a dairy-free butter alternative (like Miyoko’s or Earth Balance). Coconut oil works too, but it will change the texture slightly. Chill the dough well to prevent spreading.
Nut-Free Option
This recipe is specifically for almond flour, so it’s not nut-free. If you need a nut-free version, you’d need to use sunflower seed flour, but the flavor and texture will be different.
Serving & Storage
How to Serve
I serve these warm, right off the cooling rack, with a cold glass of milk. They’re perfect for dessert, but also great for breakfast with coffee (yes, really). They’re sturdy enough to pack in a lunchbox, too.
Side Dishes
These cookies are a complete treat on their own, but they pair well with a cup of tea, coffee, or a cold glass of almond milk. For a dessert platter, serve them with fresh berries or a dollop of whipped cream.
Refrigerator
Store in an airtight container at room temperature for up to 5 days. They stay soft and chewy. If your kitchen is very humid, store them in the fridge to prevent them from getting soggy.
Freezing
Dough: Scoop the dough onto a baking sheet and freeze until solid. Then transfer the dough balls to a freezer bag. Freeze for up to 3 months. Bake directly from frozen, adding 1-2 minutes to the baking time.
Baked Cookies: Store cooled cookies in an airtight container in the freezer for up to 3 months. Thaw at room temperature before eating. They taste just as good as fresh.
Pro Tip
If your cookies seem a bit dry after a few days, store them with a slice of bread in the container. The bread releases moisture, which softens the cookies overnight.
Nutrition Information
I’m not a nutritionist, but here’s the breakdown if you’re tracking. Keep in mind that almond flour is higher in calories and fat than wheat flour, but it’s also higher in protein and fiber.
Per Serving (based on 12 cookies):
- Calories: 180
- Protein: 4g
- Carbs: 8g
- Fiber: 2g
- Sugar: 6g
- Fat: 16g
- Saturated Fat: 6g
- Cholesterol: 25mg
- Sodium: 110mg
What’s Good:
- High in healthy fats from almonds
- Good source of vitamin E
- Lower carb than traditional cookies
- Gluten-free and grain-free
What to Know:
- Higher in calories due to almond flour
- Contains nuts (tree nuts)
- Moderate sugar content
My Take:
Look, these are cookies. They’re meant to be enjoyed. They’re not a health food, even though they’re healthier than traditional cookies. The almond flour adds nutrition, but the sugar and butter keep them in treat territory. When I make these, I enjoy one or two with a cup of tea and don’t stress about the macros. They satisfy that sweet tooth without the crash, and that’s what matters to me.
Final Thoughts
So that’s my go-to gluten-free almond flour chocolate chip cookies! I’ve probably talked your ear off at this point, but when you make a recipe this often, you have a lot to say about it. These cookies have saved me from so many disappointing baking attempts. They’re my answer to “what’s for dessert” when I want something indulgent but also aligned with my dietary needs.
This recipe has changed how I think about gluten-free baking. It’s not about replacing wheat flour; it’s about embracing what you have. Almond flour is delicious, nutritious, and versatile. When you treat it with respect, it creates something truly special. My kids love these, my gluten-eating friends love these, and I love these. They’ve become a staple in our home.
Make it yours! Try different chocolates, add nuts, or play with the spices. The best recipes are the ones you adapt to your family’s tastes. If you make this, drop a comment and let me know what you think! I love hearing how recipes turn out in your kitchen. And if something doesn’t work, tell me that too—I’m here to help troubleshoot.
Happy baking! And I hope your kitchen smells half as good as mine does right now.
Frequently Asked Questions
Why are my cookies flat?
This usually happens if the butter was too warm or if you didn’t chill the dough. Almond flour dough is softer than wheat dough, so it needs to be firm before baking. If you skip the chilling step, the cookies will spread too much. Also, make sure you’re using super-fine almond flour, not almond meal. Coarser flour doesn’t absorb moisture the same way, leading to spreading.
Why are my cookies crumbly?
This means you used too much almond flour or didn’t mix enough. Almond flour is dense, so if you pack it into the measuring cup, you’ll use too much. Spoon and level it instead. Also, make sure you’re not overbaking. Almond flour cookies continue to cook on the hot pan. If you bake them until they’re firm, they’ll be dry and crumbly. Take them out when the edges are golden and the centers look soft.
Can I use almond meal instead of almond flour?
I don’t recommend it. Almond meal has skins in it and is coarser, which will make your cookies gritty and dense. Super-fine almond flour is essential for the right texture. If you only have almond meal, you can pulse it in a food processor until it’s fine, but be careful not to turn it into almond butter.
How do I store these cookies?
Store them in an airtight container at room temperature for up to 5 days. They stay soft and chewy. If your kitchen is humid, store them in the fridge. They also freeze beautifully. Freeze the dough balls or the baked cookies for up to 3 months.
Can I double this recipe?
Yes, you can double the recipe. Just make sure you have a large enough mixing bowl. The baking time might increase by 1-2 minutes if you’re baking a larger batch. Don’t overcrowd the baking sheets; leave enough space for the cookies to spread.
Why did my cookies burn on the bottom?
This can happen if your baking sheet is dark or if your oven runs hot. Dark sheets absorb more heat, so the bottoms cook faster. Try using light aluminum sheets or lining your dark sheets with parchment paper. Also, check your cookies a minute early. Almond flour cookies can go from perfect to burnt quickly.
Can I use coconut oil instead of butter?
You can, but the texture will be different. Coconut oil is softer than butter, so the cookies might spread more. Chill the dough well to prevent this. Also, coconut oil has a distinct flavor that might not pair well with the almonds. If you want a dairy-free option, I recommend a dairy-free butter alternative that’s designed for baking.
Are these cookies safe for nut allergies?
No, these cookies contain almond flour, which is a tree nut. They are not safe for anyone with a tree nut allergy. If you need a nut-free version, you’d need to use a different flour base, like sunflower seed flour, but the flavor and texture will be different.
Pin This Recipe!
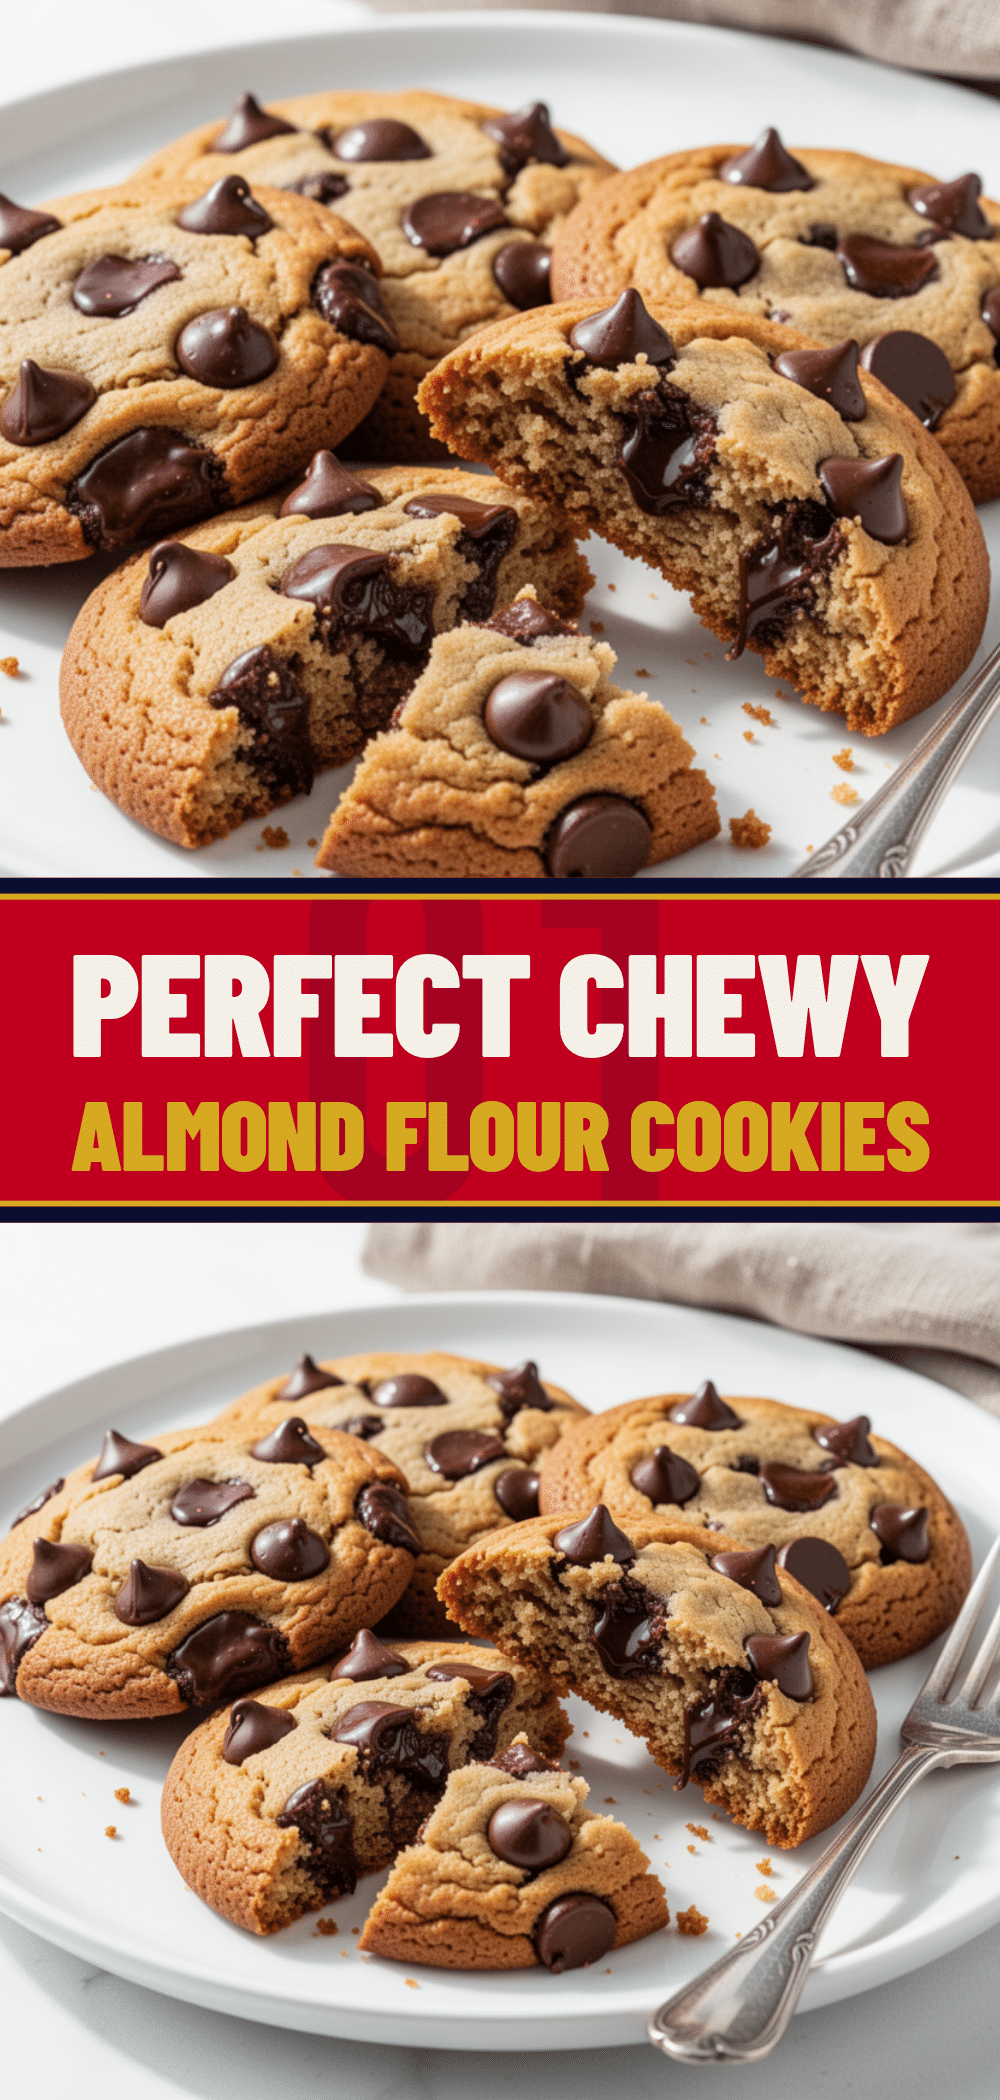

Gluten-Free Almond Flour Chocolate Chip Cookies
- Total Time: 45 minutes
- Yield: 12 cookies 1x
Description
These gluten-free almond flour chocolate chip cookies are crisp on the outside, chewy on the inside, and deeply nutty. Made with simple, real ingredients like almond flour and butter, they offer a superior texture and flavor without the need for xanthan gum or flour blends.
Ingredients
- 2 cups (200g) super-fine blanched almond flour
- ½ cup (115g) unsalted butter, softened to room temperature
- ½ cup (100g) packed brown sugar
- ½ cup (100g) granulated white sugar
- 1 large egg, room temperature
- 1 teaspoon vanilla extract
- ½ teaspoon baking soda
- ½ teaspoon salt
- 1 cup (170g) semi-sweet chocolate chips or chopped chocolate
- Flaky sea salt, for finishing (optional)
Instructions
- Preheat oven to 350°F (175°C) and line two baking sheets with parchment paper.
- In a large mixing bowl, cream the softened butter, brown sugar, and white sugar together using an electric mixer on medium-high speed for 2-3 minutes until light and fluffy.
- Add the egg and vanilla extract to the butter mixture and beat on medium speed until just combined and smooth.
- Add the almond flour, baking soda, and salt to the bowl. Mix on low speed or use a spatula just until the dry ingredients disappear. Do not overmix.
- Fold in the chocolate chips until evenly distributed throughout the dough.
- Scoop dough onto prepared baking sheets, leaving 2 inches between each cookie. For best results, chill the dough in the refrigerator for 30 minutes.
- Bake for 10-12 minutes, rotating pans halfway through, until edges are golden brown but centers still look soft.
- Let cookies cool on the baking sheet for 5 minutes to set, then transfer to a wire rack to cool completely.
- Sprinkle with flaky sea salt immediately after removing from the oven if desired.
Notes
Use super-fine blanched almond flour, not almond meal, to avoid grittiness. Spoon and level the almond flour for accurate measurement. Do not overbake; cookies will firm up as they cool. Dough can be frozen for up to 3 months.
- Prep Time: 15 minutes
- Cook Time: 10-12 minutes
- Category: Dessert
- Cuisine: American
Nutrition
- Serving Size: 1 cookie
- Calories: 180
- Sugar: 6
- Sodium: 110
- Fat: 16
- Saturated Fat: 6
- Carbohydrates: 8
- Fiber: 2
- Protein: 4
Keywords: gluten-free, almond flour, chocolate chip cookies, grain-free, dairy-free option, nutty cookies, chewy cookies


