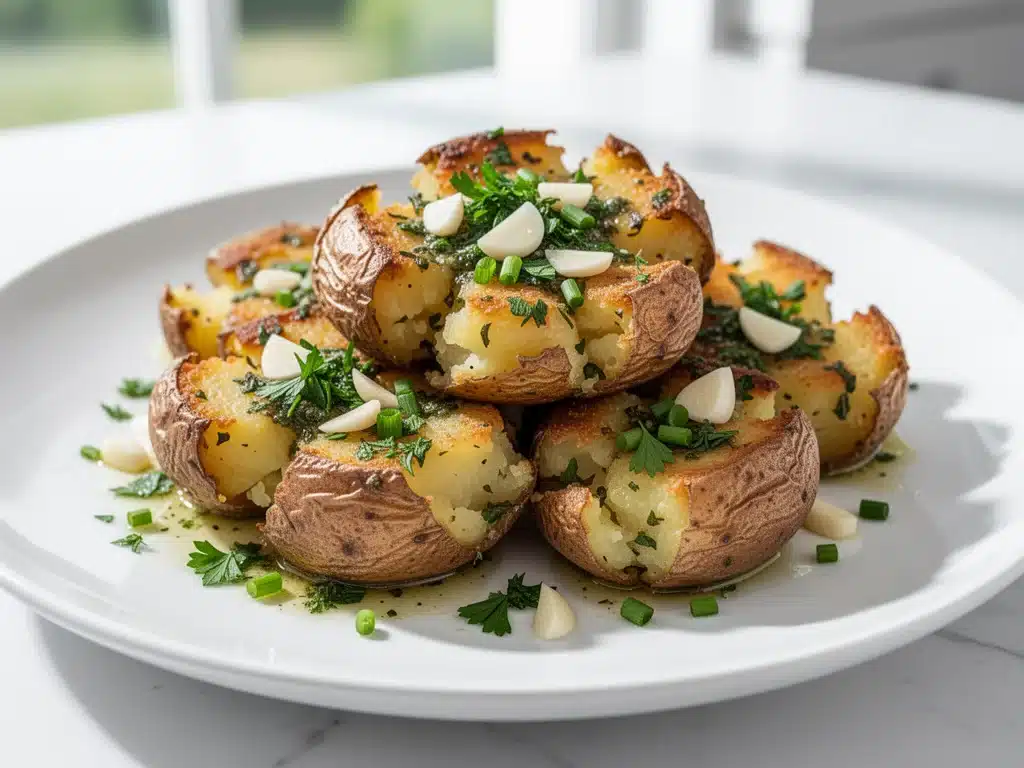
There is a specific kind of panic that sets in around 5:30 PM on a Tuesday. You’re hungry, the kids are hungry, and the fridge is looking at you like it holds the secrets to the universe but only offers leftover takeout containers and a wilting bag of spinach. Last month, I was in that exact headspace. I had no time to roast a whole chicken, no energy to chop vegetables for a stir-fry, and definitely no patience for complex techniques. I needed dinner, and I needed it yesterday.
I stared at a bag of Yukon Gold potatoes I’d bought three days ago and intended to use for mashed potatoes but had completely forgotten about. That’s when I remembered my friend Sarah’s “smashed potato hack.” I’d seen it on social media before, dismissed it as another Pinterest trend that looked cute but tasted mediocre. But desperation makes you try things. I boiled the potatoes, smashed them flat, tossed them in oil, and threw them in the oven. Twenty minutes later, my kitchen smelled like a high-end bistro, not a stressed-out suburban home.
These Crispy Smashed Potatoes with Garlic Herb Butter aren’t just a side dish. They are the bridge between “I have nothing to cook” and “I am a culinary genius.” They are stupidly simple, require almost zero prep work, and deliver the crunchiest, most flavorful potato experience you can get in under an hour. I’ve made this version at least twenty times since that Tuesday. I’ve tweaked the garlic amount, tested different herbs, and even tried making them in the air fryer (spoiler: the oven is still king for crispiness). This recipe is the one that stuck. It’s my go-to when I need to impress guests without spending hours in the kitchen, or when I just need a comfort food fix that feels a little more elevated than a standard baked potato.
The magic really happens in that garlic herb butter. It’s not just melted butter poured on top; it’s a fragrant, savory sauce that seeps into every nook and cranny of the smashed potato, creating a crispy edge and a fluffy center in every single bite. Once you try these, I promise you’ll stop buying frozen fries. These are better. They’re real. And they’re ready in the time it takes to order pizza.
Why You’ll Love This Recipe
Look, I’m not going to pretend that cooking every single night is easy. Some nights, the goal is just to get food on the table that doesn’t taste like cardboard. This crispy smashed potatoes recipe with garlic herb butter hits that sweet spot perfectly. It’s reliable, it’s delicious, and it uses ingredients I already have in my pantry. Here is why this recipe has earned a permanent spot in my weekly rotation:
- Stupidly Simple Technique — Seriously, if you can boil water and press down on a potato, you can make this. I’ve walked my teenage son through it over FaceTime while I was at work. There are no fancy cuts, no complex sauces, and no waiting for dough to rise. Just boil, smash, bake.
- Lightning Fast — From the moment the water boils to the moment they come out of the oven, this takes about 30-35 minutes. That is 10 minutes of active prep and maybe 20 minutes of hands-off baking. I make this on weeknights when I get home exhausted and just need dinner to work.
- Pantry-Friendly — You probably have 80% of these ingredients already. Potatoes, butter, garlic, salt, and basic herbs like parsley or rosemary. If you don’t have fresh herbs, dried works fine too. I keep the key items stocked just so I can throw this together on a whim.
- Crowd-Pleaser Status — I’ve served this to my vegetarian sister, my gluten-free neighbor, and my dad who only eats meat and potatoes. Everyone loved it. It’s naturally gluten-free and vegan (if you swap the butter), so it works for almost any diet.
- Makes Amazing Leftovers — Actually, these taste even better the next day. I deliberately make extra for lunch throughout the week. Reheated in the toaster oven, they stay crispy. Microwaved? They get soft, but still tasty. I prefer the toaster oven method.
- Budget-Smart — Feeds 4-6 people for under $10. Potatoes are one of the cheapest vegetables in the store. That’s less than one meal at a fast-food place, and honestly, these are way healthier and more satisfying.
This is my go-to when I need dinner to just work. No complicated techniques, no weird ingredients, just reliable, delicious food that makes everyone happy. It’s the kind of recipe that makes you feel like you’ve accomplished something, even if you barely lifted a finger.
Ingredients You’ll Need
Here’s the best part: this recipe doesn’t require a trip to a specialty grocery store. You can get everything at your local supermarket, and most of it is probably already in your kitchen. I’m particular about a few things here, mostly because I’ve learned through trial and error what makes the difference between “okay” and “amazing.”
For the Potatoes:
Yukon Gold Potatoes (2 pounds / 900g) — I swear by Yukon Golds for this recipe. They have a buttery flavor and a waxy texture that holds together well when smashed. Russets are too starchy and fall apart. Red potatoes are okay, but Yukon Golds give you the best crisp-to-fluffy ratio. Look for medium-sized potatoes, about the size of a tennis ball. Uniform size helps them cook evenly.
Vegetable or Canola Oil (3 tablespoons / 45ml) — You need enough oil to coat the potatoes generously. This is what creates the crispy crust. I use vegetable oil because it has a high smoke point and a neutral flavor. Olive oil works too, but extra virgin can burn in the oven. I keep a bottle of basic vegetable oil specifically for roasting.
Kosher Salt (1 tablespoon / 15g) — Plus more for the boiling water. Kosher salt is key because it dissolves easily and doesn’t have the metallic taste of iodized salt. I use Diamond Crystal, but Morton’s works too. Just adjust the amount if you switch brands.
Black Pepper (1 teaspoon / 2g) — Freshly cracked is best. I use a pepper grinder because pre-ground pepper loses its flavor quickly. It adds a nice subtle heat that complements the garlic.
For the Garlic Herb Butter:
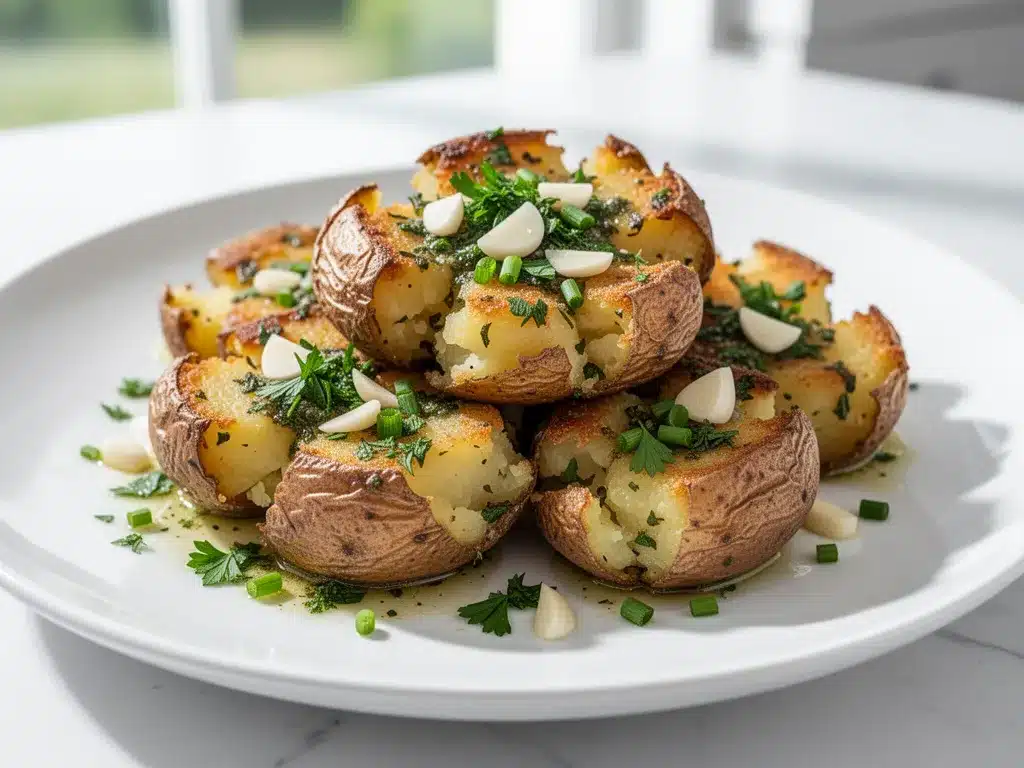
Unsalted Butter (4 tablespoons / 60g) — This is the star of the show. Use good quality butter if you can afford it. The flavor of the butter is front and center here, so cheap butter will taste cheap. I usually use Kerrygold or a local dairy brand. If you’re vegan, use a high-quality plant-based butter, but the flavor profile will be slightly different.
Garlic (4-5 cloves, minced / about 2 tablespoons) — Yes, five cloves. Don’t skimp on the garlic. This is a garlic herb butter, after all. Fresh only—no jarred garlic in this recipe. Jarred garlic has a weird metallic aftertaste that really shows up in simple dishes. Mince it finely so it distributes evenly. If you’re lazy, you can use a garlic press, but mincing by hand gives better texture.
Fresh Parsley (2 tablespoons, chopped / 5g) — Flat-leaf parsley is my preference because it has a cleaner, brighter flavor than curly parsley. It adds a fresh, grassy note that cuts through the richness of the butter. If you don’t have fresh parsley, dried parsley works, but use only 1 teaspoon. Fresh is best.
Dried Rosemary (1 teaspoon / 1g) — Rosemary adds an earthy, pine-like depth that pairs perfectly with potatoes. I use dried rosemary because it holds up better to the heat than fresh. If you use fresh, chop it very finely. Thyme is also a great alternative if you prefer a more subtle herb flavor.
Optional Add-ins:
- Parmesan Cheese (2 tablespoons, grated) — Sprinkle this on before baking for an extra savory, cheesy crust. It’s not traditional, but I love the umami boost.
- Red Pepper Flakes (½ teaspoon) — If you like a little kick, add this to the butter mixture. It adds a nice contrast to the creamy garlic.
- Lemon Zest (1 teaspoon) — A little zest brightens everything up and cuts the richness. Great for summer.
Equipment Needed
You don’t need fancy equipment for this. Here’s what I actually use in my kitchen, along with some alternatives if you don’t have the exact same tools.
Large Pot — I use a 6-quart pot for boiling the potatoes. It needs to be big enough to hold all the potatoes submerged in water with room to boil. My ancient pot from college still works fine, but any large stockpot will do. Make sure it has a lid if you want to boil faster.
Baking Sheet — A standard 13×9 inch sheet pan is perfect. I line it with parchment paper for easy cleanup, but you can also use a silicone baking mat or just grease the pan well. Parchment paper is my go-to because it prevents sticking and makes cleanup a breeze.
Mug or Glass — This is your smashing tool. I use the bottom of a heavy glass or a measuring cup to press down on the potatoes. A potato masher works too, but a mug gives you more control over the thickness. I like them thin and crispy, so I press pretty hard.
Small Saucepan or Microwave-Safe Bowl — For melting the butter. I use a small saucepan on the stove because it’s easier to stir in the garlic and herbs evenly. But if you’re in a hurry, a microwave-safe bowl works fine. Just heat in 15-second intervals to avoid burning.
Sharp Knife and Cutting Board — For chopping the parsley and mincing the garlic. A dull knife makes you cry more—learned this the hard way. I use a standard chef’s knife for everything.
Measuring Spoons and Cups — Pretty standard stuff. Dollar store versions work fine for this recipe since the measurements are forgiving.
Optional but nice:
- Garlic Press — Saves time but not necessary. Mincing by hand works fine.
- Pastry Brush — If you want to get fancy and brush the butter on evenly, but spooning it works just as well.
How to Make It: Step-by-Step
Alright, let’s make this! I’m walking you through exactly how I do it, including the little tricks I’ve picked up over time. This process is straightforward, but there are a few key moments where attention to detail makes all the difference.
Step 1: Prep Your Potatoes (5 minutes)
Wash your potatoes thoroughly under cold water. You don’t need to peel them—the skins add texture and nutrients. If they’re very large, cut them in half so they cook evenly. Uniform size is important here. I aim for potatoes that are roughly the same size, about 2 inches in diameter. This ensures they all finish cooking at the same time. Set them aside on a paper towel to dry.
Step 2: Boil the Potatoes (15-20 minutes)
Fill your large pot with water and add 1 tablespoon of kosher salt. The water should taste like the ocean. Bring it to a rolling boil. Once boiling, add the potatoes. Reduce heat to medium-high and cook for 15-20 minutes, or until the potatoes are fork-tender. You should be able to pierce the center of a potato with a fork with no resistance. Do not overcook them—they should hold their shape when smashed. If they’re too mushy, they’ll fall apart. Drain them in a colander and let them sit for 2-3 minutes to steam dry. This helps them crisp up later.
Step 3: Smash the Potatoes (5 minutes)
Preheat your oven to 425°F (220°C). Line your baking sheet with parchment paper. Place the boiled potatoes on the baking sheet, leaving a little space between each one. Take your mug or glass and press down firmly on each potato. You want them flattened to about ½ inch thick. Don’t worry if they crack a little—that’s where the crispy edges come from. The goal is to increase the surface area so more of the potato can get crispy. Arrange them in a single layer. If you overcrowd the pan, they’ll steam instead of roast.
Step 4: Make the Garlic Herb Butter (2 minutes)
While the potatoes are boiling and smashing, melt the butter in a small saucepan over low heat. Or, microwave it in a bowl for 30 seconds. Once melted, remove from heat. Add the minced garlic, chopped parsley, dried rosemary, and a pinch of black pepper. Stir well. The residual heat will infuse the butter with the flavors. Don’t cook the garlic in the pan, or it will burn and turn bitter. You just want to melt it and combine. The mixture should smell fragrant and amazing.
Step 5: Top and Bake (20 minutes)
Drizzle or spoon the garlic herb butter generously over each smashed potato. Make sure to get the butter into the cracks and crevices. You want every bite to be flavored. Sprinkle with a little more salt and pepper if you like. Place the baking sheet in the preheated oven. Bake for 15-20 minutes, or until the edges are golden brown and crispy. I rotate the pan halfway through to ensure even browning. The potatoes should look golden and hear a slight sizzle when you take them out.
Step 6: Serve Immediately
Take them out of the oven and let them cool for 2-3 minutes. They’ll crisp up more as they cool slightly. Serve warm, straight from the pan. They’re best eaten hot and crispy. If you’re serving a crowd, keep them in a warm oven (200°F) while you finish other dishes.
Total Time: About 35 minutes (10 minutes active, 25 minutes mostly hands-off)
Expert Tips & Tricks
Here’s everything I’ve learned from making this dozens of times. These tips will save you from my mistakes and guarantee success.
Don’t Skip the Drying Step
After draining the boiled potatoes, let them sit in the colander for a few minutes to steam dry. Excess moisture is the enemy of crispiness. If the potatoes are wet when you smash them, they’ll steam in the oven instead of roasting. I learned this the hard way with soggy potatoes that never crisped up.
Press Harder Than You Think
When smashing, don’t be gentle. Press down firmly to create thin edges. The thinner the edges, the crispier they get. I like mine almost paper-thin on the outside. If you leave them too thick, you’ll get a boiled potato texture instead of a crispy roast potato.
Use Enough Oil
I know it sounds like a lot, but the oil is essential for crispiness. The potatoes need to be coated well. If you skimp on oil, they’ll dry out and burn instead of crisping. I drizzle oil over them before baking, too, for extra insurance.
Garlic Goes In Last
Always add the garlic to the melted butter off the heat. Cooking garlic in hot oil or butter can cause it to burn quickly, resulting in a bitter taste. The residual heat is enough to infuse the flavor without burning it.
Rotate the Pan
Ovens have hot spots. Rotating the baking sheet halfway through baking ensures even browning. I set a timer for 10 minutes and rotate then. It’s a small step that makes a big difference in appearance.
Common Mistakes (and how to avoid them):
- Mistake: Potatoes fall apart when smashing — Fix: They were overcooked. Boil for less time next time. They should be tender but still hold their shape.
- Mistake: Potatoes are soggy, not crispy — Fix: Not enough oil, or the pan was overcrowded. Give them space and use plenty of oil.
- Mistake: Garlic is burnt and bitter — Fix: You cooked the garlic too long. Add it to the butter off the heat.
Variations & Substitutions
Once you’ve nailed the basic version, here’s how you can mix it up. I’ve tried all of these, and they all work great.
Cheesy Smashed Potatoes
Before baking, sprinkle 2 tablespoons of grated Parmesan or cheddar cheese over each potato. The cheese melts and creates a savory, crispy crust. This is my husband’s favorite variation. He loves the extra umami.
Spicy Jalapeño Version
Add 1 finely diced jalapeño to the garlic herb butter. Sprinkle with red pepper flakes before baking. This adds a nice kick that pairs well with the creamy butter. Great for game day.
Lemon Herb Version
Skip the rosemary and add the zest of one lemon to the butter. Finish with fresh dill or chives. This is lighter and brighter, perfect for spring or summer gatherings.
Bacon Lover’s
Cook 4 strips of bacon until crispy, crumble it, and sprinkle over the potatoes after baking. Add the bacon bits to the garlic butter for extra flavor. It’s indulgent but worth it.
Dietary Modifications:
- Gluten-Free — This recipe is naturally gluten-free. Just ensure your baking powder (if using) is gluten-free.
- Dairy-Free — Replace butter with olive oil or a plant-based butter substitute. The flavor will be different, but still delicious. Use olive oil for the crispiest result.
- Vegan — Use plant-based butter and skip the cheese. Add nutritional yeast to the butter mixture for a cheesy flavor. My lactose-intolerant friend loves this version.
Serving & Storage
How to Serve:
I usually serve these straight from the baking sheet at the dinner table—it looks rustic and stays warm. But here are other ways I’ve enjoyed them:
Side Dishes:
- Grilled steak or chicken
- Fish tacos (the crispy potatoes add great texture)
- A simple green salad with vinaigrette
- Roasted asparagus or broccoli
Toppings Bar:
When I have guests, I put out small bowls of: extra garlic herb butter, crumbled bacon, chopped chives, sour cream, and hot sauce. Everyone customizes their portion. It’s fun and interactive.
Storage Instructions:
Refrigerator:
Store leftovers in an airtight container for up to 3 days. The potatoes will soften in the fridge, which is normal. They won’t be crispy until reheated.
Reheating:
Best method: Oven or toaster oven. Preheat to 400°F and bake for 10-15 minutes until crispy again. This restores the texture perfectly.
Microwave method: Heat for 1-2 minutes, but they will be soft. Not recommended if you want crispiness.
Air fryer method: 350°F for 5-7 minutes. Works well too and is faster than the oven.
Freezing:
Honestly, these don’t freeze well. The texture changes, and they become mushy when thawed. It’s best to make them fresh. If you must freeze, freeze the boiled potatoes before smashing, but the quality won’t be great.
Nutrition Information
I’m not a nutritionist, but here’s the breakdown if you’re tracking. This is per serving (based on 6 servings).
Per Serving:
- Calories: 280
- Protein: 4g
- Carbs: 35g
- Fiber: 3g
- Sugar: 1g
- Fat: 14g
- Saturated Fat: 7g
- Cholesterol: 25mg
- Sodium: 450mg
What’s Good:
- Good source of carbohydrates for energy
- Contains potassium from potatoes
- Lower in calories than French fries
What to Know:
- Higher in fat from the butter and oil
- Contains dairy (unless modified)
- Moderate sodium (use low-sodium butter to reduce)
My Take:
Look, these are potatoes with butter and oil. They’re not a diet food. But they’re way better than takeout fries, cost less, and you know exactly what’s in them. When I want to make them lighter, I reduce the butter to 2 tablespoons and use olive oil. But usually? I just eat a reasonable portion and enjoy them. Balance is key.
Final Thoughts
So that’s my go-to crispy smashed potatoes with garlic herb butter! I’ve probably talked your ear off at this point, but when you make a recipe this often, you have a lot to say about it. This has saved weeknight dinners more times than I can count. It’s my answer to “what’s for dinner” when I’m tired, don’t want takeout, and still want something that tastes really good. My kids are happy, my husband’s happy, and I’m happy because I’m not stressed about cooking.
Make it yours! Try different herbs, add cheese, or go spicy. The best recipes are the ones you adapt to your family’s tastes. If you make this, drop a comment and let me know what you think! I love hearing how recipes turn out in your kitchen. And if something doesn’t work, tell me that too—I’m here to help troubleshoot.
Happy cooking! And I hope your kitchen smells half as good as mine does right now.
Frequently Asked Questions
Can I use Russet potatoes instead of Yukon Golds?
You can, but the result will be different. Russets are starchier and fluffier, so they might fall apart more easily when smashing. Yukon Golds hold their shape better and have a creamier texture. If you use Russets, be gentler when smashing and check them frequently so they don’t overcook.
Why did my smashed potatoes turn out soggy?
This usually happens for two reasons: not enough oil, or overcrowding the pan. Potatoes need space to roast. If they’re touching, they steam. Also, make sure you dry them well after boiling. Excess moisture prevents crispiness. I always pat them dry with a paper towel before smashing.
Can I make this ahead for a dinner party?
Sort of. You can boil and smash the potatoes up to 4 hours ahead. Store them on the baking sheet, covered in the fridge. When ready to serve, let them come to room temperature, add the butter, and bake as directed. They’ll still crisp up nicely. I do this all the time to save stress during parties.
Can I use air fryer instead of oven?
Yes! Air fryer works great for smaller batches. Preheat to 400°F. Arrange smashed potatoes in the basket in a single layer. Cook for 10-12 minutes, flipping halfway through. They get very crispy in the air fryer. Just don’t overcrowd the basket.
Why did my garlic burn in the butter?
Garlic burns very quickly in hot butter. Always add minced garlic to the butter off the heat. The residual heat is enough to infuse the flavor. If you cook it on the stove, keep the heat very low and watch it closely. But off-heat is safer and prevents bitterness.
How do I reheat leftovers without them getting dry?
Use the oven or toaster oven. Preheat to 400°F and bake for 10-15 minutes. This restores the crispiness. Microwaving will make them soft and chewy. If you must microwave, add a splash of water and cover it, but the texture won’t be the same.
Can I double this recipe?
Absolutely! Double everything and use two baking sheets. Rotate them in the oven halfway through for even cooking. I do this when I’m meal-prepping or feeding a crowd. Just make sure your oven has enough space for two racks.
Pin This Recipe!
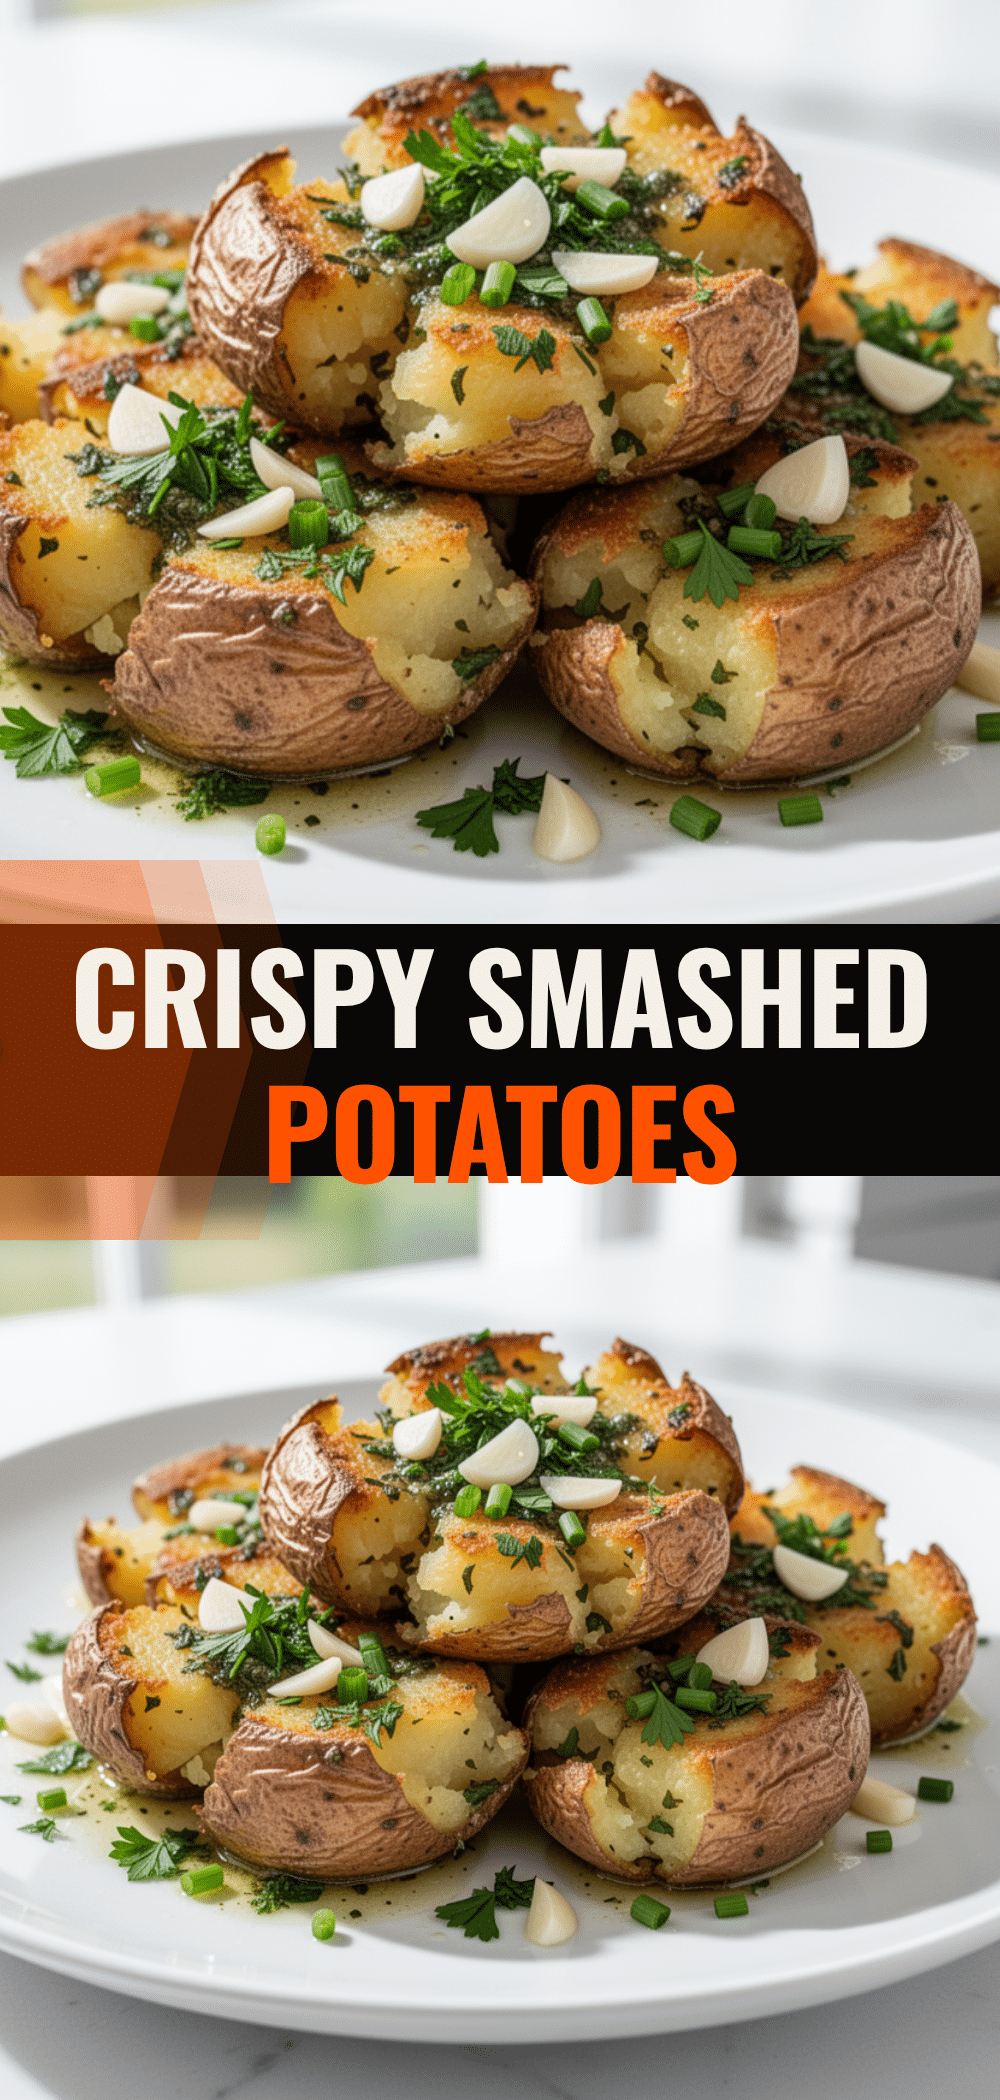
Crispy Smashed Potatoes: 10 Min Garlic Herb Butter Recipe
- Total Time: 35 minutes
- Yield: 6 servings 1x
Description
These crispy smashed potatoes with garlic herb butter are a simple, fast, and flavorful side dish that delivers a crunchy exterior and fluffy interior in under an hour.
Ingredients
- 2 pounds Yukon Gold potatoes
- 3 tablespoons vegetable or canola oil
- 1 tablespoon kosher salt (plus more for boiling water)
- 1 teaspoon black pepper
- 4 tablespoons unsalted butter
- 4–5 cloves garlic, minced
- 2 tablespoons fresh parsley, chopped
- 1 teaspoon dried rosemary
- Optional: 2 tablespoons grated Parmesan cheese
- Optional: ½ teaspoon red pepper flakes
- Optional: 1 teaspoon lemon zest
Instructions
- Wash potatoes thoroughly; do not peel. If large, cut in half to ensure uniform size. Set aside to dry.
- Fill a large pot with water, add 1 tablespoon kosher salt, and bring to a rolling boil.
- Add potatoes to boiling water and cook for 15-20 minutes until fork-tender but holding their shape. Drain and let steam dry for 2-3 minutes.
- Preheat oven to 425°F (220°C) and line a baking sheet with parchment paper.
- Place boiled potatoes on the baking sheet and press down firmly with a mug or glass to flatten to about ½ inch thick.
- Melt butter in a small saucepan or microwave. Remove from heat and stir in minced garlic, parsley, rosemary, and black pepper.
- Drizzle the garlic herb butter generously over the smashed potatoes, ensuring it gets into the cracks.
- Bake for 15-20 minutes until edges are golden brown and crispy, rotating the pan halfway through.
- Let cool for 2-3 minutes before serving immediately.
Notes
Ensure potatoes are dry after boiling to maximize crispiness. Press potatoes firmly to create thin, crispy edges. Add garlic to butter off the heat to prevent burning. For leftovers, reheat in an oven or toaster oven at 400°F to restore crispiness.
- Prep Time: 10 minutes
- Cook Time: 25 minutes
- Category: Side Dish
- Cuisine: American
Nutrition
- Serving Size: 1 smashed potato
- Calories: 280
- Sugar: 1
- Sodium: 450
- Fat: 14
- Saturated Fat: 7
- Carbohydrates: 35
- Fiber: 3
- Protein: 4
Keywords: smashed potatoes, garlic herb butter, crispy potatoes, easy side dish, weeknight dinner, gluten-free, vegetarian


