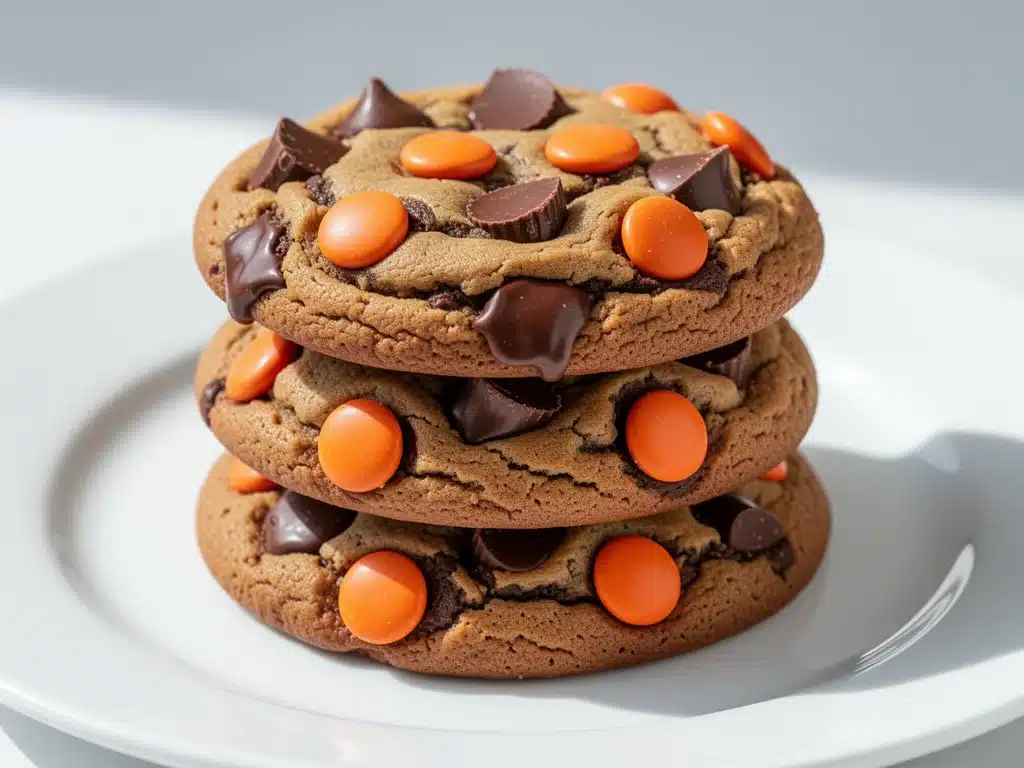
Last Tuesday, I was standing in my kitchen at 7:30 PM, staring into the open refrigerator like it held the secrets to the universe. Dinner had been a disaster (something about a burnt casserole and a crying toddler), and I knew my husband’s mood was about to hit rock bottom. I needed a win. Something sweet, something quick, and something that would make my kids forget they just had mashed potatoes for dinner.
I had a bag of Reese’s Pieces sitting on the counter, leftover peanut butter, and a half-used stick of butter. Usually, this combination leads to a messy kitchen and a minor crisis. But that night, I threw them together with a handful of chocolate chips and a prayer. I didn’t follow a recipe. I just followed my gut.
When they came out of the oven, the smell was insane. It smelled like a candy store exploded in the best way possible. My son took one bite, stopped mid-sentence, and just stared at me. “Are these from the store?” he asked. I laughed and said no. He didn’t believe me until I ate one myself and nearly fell over because they were actually incredible.
That was six months ago. I’ve made these Chocolate Peanut Butter Cup Cookies with Reese’s Pieces probably thirty times since then. They’ve become my emergency rescue dessert, my party centerpiece, and my way of saying “I love you” when I’m too tired to cook a real meal. And here’s the honest truth: they are better than any bakery cookie you’ll buy. Better than takeout dessert. Better than those sad, dry cookies from the grocery store aisle.
People think baking is this complicated art form. It’s not. It’s chemistry, sure, but it’s also just mixing stuff until it looks right. These cookies are proof that you don’t need fancy techniques or expensive ingredients to make something that tastes amazing. You just need to know the right ratios and not be afraid of the peanut butter.
If you’ve been looking for a treat that’s chewy, crunchy, sweet, and salty all at once, this is it. I’ve tweaked this recipe so many times that it’s basically perfect now. Soft centers, crispy edges, pockets of melted chocolate, and bursts of peanut butter flavor in every bite. Let me show you how to make them.
Why You’ll Love This Recipe
There are a lot of cookie recipes out there. Chocolate chip? Classic. Oatmeal raisin? Controversial (don’t @ me). But Chocolate Peanut Butter Cup Cookies with Reese’s Pieces? That’s a different category entirely. It’s indulgent without being overly heavy, and it’s ridiculously easy to pull together.
Here’s why these cookies have taken over my kitchen (and likely will take over yours too):
- Stupid Simple Ingredients — Seriously, if you have butter, sugar, eggs, flour, peanut butter, and chocolate, you’re halfway there. I don’t even use vanilla extract half the time because the peanut butter is strong enough on its own. If you can boil water, you can make these.
- Lightning Fast Prep — 15 minutes of mixing, 12 minutes in the oven. That’s it. I make these on weeknights when I get home exhausted and just want to sit on the couch. No chilling dough overnight, no fancy tempering of chocolate. Just scoop, bake, eat.
- The Texture Game — This is the big one. Most peanut butter cookies are dry and crumbly. These are dense and chewy in the middle, with slightly crisp edges. The Reese’s Pieces add this fun little crunch that contrasts with the soft dough. It’s a texture dream.
- Kid-Approved (Even by Picky Eaters) — My daughter usually turns her nose up at anything “fancy.” But she loves these. They taste like candy, but they’re technically cookies. It’s the perfect loophole for parents who want to give their kids a treat that feels special.
- Makes Amazing Leftovers — Okay, let’s be real. These rarely last more than two days in our house. But if they do, they actually taste better the next day. The flavors meld together, and the peanut butter gets even more pronounced. I pack them in my lunchbox at work, and my coworkers think I’m secretly a professional baker.
- Budget-Smart — You’re using pantry staples. Reese’s Pieces are cheap. Chocolate chips are cheap. Butter and sugar are cheap. This recipe makes about 24 large cookies for under $10. That’s less than two slices of pizza, but way more satisfying.
This is my go-to when I need dessert to just work. No complicated techniques, no weird ingredients I can’t find, just reliable, delicious food that makes everyone happy. And honestly? It makes me happy because I’m not stressed about baking.
Ingredients You’ll Need
Here’s the best part: you probably have most of this already in your pantry. I’m particular about three ingredients here, and I’ll tell you exactly why. Don’t skip the details, or you might end up with a flat, greasy mess instead of a chewy cookie.
For the Dough Base
Unsalted butter (1 cup / 226g, softened) — This is non-negotiable. I use salted butter sometimes, but then I cut back on the added salt. Softened means it should be cool to the touch but squishable. If you microwave it and it’s melty, you’re ruining the texture. It’ll spread too much. Let it sit on the counter for 30 minutes.
Granulated sugar (½ cup / 100g) — This helps create those crispy edges. If you only want chewy cookies, you can use all brown sugar, but the mix is better. I like the contrast.
Brown sugar (1 cup / 200g, packed) — This is the chewy factor. Dark brown sugar has more molasses, which gives a deeper flavor. I prefer dark brown for these cookies because it pairs better with the peanut butter. Light brown works, but it’s a bit milder.
Eggs (2 large) — Room temperature eggs mix in easier. I know, I know, it’s a pain. But cold eggs can make the dough seize up a bit. Just take them out of the fridge when you start melting the butter.
Vanilla extract (1 teaspoon) — I’m not a huge vanilla person, but it rounds out the peanut butter flavor. Don’t skip it, but don’t overdo it either. You don’t want vanilla cookies.
All-purpose flour (2 cups / 250g) — Don’t use cake flour or bread flour. All-purpose is the sweet spot. Spoon it into the measuring cup and level it off. Don’t scoop directly from the bag, or you’ll pack it down and end up with dry cookies. (I learned this the hard way. Dry cookies are sad cookies.)
Baking soda (1 teaspoon) — This helps the cookies spread and brown. Make sure it’s not expired. Old baking soda makes flat, dense cookies. Test it with a little vinegar if you’re unsure.
Salt (½ teaspoon) — Even though we’re using unsalted butter, salt is crucial. It enhances the chocolate and peanut butter flavors. Don’t skip it.
For the Flavor & Mix-ins
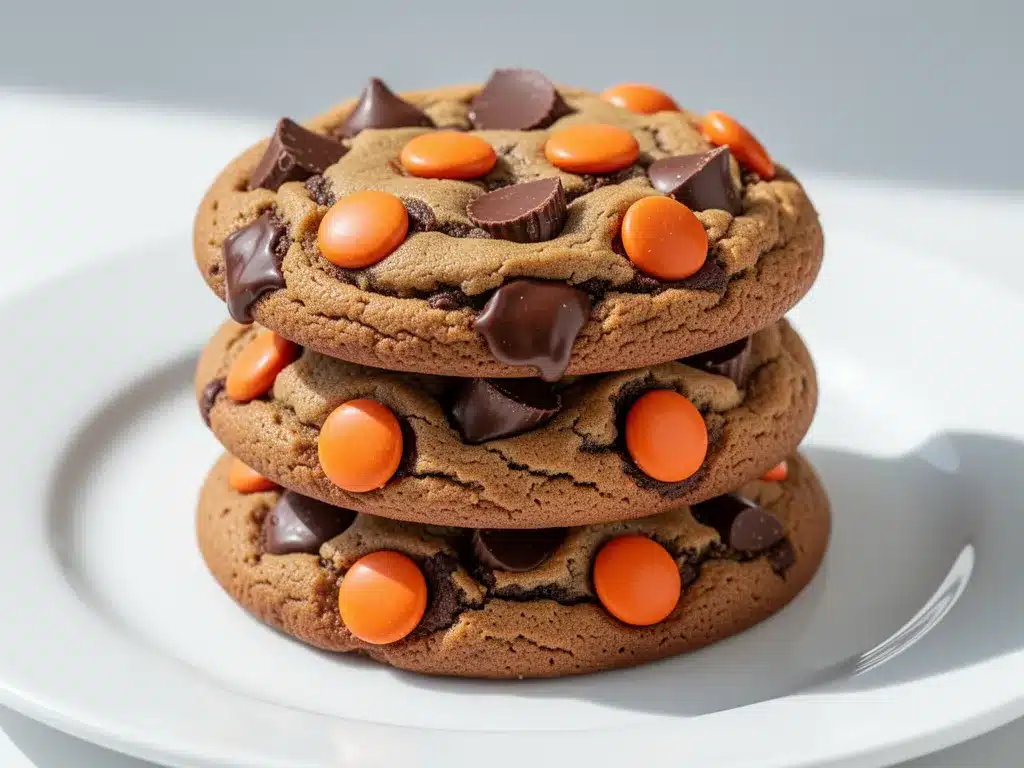
Creamy peanut butter (½ cup / 128g) — This is the star. Use standard creamy peanut butter like Jif or Skippy. Natural peanut butter (the kind where the oil separates) doesn’t work well here because the oil makes the dough greasy. We want structure, not a puddle. If you must use natural, make sure it’s well-stirred and thick, but I don’t recommend it.
Chocolate chips (1 cup / 170g) — Semi-sweet chocolate chips are my go-to. They’re not too sweet and balance the saltiness of the peanut butter. Dark chocolate chips work too if you want a more intense chocolate flavor. Milk chocolate is too sweet for me.
Reese’s Pieces (1 cup / 150g) — Obviously, these are the namesake ingredient. They add color, crunch, and bursts of peanut butter flavor. You can use Reese’s Cups (chopped) if you want bigger chunks, but Pieces are easier to distribute evenly. I buy the big tubs when they’re on sale.
Optional: Sea salt flakes — For sprinkling on top before baking. This is the “fancy” touch that makes them look like they came from a high-end bakery. Totally worth it.
Equipment Needed
You don’t need fancy equipment for this. Here’s what I actually use. Most of this is probably already in your kitchen.
Large mixing bowl — I use a 4-quart stainless steel bowl. It needs to be big enough to mix everything without flour flying everywhere. Plastic works too, but I like the stability of metal.
Electric mixer — A hand mixer or stand mixer makes this so much easier. Creaming the butter and sugar by hand takes arm workouts I don’t have time for. If you must mix by hand, be prepared for some serious elbow grease.
Measuring cups and spoons — Pretty standard stuff. Dollar store versions work fine for this recipe. Just be accurate with the flour.
Baking sheets — I use two half-sheet pans. Dark pans bake faster, so I might lower the temperature by 25 degrees if I’m using them. Light aluminum pans are more forgiving.
Parchment paper — Line your baking sheets. This is non-negotiable for easy cleanup and even baking. I’ve tried bare pans, and the cookies stick. It’s a mess. Don’t do it.
Cooling rack — Optional but recommended. Letting cookies cool on the pan can make them overcook from residual heat. A rack stops the cooking process.
Silicone spatula — For scraping the bowl. I use a big one. It’s the most useful tool in my kitchen.
Cookie scoop — I use a 2-tablespoon scoop. It ensures uniform size so they bake evenly. If you don’t have one, just use two spoons to drop dollops of dough. Just try to make them all the same size.
How to Make It: Step-by-Step
Alright, let’s make this! I’m walking you through exactly how I do it, including the little tricks I’ve picked up over the years. This is straightforward, but there are a few key moments where attention matters.
Step 1: Prep Your Oven and Pans (2 minutes)
Preheat your oven to 350°F (175°C). Line two baking sheets with parchment paper. If you’re baking in batches, make sure the second sheet is lined too. I like to have everything ready before I start mixing because once the butter is creamed, things move fast.
Step 2: Cream the Butter and Sugars (3-4 minutes)
In your large mixing bowl, combine the softened butter, granulated sugar, and brown sugar. Beat on medium-high speed for about 3-4 minutes. You’re looking for a light, fluffy texture. This incorporates air into the dough, which helps the cookies rise slightly. If you rush this step, your cookies will be dense. Scrape down the sides of the bowl with your spatula halfway through to make sure everything is mixed evenly.
Step 3: Add Wet Ingredients (1 minute)
Add the eggs one at a time, beating well after each addition. Then add the vanilla extract and the creamy peanut butter. Mix until just combined. The mixture might look a bit curdled at first—that’s normal. It’ll come together in the next step. Don’t overmix here, or the cookies can become tough.
Step 4: Mix Dry Ingredients (1 minute)
In a separate small bowl (or just dump it in if you’re lazy, but separate is better for distribution), whisk together the flour, baking soda, and salt. Now, add the dry ingredients to the wet ingredients. Mix on low speed, or use your spatula, until the flour disappears. Stop mixing as soon as you see no more white streaks. Overmixing develops gluten, which makes cookies chewy in a bad way (like rubber bands). We want tender chewiness, not shoe leather.
Step 5: Fold in the Mix-ins (2 minutes)
Stir in the chocolate chips and Reese’s Pieces by hand. Use your spatula or a wooden spoon. Be generous here. I like to see chunks of chocolate and candy in every cookie. If you’re worried about distribution, do a quick fold to make sure they’re spread out.
Step 6: Scoop and Bake (12-14 minutes)
Using a cookie scoop or spoon, drop rounded tablespoons of dough onto the prepared baking sheets. Leave about 2 inches between each cookie because they will spread. If you put them too close, they’ll merge into one giant cookie monster.
Bake for 10-12 minutes. You want the edges to be set and slightly golden, but the centers to still look soft and slightly underbaked. This is crucial. They will continue to cook on the hot pan after you take them out. If you bake them until they look fully done in the oven, they’ll be hard by the time they cool.
Step 7: Cool and Serve (10 minutes)
Let the cookies sit on the baking sheet for 5 minutes. This allows them to set. Then, transfer them to a cooling rack to finish cooling. If you can’t wait (and who can?), eat one warm. It’s dangerous, but delicious. Sprinkle with a tiny pinch of sea salt flakes if you want that sweet-salty kick.
Expert Tips & Tricks
Here’s everything I’ve learned from making these dozens of times. These tips will save you from my mistakes.
Don’t Overbake — This is the #1 mistake people make. Take them out when they look slightly underdone. The residual heat will finish cooking them. Overbaked peanut butter cookies are dry and crumbly. We want soft and chewy.
Chill the Dough (Optional but Recommended) — If you have time, chill the dough for 30 minutes before baking. This prevents the cookies from spreading too much and concentrates the flavors. I usually don’t have time for this, but when I do, the cookies are thicker and more flavorful.
Use Room Temperature Butter — I can’t stress this enough. Cold butter won’t cream properly with the sugar. Melty butter makes greasy cookies. Softened, cool-to-the-touch butter is the goal.
Measure Flour Correctly — Spoon and level. Don’t scoop. Scooping packs the flour down, leading to dry cookies. If you scoop a cup of flour, you might actually get 150g instead of 120g. That extra flour ruins the texture.
Don’t Skimp on Peanut Butter — The peanut butter is the main flavor. If you reduce it, the cookies lose their identity. Stick to the recipe ratio.
Storage is Key — Store cookies in an airtight container at room temperature for up to 5 days. Add a slice of bread to the container to keep them soft. The bread dries out instead of the cookies. Genius, right?
Variations & Substitutions
Once you’ve nailed the basic version, here’s how you can mix it up. I’ve tried all of these.
Chunky Version — Chop Reese’s Cups into chunks instead of using Pieces. This gives you bigger pockets of peanut butter and chocolate. It’s more indulgent but less evenly distributed.
Double Chocolate — Add 2 tablespoons of cocoa powder to the dry ingredients. This makes the dough itself chocolatey, not just the chips. It’s intense and rich. Great for chocolate lovers.
Pretzel Crunch — Add ½ cup of crushed pretzels to the dough. The salty crunch pairs amazingly with the sweet peanut butter. It’s a game-changer.
Gluten-Free — Use a 1:1 gluten-free flour blend. Make sure it contains xanthan gum, or add ½ teaspoon. The texture is slightly different but still good. I’ve used Bob’s Red Mill and it works well.
Nut-Free — Use sunflower seed butter or soy butter instead of peanut butter. It’s not the same, but it works for schools or allergies. Just note that the flavor will be different.
Dark Chocolate Swap — Use dark chocolate chips or chopped dark chocolate bars. This reduces the overall sweetness and makes the cookies taste more sophisticated.
Serving & Storage
How to Serve: I usually serve these warm, right off the cooling rack. They’re best with a cold glass of milk. The milk cuts through the richness of the peanut butter and chocolate. I also like serving them at parties with a variety of dips, like caramel or white chocolate, but honestly, they’re perfect on their own.
Refrigerator: Store in an airtight container for up to 5 days. They stay soft if you keep them sealed. If they start to dry out, put a slice of bread in the container for a few hours.
Freezing: Yes, you can freeze these! Bake them, let them cool completely, and store in a freezer-safe bag or container for up to 3 months. You can eat them frozen (they’re like cookie ice cream) or thaw them at room temperature. I also freeze the dough balls! Scoop the dough, freeze on a tray, then transfer to a bag. Bake straight from frozen, adding 1-2 minutes to the bake time.
Reheating: If you have leftovers, microwave a cookie for 10-15 seconds to soften it up. It’s like getting a fresh-baked cookie in seconds.
Nutrition Information
I’m not a nutritionist, but here’s the breakdown if you’re tracking. Keep in mind, these are rich cookies, so portion control is key.
Per Cookie (based on 24 cookies):
- Calories: 220
- Protein: 5g
- Carbs: 28g
- Fiber: 1g
- Sugar: 18g
- Fat: 12g
- Saturated Fat: 5g
- Cholesterol: 20mg
- Sodium: 150mg
What’s Good: Decent protein from the peanut butter and eggs. Iron from the chocolate. What to Know: High in sugar and fat, obviously. It’s a treat, not a health food. But it’s better than store-bought candy bars because you control the ingredients. When I make these, I enjoy one or two with a coffee or tea, and I’m satisfied. No need to eat the whole batch.
Final Thoughts
So that’s my go-to Chocolate Peanut Butter Cup Cookies with Reese’s Pieces! I’ve probably talked your ear off at this point, but when you make a recipe this often, you have a lot to say about it.
This has saved dessert nights more times than I can count. It’s my answer to “what’s for dessert” when I’m tired, don’t want to order takeout, and still want something that tastes really good. My kids are happy, my husband’s happy, and I’m happy because I’m not stressed about baking.
Make it yours! Try different add-ins, swap in your favorite chocolate, adjust the salt. The best recipes are the ones you adapt to your family’s tastes. If you make these, drop a comment and let me know what you think! I love hearing how recipes turn out in your kitchen. And if something doesn’t work, tell me that too—I’m here to help troubleshoot.
Happy baking! And I hope your kitchen smells half as good as mine does right now.
Frequently Asked Questions
Can I use natural peanut butter?
I really don’t recommend it. Natural peanut butter has separated oils that make the dough greasy and the cookies spread too much. The cookies might end up flat and crumbly. Stick to standard creamy peanut butter like Jif or Skippy for the best texture. If you must use natural, make sure it’s very thick and well-stirred, but the results won’t be as good.
Why did my cookies spread too much?
Usually, this means your butter was too soft or melted. If the butter is melty, it incorporates too much air and spreads rapidly in the oven. Next time, make sure your butter is cool to the touch but squishable. Also, check your baking soda—if it’s old, it might not be working correctly, affecting the structure. Chilling the dough for 30 minutes can also help prevent spreading.
Can I make these ahead of time?
Absolutely! You can make the dough and chill it in the fridge for up to 3 days. Or, scoop the dough balls and freeze them. When you’re ready to bake, just pop the frozen dough balls on the baking sheet and add 1-2 minutes to the baking time. This is my favorite way to prep for parties. I always have cookie dough ready to go.
Can I substitute Reese’s Pieces with something else?
Yes! You can use M&Ms (peanut butter M&Ms are great), chopped Reese’s Cups, or even chocolate-covered peanuts. The key is to have something that adds crunch and peanut butter flavor. If you use chopped Reese’s Cups, you’ll get bigger chunks, which is delicious but less evenly distributed. Experiment and see what you like!
How do I store leftovers?
Store them in an airtight container at room temperature for up to 5 days. To keep them soft, add a slice of white bread to the container. The bread will dry out, but the cookies will stay moist. If you want to freeze them, store them in a freezer-safe bag for up to 3 months. Thaw at room temperature or eat frozen.
Can I double this recipe?
Yes, you can double everything. Just make sure you have a large enough mixing bowl. I usually mix in batches if I’m doubling, to make sure the flour is incorporated evenly. The baking time stays the same, but you’ll need to bake in multiple batches. Don’t overcrowd the pans!
Pin This Recipe!


Chocolate Peanut Butter Cup Cookies with Reese’s Pieces
- Total Time: 27 minutes
- Yield: 24 servings 1x
Description
Chewy, soft-centered cookies with crispy edges, packed with creamy peanut butter, semi-sweet chocolate chips, and crunchy Reese’s Pieces. An easy, kid-approved dessert that comes together in under 30 minutes.
Ingredients
- 1 cup (226g) unsalted butter, softened
- ½ cup (100g) granulated sugar
- 1 cup (200g) packed dark brown sugar
- 2 large eggs, room temperature
- 1 teaspoon vanilla extract
- 2 cups (250g) all-purpose flour
- 1 teaspoon baking soda
- ½ teaspoon salt
- ½ cup (128g) creamy peanut butter (e.g., Jif or Skippy)
- 1 cup (170g) semi-sweet chocolate chips
- 1 cup (150g) Reese’s Pieces
- Sea salt flakes, optional for sprinkling
Instructions
- Preheat oven to 350°F (175°C). Line two baking sheets with parchment paper.
- In a large mixing bowl, cream together the softened butter, granulated sugar, and brown sugar on medium-high speed for 3-4 minutes until light and fluffy. Scrape down the sides of the bowl.
- Add eggs one at a time, beating well after each addition. Mix in vanilla extract and creamy peanut butter until just combined.
- In a separate bowl, whisk together flour, baking soda, and salt. Add dry ingredients to the wet mixture and mix on low speed or by hand until no white streaks remain. Do not overmix.
- Fold in chocolate chips and Reese’s Pieces by hand.
- Scoop rounded tablespoons of dough onto prepared baking sheets, leaving 2 inches between cookies.
- Bake for 10-12 minutes, or until edges are set and slightly golden but centers still look soft.
- Let cookies cool on the baking sheet for 5 minutes, then transfer to a cooling rack to finish cooling.
- Sprinkle with sea salt flakes if desired and serve warm.
Notes
Ensure butter is softened but not melted to prevent greasy cookies. Spoon and level flour for accurate measurement to avoid dry cookies. Do not overbake; cookies will continue to cook on the hot pan. Store in an airtight container with a slice of bread to maintain softness for up to 5 days. Dough can be chilled for 30 minutes to prevent spreading or frozen for later baking.
- Prep Time: 15 minutes
- Cook Time: 12 minutes
- Category: Dessert
- Cuisine: American
Nutrition
- Serving Size: 1 cookie
- Calories: 220
- Sugar: 18
- Sodium: 150
- Fat: 12
- Saturated Fat: 5
- Carbohydrates: 28
- Fiber: 1
- Protein: 5
Keywords: chocolate peanut butter cookies, reese's pieces cookies, easy dessert, kid-friendly cookies, chewy cookies, peanut butter dessert, homemade cookies


