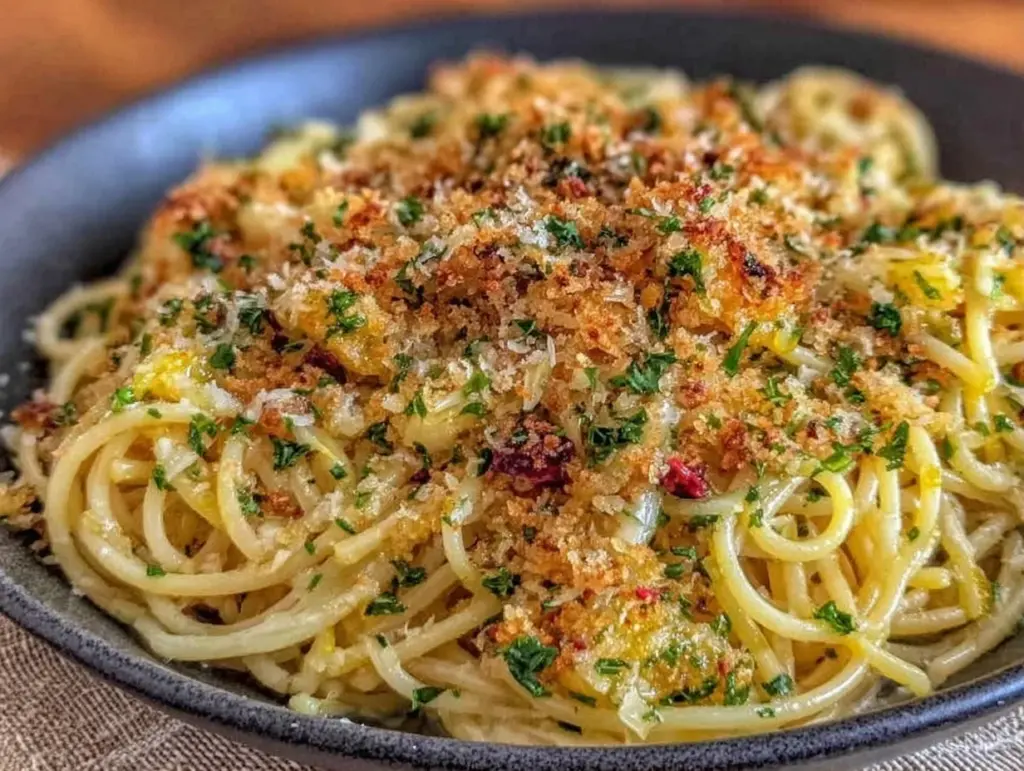
Three years ago, I made a pasta dish that I still can’t look at without wincing. I was trying to impress a date who claimed to be a “true Italian foodie” (spoiler: he was just a guy who liked to critique my cooking). I decided to make pasta aglio e olio because it sounded simple. “How hard can garlic and oil be?” I thought. I threw a whole head of garlic into the pan, cranked the heat to high, and walked away to grab a wine glass. When I came back, the kitchen smelled like a burning tire. The garlic was black. The oil was bitter. The pasta was swimming in a dark, greasy soup. My date politely picked around the black bits, but I knew I’d failed. I spent the next hour trying to salvage it with cheese, which only made it worse.
That night, I ate takeout pizza and swore I’d never try Italian cooking again. But here’s the thing about being a home cook: you don’t quit after one disaster. You figure out what went wrong. In this case, it was heat management and patience. I realized that aglio e olio isn’t just “garlic and oil.” It’s an emulsion. It’s about patience. It’s about getting that garlic to turn a pale, fragrant gold without crossing the line into bitterness.
Fast forward to last Tuesday. I had thirty minutes, a tired brain, and a craving for something warm and comforting. I pulled out my favorite olive oil, some good spaghetti, and a loaf of stale bread. I decided to make my Easy Pasta Aglio e Olio with Toasted Breadcrumbs. I followed the rules this time. Low heat. Cold oil start. Toasted breadcrumbs for texture. The result? Creamy, cohesive, and absolutely addictive. It tasted like a restaurant plate, not a desperate attempt at romance. Since then, I’ve made this recipe at least twenty times. It’s become my go-to when I need dinner to just work, when I want to feel fancy but don’t have the energy to chop vegetables, or when I’m hosting a last-minute dinner party and need to look like I tried. This Easy Pasta Aggio e Olio with Toasted Breadcrumbs is the ultimate flex of minimal ingredients and maximum flavor.
Why You’ll Love This Recipe
There’s a reason this dish has been a staple in Italian households for centuries. It’s not just nostalgia; it’s culinary efficiency. Here’s why this version, with the added crunch of toasted breadcrumbs, has completely replaced my other weeknight go-tos.
It Uses Pantry Staples — Seriously. If you have olive oil, garlic, pasta, and bread, you have this meal. I don’t need to run to the store for exotic spices or hard-to-find greens. This is the ultimate “I forgot to shop” dinner. It’s reliable in a way that complicated recipes aren’t.
The Texture Game is Strong — Most aglio e olio recipes are just soft pasta and oily garlic. The toasted breadcrumbs add a crucial crunch that mimics the texture of fried onions or croutons. It gives you something to sink your teeth into. It transforms a simple dish into something with depth and interest. Every bite has a contrast between the silky sauce and the crispy crumb.
It’s Ready in 20 Minutes — I’ve timed this. From boiling water to plating, it takes twenty minutes. I’ve made this after getting home from work at 7:30 PM, exhausted, and it was on the table by 7:50 PM. It’s faster than ordering takeout and arrives at your table in a fraction of the time.
It’s Naturally Vegan-Friendly — Unlike my creamy vegetarian alfredo sauce which relies on dairy, this dish is inherently plant-based. No butter, no cheese, no cream. Just oil, garlic, and pasta. It’s proof that you don’t need animal products to feel satisfied. If you want to add cheese later, you can, but the base is completely vegan.
It Feels Fancy but Isn’t — When you serve this, it looks elegant. The glossy sauce, the golden garlic, the scattered green herbs, and the crunchy topping make it look like something you’d get at a nice trattoria. But the effort level is low. It’s a confidence booster for your cooking skills.
This is my go-to when dinner needs to just work. It’s comforting, it’s quick, and it tastes incredible. Plus, if you’re a fan of simple, bold flavors, you’ll appreciate how it pairs well with other light meals. I often serve this alongside a crisp Mediterranean chickpea salad for a full, balanced meal that feels light but satisfying.
Key Ingredients for the Best Aglio e Olio
Because this recipe has so few ingredients, the quality of each one matters more than usual. You can’t hide bad olive oil behind heavy cream or spices. Here’s exactly what you need and why I pick these specific items.
Extra Virgin Olive Oil (1/2 cup / 120 ml) — This is your sauce. Don’t cheap out here. You need an oil with a fruity, peppery finish. I use a mid-range Spanish or Italian oil. If it’s too mild, the dish will taste flat. If it’s too bitter, it will overpower the garlic. Look for a bottle that was harvested within the last year. The oil carries the flavor of the garlic, so it needs to be delicious on its own.
Garlic (8 large cloves / 4 tbsp minced) — Yes, eight cloves. This is not a mistake. I used to use four, and it tasted like pasta with oil. Now I use eight, and it tastes like a garlic lover’s dream. Slice them thinly or mince them finely. Uniform pieces ensure they cook evenly. If you have a garlic press, avoid it for this recipe. Pressed garlic burns faster because it’s too fine. Sliced or thinly chopped garlic browns more gently.
Pasta (12 oz / 340g spaghetti or linguine) — Long pasta is traditional for a reason. The long strands catch the oil and garlic better than short shapes. Spaghetti is classic, but linguine or even fettuccine works well. Avoid thin angel hair; it breaks easily in the emulsion process. Thick spaghetti holds the sauce well without getting mushy. I always buy organic, bronze-die extruded pasta if I can find it. The rougher surface helps the sauce stick.
Stale Bread (2 cups / 60g cubed, from a rustic loaf) — This is the secret weapon. I use a day-old baguette or sourdough. Fresh bread doesn’t toast right; it just gets chewy. Stale bread has less moisture, so it crisps up like a crouton. Tear or cube it into bite-sized pieces. The size should be small enough to sprinkle evenly but large enough to provide crunch. I usually tear mine by hand for irregular shapes that look more rustic.
Red Pepper Flakes (1 tsp / 2g) — Just enough to give a gentle warmth, not a fireball. Start with half a teaspoon if you’re sensitive to heat. You want to taste the heat in the background, not dominate the garlic flavor. I prefer whole flakes over powder because they infuse the oil more slowly and evenly.
Fresh Parsley (1/4 cup / 15g chopped) — Flat-leaf parsley is my preference. It has a cleaner, grassier flavor than curly parsley, which can be bitter. I add it at the very end to keep it bright green. If you use curly parsley, chop it finely so it doesn’t look like confetti. The green color also makes the dish look more appetizing against the golden garlic.
Salt (For pasta water and finishing) — Use plenty of salt in the pasta water. It should taste like the sea. This seasons the pasta from the inside out. You’ll also need flaky sea salt for finishing the dish, which adds a nice crunch and bursts of salinity.
Tools Needed
You don’t need fancy equipment for this. In fact, simplicity is key. Here’s what I use in my kitchen.
Large Skillet — I use a 12-inch stainless steel or cast iron skillet. The wide surface area is crucial. You need room to toss the pasta and emulsify the sauce. If your pan is too small, the pasta will steam instead of mix. A non-stick pan works too, but stainless steel gives you better control over the heat.
Pasta Pot — Any large pot works. I use a 6-quart pot. Make sure it’s big enough for the pasta to move freely. Crowded pasta leads to gummy results.
Tongs — Essential for tossing the pasta in the sauce. Forks are too cumbersome. I have a pair of long-handled tongs that I use exclusively for pasta. They make the mixing process much easier.
Microplane or Fine Grater — Optional, but I like to grate a little Parmesan or Pecorino Romano on top if I’m not keeping it vegan. It adds a salty, umami punch. If you don’t have a microplane, a box grater works fine.
Colander — A standard colander is fine. I keep mine hanging by the sink for easy access. Make sure it’s clean; you don’t want residual soap taste in your pasta water.
How to Make Easy Pasta Aglio e Olio with Toasted Breadcrumbs
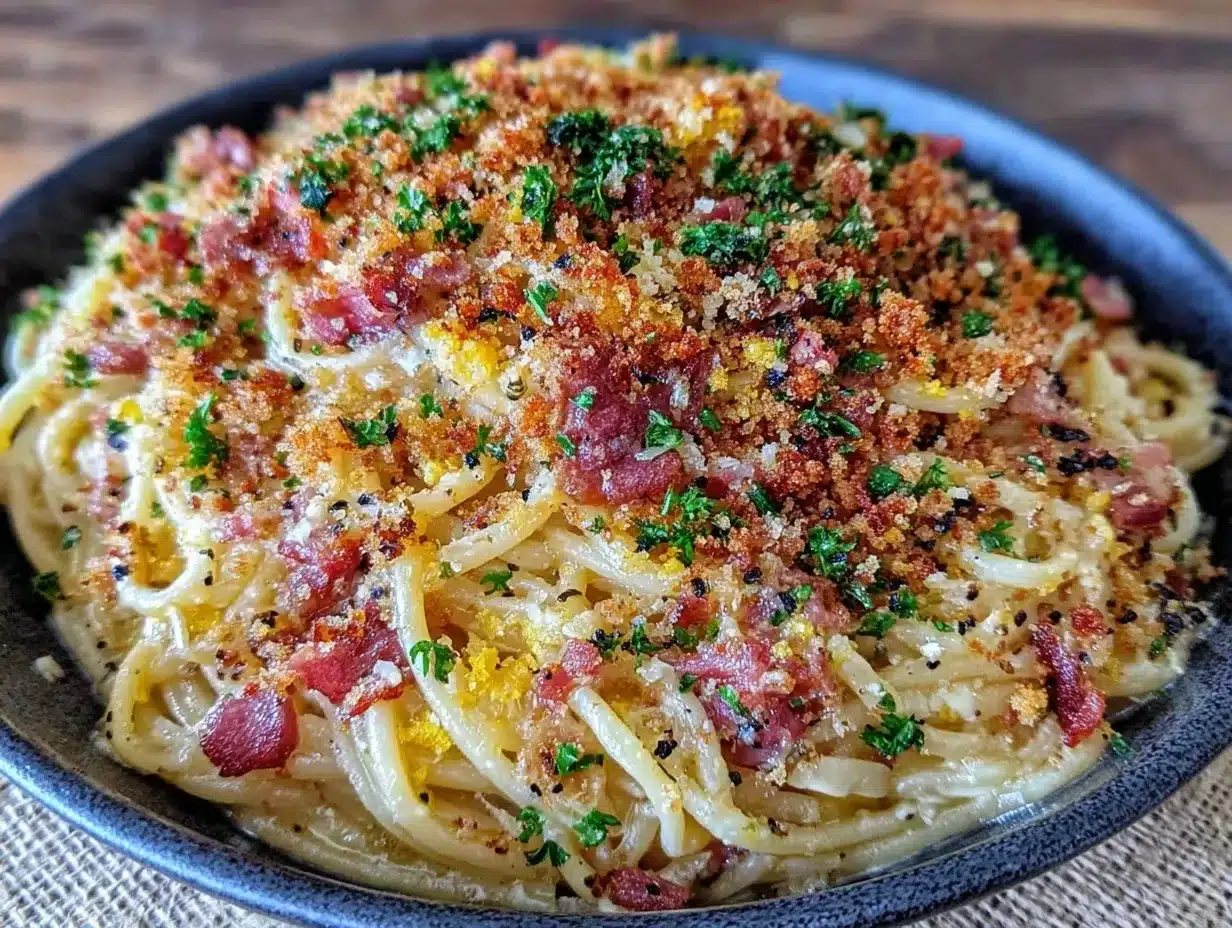
Let’s walk through the steps. I’ve broken this down so you can follow along without stress. The key is to prep everything before you start cooking, because once the pasta is in the water, things move fast.
Step 1: Prep the Bread and Garlic (10 minutes)
Start by heating your oven to 375°F (190°C). Place your bread cubes on a baking sheet. Drizzle them with about 1 tablespoon of olive oil and a pinch of salt. Toss them with your hands until they’re lightly coated. Spread them out in a single layer. Put them in the oven and toast for 8-10 minutes, flipping halfway through, until they are golden brown and crisp. Set them aside. This step can be done while the water boils, so you’re not rushing later.
While the bread toasts, slice your garlic thinly. I like to slice it diagonally, which creates more surface area for browning. If you prefer a milder garlic flavor, remove the green sprout in the center of each clove. It can taste bitter. Keep the slices uniform so they cook evenly.
Step 2: Boil the Pasta (10 minutes)
Bring a large pot of salted water to a rolling boil. Use about 1 tablespoon of salt per quart of water. Add the spaghetti and cook according to package directions, but start checking it 1 minute early. You want it al dente, meaning it still has a slight bite. Do not overcook it. The pasta will finish cooking in the sauce, so if it’s already soft, it will turn mushy.
Before you drain the pasta, reserve 1 cup of the starchy pasta water. This is the liquid gold that helps create the emulsion. Set it aside. Drain the pasta and set it aside in a bowl or the pot.
Step 3: Infuse the Oil (5 minutes)
This is the most important step. In your large skillet, add the remaining 1/2 cup of olive oil and the sliced garlic. Turn the heat to medium-low. You want a gentle simmer, not a fry. If the oil is smoking, it’s too hot. Add the red pepper flakes now.
Cook the garlic for 3-5 minutes, stirring frequently. Watch it closely. You are looking for a pale gold color. It should smell fragrant and sweet. If it turns dark brown, it’s burnt and bitter. If you’re nervous, you can take the pan off the heat for a minute if it starts to brown too quickly. The residual heat will continue to cook the garlic. Once it’s golden and fragrant, remove the pan from the heat. This prevents the garlic from overcooking.
Step 4: Emulsify and Toss (3 minutes)
Add the cooked pasta to the skillet with the garlic oil. Pour in about 1/2 cup of the reserved pasta water. Turn the heat back to medium. Use your tongs to toss the pasta vigorously. The starch in the water and the oil will combine to create a creamy sauce that clings to the pasta. Keep tossing and adding small splashes of pasta water until the sauce looks glossy and coats every strand. This usually takes 2-3 minutes. Don’t rush this step. The emulsion is what makes this dish feel luxurious.
Step 5: Finish and Serve (2 minutes)
Remove the pan from the heat. Add the chopped parsley and toss again. Taste the pasta. Add more salt if needed. The pasta should be seasoned well. Serve immediately, topped with the toasted breadcrumbs and a sprinkle of flaky sea salt. If you’re adding cheese, grate it on top now.
Total time: About 20 minutes. It’s fast, but the active time is minimal. Most of it is waiting for the water to boil and the bread to toast.
Expert Tips for Perfect Aglio e Olio
Here’s everything I learned from making this too many times, including that first disastrous attempt.
The Cold Oil Start
I learned this trick by accident. Instead of heating the oil first, I started with cold oil and added the garlic before turning on the heat. This allows the garlic to infuse into the oil slowly as it heats up. By the time the oil is hot enough to cook the garlic, it’s already flavored. It prevents the garlic from burning before the oil is ready. It’s a game-changer for consistency.
Don’t Skip the Pasta Water
I know it seems like extra work, but the starchy water is non-negotiable. Without it, you have oily pasta. With it, you have a sauce. The starch acts as a binder. If you run out of water, you can add a little more, but start with a cup. The sauce should look creamy, not greasy.
Control the Heat
Garlic burns easily. Medium-low is your friend. If you’re using a gas stove with a strong flame, you might need to turn it down even further. Cast iron retains heat, so be careful. If the garlic starts to sizzle too loudly, take the pan off the burner for a moment. It’s better to undercook the garlic slightly than to burn it.
Toast the Breadcrumbs Separately
Some recipes tell you to toast the breadcrumbs in the same pan as the garlic. I don’t recommend this. The breadcrumbs will absorb the garlic oil and become soggy if you’re not careful. Toasting them in the oven gives you even, dry crunch. You want a contrast, not a soggy topping.
Use Fresh Parsley
Dried parsley has no place here. It tastes like dust. Fresh parsley adds a bright, herbal note that cuts through the richness of the oil. Chop it finely so it distributes evenly. If you don’t like parsley, you can use basil, but parsley is the classic choice.
Recipe Variations to Mix It Up
Once you’ve nailed the basic version, here’s how to mix it up. This recipe is a canvas, not a rigid rulebook.
Spicy Sausage Aglio e Olio
Add crumbled Italian sausage to the pan after removing the garlic. Brown it well, then add the pasta. The sausage adds a savory, fennel-heavy depth that makes the dish heartier. This is great for a meat-eater version.
Shrimp Aglio e Olio
Sauté shrimp in the garlic oil before adding the pasta. Shrimp cooks quickly, so just 2-3 minutes per side. The sweetness of the shrimp pairs beautifully with the garlic. This feels like a seafood restaurant dish.
Broccoli Rabe Version
Sauté chopped broccoli rabe in the oil before adding the garlic. The bitterness of the greens balances the richness of the oil. It’s a classic Roman combination. Add a pinch of red pepper flakes to enhance the heat.
Creamy Aglio e Olio
Stir in a splash of heavy cream or a knob of butter at the end. This makes it richer and more like a carbonara without the eggs. It’s indulgent and perfect for cold nights.
Gluten-Free Option
Simply use gluten-free pasta. Brown-rice or corn-based pastas work well. Be careful not to overcook them, as they can get mushy faster. The rest of the recipe stays the same.
Vegan Cheese Twist
If you want a dairy-free “cheesy” flavor, stir in a tablespoon of nutritional yeast at the end. It adds a nutty, savory note that mimics Parmesan. It’s a great hack for vegans.
Serving & Storage
Serving
I serve this as a main course, often with a simple green salad on the side. The Mediterranean chickpea salad I mentioned earlier is perfect because the vinegar cuts through the oil. You can also serve it with crusty bread if you want extra carbs. Top with lemon zest for a bright finish. The acidity of the lemon wakes up the palate.
Storage
This dish is best eaten fresh. The breadcrumbs lose their crunch if stored in the sauce. If you have leftovers, store the pasta and sauce separately from the breadcrumbs. The pasta will keep in the refrigerator for up to 3 days. Reheat it gently in a skillet with a splash of water to loosen the sauce. It won’t be as creamy as fresh, but it’s still good.
Freezing
I don’t recommend freezing this dish. The pasta texture changes when frozen and reheated, becoming soft and mushy. The oil can also separate. It’s just not worth the effort. Make a fresh batch instead. It’s so quick that there’s no real benefit to freezing it.
Nutrition Information
I’m not a nutritionist, but here’s the breakdown for one serving (assuming 4 servings per recipe). This is comfort food with a lot of oil. It’s calorie-dense but satisfying.
| Nutrient | Amount per Serving |
|---|---|
| Calories | 450 kcal |
| Protein | 10g |
| Carbohydrates | 55g |
| Fiber | 3g |
| Fat | 22g |
| Sodium | 300mg |
My Take: This is high in carbs and fat, but the fat is mostly from olive oil, which is heart-healthy. It’s not “diet food,” but it’s better than takeout and I know exactly what’s in it. If you’re watching your calories, use a little less oil or more pasta. If you’re active, it’s a great fuel source.
Final Thoughts
Making Easy Pasta Aglio e Olio with Toasted Breadcrumbs is about embracing simplicity. It’s about trusting your ingredients and paying attention to the details. That one trick—the cold oil start and the careful toasting of the garlic—makes all the difference. It turns a simple pantry meal into something special. I hope you try this recipe and find your own version of perfection. Don’t be afraid to experiment with the breadcrumbs or the herbs. Make it yours.
If you make this, drop a comment! I love hearing how it turns out in your kitchen. Did you add shrimp? Did you use a different type of bread? Share your stories. And if you’re looking for more easy weeknight dinners, check out my garlic butter shrimp scampi for a similar vibe with a seafood twist. Happy cooking!
FAQs
Can I use jarred garlic instead of fresh?
I don’t recommend it. Jarred garlic has a metallic taste and often contains preservatives that affect the flavor. Fresh garlic is cheap and easy to peel. Slice it yourself for the best results. The difference in taste is significant.
Why did my garlic burn?
The heat was too high. Garlic burns very quickly. Always start with cold oil and medium-low heat. If you see it browning too fast, take the pan off the heat. It’s better to undercook it slightly than to have bitter, black bits in your sauce.
Can I make this ahead of time?
You can prep the ingredients ahead of time, but don’t assemble the dish until you’re ready to eat. The breadcrumbs will get soggy if mixed with the sauce too early. Toast the bread and slice the garlic in advance, but cook the pasta and sauce fresh.
What kind of bread is best for breadcrumbs?
Stale rustic bread is best. Baguettes, sourdough, or ciabatta all work well. The key is that the bread should be dry. If your bread is fresh, leave the cubes on a baking sheet for an hour to dry out before toasting. This ensures they get crispy instead of chewy.
Is this recipe gluten-free?
The base recipe is gluten-free if you use gluten-free pasta. Check your breadcrumbs to ensure they are made from gluten-free bread. Many store-bought breadcrumbs contain wheat, so make your own from gluten-free bread if needed.
Can I add cheese to this?
Traditionally, no. Aglio e olio is usually vegan. But if you want to add Parmesan or Pecorino Romano, go for it. It adds a salty, umami boost. Just add it at the end, off the heat, so it doesn’t clump. It’s a delicious variation, even if it’s not authentic.
How do I fix a sauce that’s too oily?
If your sauce looks greasy, add more pasta water and toss vigorously. The starch will help emulsify the oil. If it’s still too oily, you can add a tablespoon of butter or a splash of cream to bind it. But usually, more pasta water and patience fixes the issue.
Pin This Recipe!
Easy Pasta Aglio e Olio with Toasted Breadcrumbs
- Total Time: 20 minutes
- Yield: 4 servings 1x
Description
A quick, 20-minute weeknight dinner featuring silky emulsified pasta, fragrant garlic, and crunchy toasted breadcrumbs. This vegan-friendly Italian classic uses pantry staples for maximum flavor with minimal effort.
Ingredients
- 1/2 cup extra virgin olive oil (divided)
- 8 large cloves garlic, thinly sliced
- 12 oz (340g) spaghetti or linguine
- 2 cups (60g) stale rustic bread, cubed
- 1 tsp red pepper flakes
- 1/4 cup (15g) fresh flat-leaf parsley, chopped
- Salt (for pasta water and finishing)
- Flaky sea salt (for finishing)
Instructions
- Preheat oven to 375°F (190°C). Toss bread cubes with 1 tablespoon olive oil and a pinch of salt. Spread on a baking sheet and toast for 8-10 minutes until golden and crisp. Set aside.
- Bring a large pot of salted water to a rolling boil. Add pasta and cook until al dente, checking 1 minute early. Reserve 1 cup of starchy pasta water before draining.
- In a large skillet, add the remaining 1/2 cup olive oil and sliced garlic. Start with cold oil and turn heat to medium-low. Add red pepper flakes.
- Cook garlic gently for 3-5 minutes, stirring frequently, until pale gold and fragrant. Do not let it burn. Remove pan from heat if browning too quickly.
- Add cooked pasta to the skillet with the garlic oil. Pour in 1/2 cup reserved pasta water. Toss vigorously over medium heat to create a creamy emulsion. Add more pasta water as needed until sauce is glossy.
- Remove from heat. Stir in chopped parsley. Taste and adjust seasoning with salt.
- Serve immediately, topped with toasted breadcrumbs and flaky sea salt.
Notes
Use stale bread for the best crunch. Start with cold oil to prevent burning the garlic. Reserve pasta water for emulsifying the sauce. Do not freeze leftovers as pasta texture suffers.
- Prep Time: 10 minutes
- Cook Time: 10 minutes
- Category: Main Course
- Cuisine: Italian
Nutrition
- Serving Size: 1 plate
- Calories: 450
- Sugar: 2
- Sodium: 300
- Fat: 22
- Saturated Fat: 3
- Carbohydrates: 55
- Fiber: 3
- Protein: 10
Keywords: pasta aglio e olio, easy pasta recipe, vegan pasta, weeknight dinner, garlic pasta, toasted breadcrumbs, Italian comfort food, quick meals


