There was a specific Tuesday in October last year when the leaves outside my window were turning that deep, burnt orange color that makes you want to wrap yourself in a blanket and never leave the couch. The air had that crisp, biting chill that smells like woodsmoke and damp earth. I had just finished a long day of work, and my brain felt like it was running on fumes. I didn’t want a complex dinner that required chopping a dozen vegetables. I didn’t want to stand over a stove stirring something delicate. What I wanted was comfort. I wanted something warm, sweet, and ridiculously easy that tasted like autumn itself.
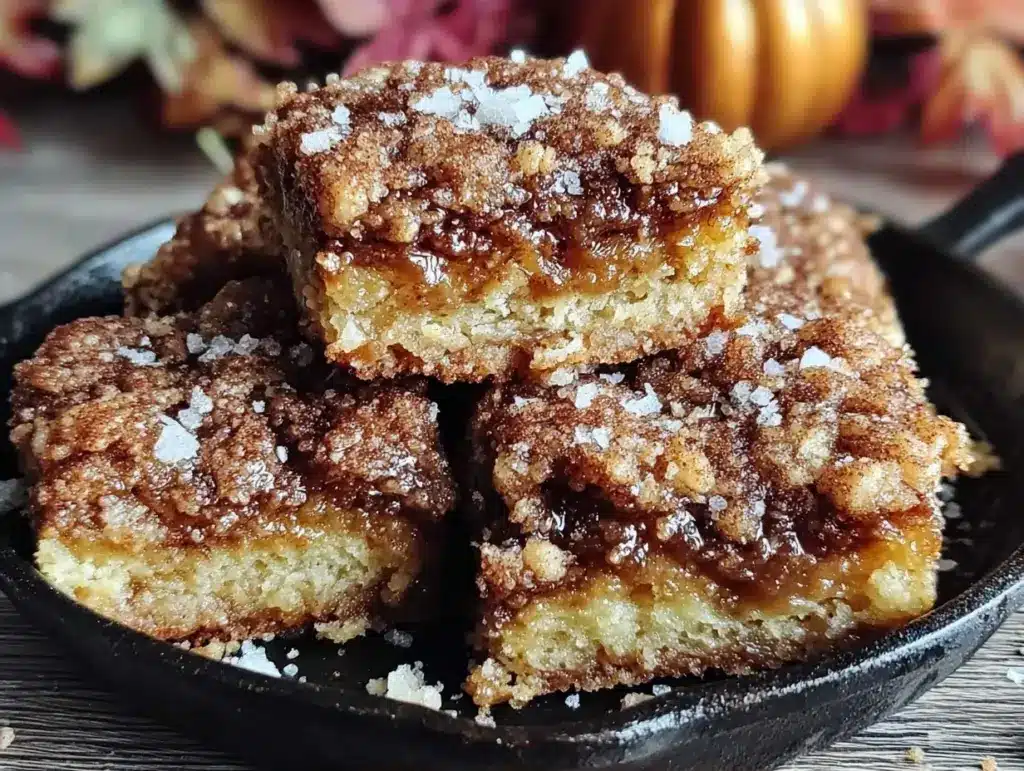
So, I raided my pantry. I had flour, sugar, butter, cinnamon, and a lone tub of cream cheese. I threw together what I thought would be a mediocre crumble. But thirty minutes later, when that scent of brown butter and cinnamon filled my kitchen, my partner wandered in, eyes half-closed, asking if I’d made a fresh batch of cookies. They weren’t cookies, though. They were these thick, gooey, cinnamon-sugar topped bars that sat perfectly between a cake and a cookie. I’ve since made the Cozy Fall Snickerdoodle Sheet Pan Bars at least twelve times since that first rainy afternoon. It’s become my go-to when I need a win in the kitchen with minimal effort.
What I love most about this recipe is how it captures that nostalgic snickerdoodle flavor but transforms it into something more substantial. It’s not just a treat; it’s a moment of pause. The cream cheese layer adds a tangy richness that cuts through the sweetness, making every bite feel balanced rather than cloying. Whether you’re hosting a last-minute gathering or just need a little mid-week hug in food form, these bars deliver. I’ve tweaked the ratios a few times, learning the hard way that under-baking leads to a gummy disaster, but once I got it right, it was perfect. This Cozy Fall Snickerdoodle Sheet Pan Bars recipe is my answer to “what’s for dessert?” when I’m tired but craving something homemade.
Why You’ll Love This
I know what you’re thinking. Another bar recipe? But hear me out. This isn’t just another sweet tooth fixer. This Cozy Fall Snickerdoodle Sheet Pan Bars hits different because it combines texture, temperature, and flavor in a way that feels like a hug. Here’s why this recipe has earned a permanent spot in my rotation:
- Minimal Cleanup — The best part? It’s a sheet pan recipe. I mix the dough in one bowl, spread it, add the filling, and bake it all on one tray. No washing three separate mixing bowls or lining two pans. I made this while helping my kid with homework, and I still had time to wipe down the counters before dinner was served.
- Five Simple Ingredients — Real talk: I don’t want to buy a bag of specialty flour or a stick of butter I’ll use once a year. This Cozy Fall Snickerdoodle Sheet Pan Bars uses pantry staples. Flour, sugar, butter, cream cheese, and cinnamon. That’s it. If you have these, you’re already halfway done.
- Perfect Texture Contrast — The magic is in the layers. You get the crisp, sugary top from the cinnamon swirl, the soft, cake-like base, and the creamy, tangy middle. It’s not just one note. It’s a symphony of textures that keeps you coming back for another square.
- Meal Prep Friendly — I make these on Sunday evenings. They keep beautifully in the fridge for up to five days. I grab one with my morning coffee, and it fuels me through the morning slump without the crash of a sugary snack. It’s comfort food that actually works for a busy schedule.
- Family Approved — My picky eaters, who usually turn their noses up at “healthy-ish” desserts, devour these. The cinnamon sugar smell is irresistible. I’ve served these to book clubs, PTA meetings, and just random Tuesday nights, and they disappear fast. It’s a crowd-pleaser that doesn’t feel like a compromise.
This is my go-to when dinner needs to just work, and dessert needs to feel special without the stress.
Key Ingredients
Let’s talk about what goes into this Cozy Fall Snickerdoodle Sheet Pan Bars. I’ve tested this recipe with different brands and substitutions, and here’s what actually works. I want you to succeed, so pay attention to the details.
Unsalted Butter
1 cup (2 sticks / 226g) unsalted butter, softened — This is your fat base. I use unsalted because it gives me control over the salt level. If you only have salted, reduce the added salt in the dough by half. Make sure it’s softened to room temperature. Cold butter won’t cream properly with the sugar, and you’ll end up with a dense bar instead of a tender one. I’ve learned this the hard way when I rushed in the morning.
Granulated Sugar
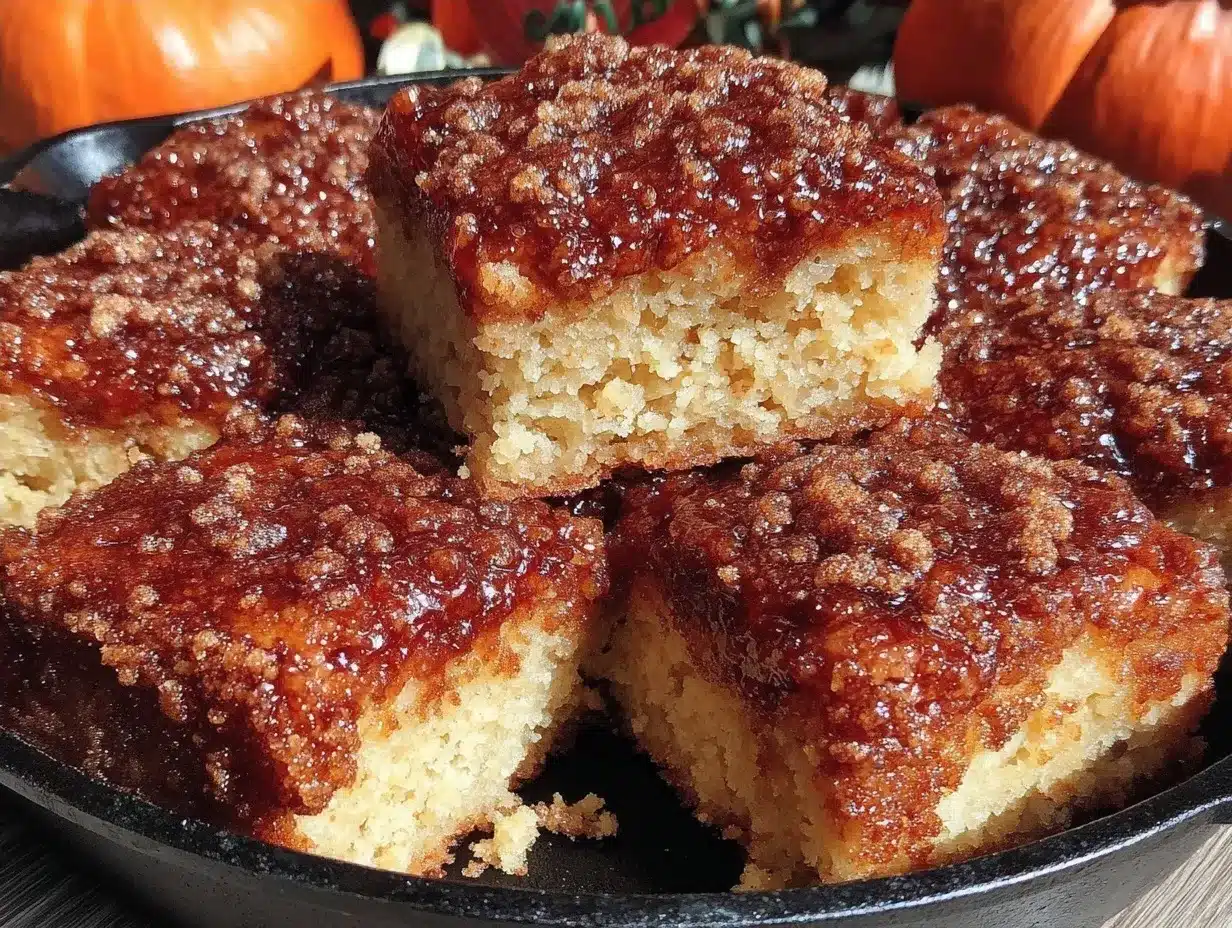
1 cup (200g) granulated sugar — For the dough. You’ll also need more for the coating. Granulated sugar creates that slight crunch on top. Don’t swap this for brown sugar if you want the classic snickerdoodle texture. Brown sugar makes it chewier and more molasses-forward, which is delicious but changes the profile. Stick to white for that authentic cookie feel.
Granulated Sugar (for coating)
½ cup (100g) granulated sugar — This gets mixed with cinnamon and rolled on top. It caramelizes slightly in the oven, creating that signature crust. I measure this out separately so I don’t run out mid-spread.
Ground Cinnamon
2 tsp ground cinnamon (for dough) + 2 tsp (for topping) — Cinnamon is the star here. I use a good quality brand like Simply Organic. If your cinnamon is old, the flavor will be flat. Smell it first. If it doesn’t punch your nose, toss it. For the topping, I mix 2 tbsp sugar with 1 tsp cinnamon for that classic swirl. It’s non-negotiable for the snickerdoodle vibe.
All-Purpose Flour
2 ½ cups (315g) all-purpose flour — This provides the structure. I sift mine to remove lumps, which ensures an even texture. If you’re gluten-free, you can use a 1:1 gluten-free flour blend, but I haven’t tested it extensively. The texture might be slightly crumblier, but it still tastes great.
Cream Cheese
8 oz (225g) full-fat cream cheese, softened — This is the secret weapon. It adds a tangy richness that balances the sweet dough. Use full-fat brick cream cheese, not the spreadable kind in a tub. The spreadable kind has too much moisture and air, which can make the layer runny. I buy the 8 oz blocks and keep them in the fridge specifically for this recipe.
Eggs
2 large eggs (100g total without shell) — These bind everything together. Room temperature eggs incorporate better into the cream cheese mixture. If your eggs are cold, just set them in warm water for five minutes. It makes a difference in the smoothness of the batter.
Vanilla Extract
1 tsp pure vanilla extract — Enhances the flavor without overpowering. I use McCormick or Nielsen-Massey. Avoid imitation vanilla if you can help it; it has a chemical aftertaste that clashes with the cinnamon.
Baking Powder
1 tsp baking powder — Helps the bars rise slightly. Don’t skip this, or you’ll end up with dense bricks. Check your expiration date; old baking powder loses its lift.
Salt
½ tsp fine sea salt — Balances the sweetness. I use Maldon or Morton. It’s subtle but essential for making the cinnamon pop.
Tools Needed
You don’t need fancy equipment to make this Cozy Fall Snickerdoodle Sheet Pan Bars. Here’s what I use, and what you can swap if needed.
- 9×13 inch baking dish — I use a Pyrex glass dish. It distributes heat evenly. If you use a metal pan, the edges might brown faster, so keep an eye on it. Dark metal pans might require reducing the oven temp by 25°F.
- Electric mixer or stand mixer — I use a hand mixer because it’s easier to clean. You can do this by hand with a strong arm, but it takes about 5 minutes longer. A stand mixer is great if you have one, but not required.
- Rubber spatula — Essential for scraping the bowl clean. I have a few, but one sturdy one works. Silicone is best for scraping every bit of batter out.
- Whisk — For mixing the cinnamon and sugar topping. A small whisk works fine. You could use a fork, but a whisk ensures no lumps of cinnamon remain.
- Parchment paper — I line my pan with parchment. It makes cleanup a breeze and prevents sticking. You can grease the pan if you don’t have parchment, but the bars might stick slightly more.
Cooking Instructions
Let’s get into the nitty-gritty. I’m walking you through exactly how I make these bars, step by step. Timing is everything here.
Step 1: Prep the Pan and Oven (5 minutes)
Preheat your oven to 350°F (175°C). Line your 9×13 inch baking dish with parchment paper, leaving an overhang on the sides. This overhang is crucial for lifting the bars out later for easy cutting. Grease the parchment lightly with butter or cooking spray. This ensures nothing sticks, even if you’re feeling lazy.
Step 2: Cream the Butter and Sugar (3 minutes)
In a large bowl, beat the softened butter and 1 cup of granulated sugar together until light and fluffy. This should take about 2-3 minutes. You want the mixture to pale in color. This step incorporates air, which helps the bars rise. If you rush this, your bars will be dense. I usually do this on medium-high speed. Scrape down the sides of the bowl with your spatula to ensure even mixing.
Step 3: Add Eggs and Vanilla (2 minutes)
Add the eggs one at a time, beating well after each addition. Add the vanilla extract and salt. Mix until just combined. Don’t overmix here. You want a smooth, creamy batter. If you overmix, you might develop too much gluten, leading to tough bars. The batter should look like thick frosting.
Step 4: Mix in Flour and Baking Powder (2 minutes)
Reduce your mixer speed to low. Add the flour and baking powder gradually. Mix until just combined. It’s okay if there are tiny streaks of flour; they’ll disappear as you spread the dough. Overmixing at this stage is the #1 mistake. Once the flour hits the liquid, gluten starts forming. Stop mixing as soon as you see no more dry flour. The dough will be thick and stiff.
Step 5: Spread the Dough (5 minutes)
Transfer the dough to your prepared baking dish. Use wet hands or a spatula to press it evenly into the pan. You want a uniform layer. If the dough is too sticky, wet your hands with cold water. This helps it spread smoothly. Press it firmly so it doesn’t crack during baking. This layer is your base, so make it even.
Step 6: Make the Cream Cheese Layer (3 minutes)
In a separate bowl, beat the softened cream cheese, ¼ cup sugar, 1 egg, and ½ tsp vanilla until smooth and creamy. This mixture should be thick but spreadable. If it’s too runny, your cream cheese might be too warm. If it’s too stiff, add a teaspoon of milk. Spread this layer evenly over the dough. Use a knife to smooth out any bumps. This is the tangy heart of the bar.
Step 7: Create the Cinnamon Swirl (2 minutes)
Mix the remaining ¼ cup sugar with 2 tsp cinnamon. Sprinkle this evenly over the cream cheese layer. Then, take a knife or skewer and gently drag it through the layers in a zigzag pattern. Don’t over-mix; you want visible swirls, not a muddy brown mess. This creates that beautiful marbled effect and ensures every bite has cinnamon.
Step 8: Bake and Cool (35-40 minutes)
Bake for 30-35 minutes. The edges should be golden brown, and the center should be set but slightly jiggly. Do not overbake. The bars will continue to cook as they cool. If you bake them until the center is firm, they’ll be dry. Let them cool in the pan for at least 20 minutes before cutting. This resting time allows the layers to set. If you cut them hot, they’ll fall apart. Patience is key here.
Total Time: 15 minutes prep, 35 minutes bake, 20 minutes cool. Total: ~70 minutes.
Expert Tips
Here’s everything I learned from making this too many times. I want you to nail it on the first try.
The Game-Changers:
Room Temperature Ingredients are Non-Negotiable
I’ve made this mistake twice. Cold cream cheese and cold eggs create a lumpy batter that doesn’t mix well with the dough. It leads to pockets of raw cream cheese. Let your butter, cream cheese, and eggs sit out for at least an hour before you start. If you forget, warm the butter in the microwave for 10-second bursts and set eggs in warm water. It saves the recipe.
Don’t Overmix the Cream Cheese Layer
Once you beat the cream cheese, stop. Overbeating incorporates too much air, which can cause the layer to rise and then collapse. You want a dense, creamy layer. Beat just until smooth. It’s a subtle difference, but it affects the texture significantly.
Use Parchment Paper
I can’t stress this enough. Without parchment, these sticky, sugary bars will stick to the pan. Parchment makes removal effortless and cleanup a 10-second rinse. It’s worth the extra step.
Common Problems & Solutions:
- Bars are too dense — You likely overmixed the flour or didn’t cream the butter and sugar enough. Next time, cream for a full 3 minutes and mix flour on low.
- Cream cheese layer is runny — Your cream cheese was too warm or you added too much liquid. Use brick cream cheese and don’t add milk unless necessary.
- Edges burn before center is done — Your oven runs hot. Tent the pan with foil after 20 minutes if the edges are darkening too quickly.
Pro Tricks:
Chill Before Cutting
For clean cuts, chill the bars in the fridge for 30 minutes before slicing. The cold firms up the cream cheese layer, making it easier to cut neat squares. Use a sharp knife and wipe it clean between cuts.
Add a Pinch of Nutmeg
For a deeper fall flavor, add a pinch of nutmeg to the cinnamon sugar topping. It’s subtle but adds complexity. I love this variation during the holidays.
Recipe Variations
Once you’ve nailed the basic version, here’s how to mix it up. The Cozy Fall Snickerdoodle Sheet Pan Bars are a canvas for creativity.
Apple Cinnamon Variation
Grate one small apple (about ½ cup) and fold it into the cream cheese layer. The moisture from the apple adds a fresh tartness that pairs beautifully with the cinnamon. It’s like eating apple pie in bar form. I add this in October when apples are cheap and plentiful.
Maple Pecan Variation
Stir ½ cup chopped pecans into the dough before spreading. Drizzle 2 tbsp maple syrup over the cream cheese layer before adding the cinnamon sugar. The nuttiness and maple depth make this version richer and more complex. It’s perfect for Thanksgiving.
Gluten-Free Option
Swap the all-purpose flour for a 1:1 gluten-free flour blend. I’ve tested this with Bob’s Red Mill and King Arthur. The texture is slightly more crumbly but still delicious. Add a teaspoon of xanthan gum if your blend doesn’t include it, to help bind the dough.
Dairy-Free Option
Use dairy-free butter and dairy-free cream cheese. Miyoko’s or Kite Hill work well. The flavor will be slightly different, but the cinnamon sugar will still shine. It’s a great option for friends with allergies.
Vegan Option
This is trickier because of the egg and cream cheese. Use flax eggs (1 tbsp ground flax + 3 tbsp water per egg) and a vegan cream cheese alternative. The texture will be denser, but the flavor is still satisfying. I haven’t perfected this version yet, so I stick to the dairy version for best results.
Serving & Storage
How you serve these bars matters just as much as how you make them.
Serving Suggestions:
- Warm with Ice Cream — Warm a square in the microwave for 10 seconds and top with vanilla ice cream. The contrast of hot and cold is incredible. It feels like a fancy dessert.
- With Coffee or Tea — These bars are perfect with a black coffee or a spiced chai latte. The cinnamon pairs beautifully with both. I serve them at brunch often.
- Plain — Honestly, they’re great on their own. The sweetness is balanced by the tangy cream cheese. You don’t need frosting.
Storage Tips:
- Room Temperature — Store in an airtight container for up to 2 days. They stay moist and fresh. If your kitchen is very hot, refrigerate them.
- Refrigerator — Store in an airtight container for up to 5 days. The cream cheese layer requires refrigeration for food safety. Let them come to room temperature before eating for the best texture.
- Freezer — Yes, they freeze well! Wrap individual squares in plastic wrap and place them in a freezer bag. They’ll last for 3 months. Thaw in the fridge overnight. The texture holds up surprisingly well.
My Take: This is comfort food. It’s indulgent but balanced. Not diet food, but better than takeout. I know what’s in it, and it fuels my day without feeling like a guilt trip.
Final Thoughts
These Cozy Fall Snickerdoodle Sheet Pan Bars are more than just a recipe. They’re a reminder that simple ingredients can create something magical. I love that I can make them on a whim, share them with friends, or just enjoy them alone with a good book. They’ve become a staple in my home, and I hope they become one in yours too. If you make this, drop a comment! I love hearing how it turns out in your kitchen. Try adding that apple variation or the maple drizzle. Customize it to your taste. Happy cooking!
FAQs
Can I use salted butter instead of unsalted?
Yes, but reduce the added salt in the dough to ¼ tsp. Salted butter varies in salt content, so taste your dough if possible. I prefer unsalted for control, but salted works in a pinch.
Why did my bars collapse in the middle?
This usually happens if the cream cheese layer is too runny or if you overmixed the batter. Ensure your cream cheese is at room temperature but not melted. Also, check your baking powder; if it’s old, it won’t provide enough lift to support the layers.
Can I make these ahead of time?
Absolutely. I make these on Sunday and eat them throughout the week. They keep well in the fridge for up to 5 days. In fact, they taste even better the next day as the flavors meld together.
What size pan should I use?
A 9×13 inch pan is ideal. If you use an 8×8 pan, the bars will be thicker and may need extra baking time (add 5-10 minutes). If you use a larger pan, the bars will be thinner and bake faster. Adjust accordingly.
Can I freeze the dough?
I haven’t tried freezing the raw dough, but I suspect it might get soggy due to the cream cheese layer. It’s better to bake the bars and then freeze them. They thaw beautifully.
Is there a substitute for cream cheese?
You can use mascarpone for a richer, milder flavor, or a dairy-free cream cheese alternative. The texture will vary slightly, but the cinnamon sugar topping will still shine. I’ve tried Greek yogurt, but it’s too thin and makes the layer runny.
How do I get clean cuts?
Chill the bars in the fridge for 30 minutes before cutting. Use a sharp knife and wipe it clean between cuts. A serrated knife can also help saw through the layers without squishing them.
Pin This Recipe!


Cozy Fall Snickerdoodle Sheet Pan Bars
- Total Time: 70 minutes
- Yield: 12 servings 1x
Description
These thick, gooey bars combine a tender cinnamon-sugar base with a tangy cream cheese layer and a crisp, caramelized top. It’s a minimal-effort, 5-ingredient dessert that captures the nostalgic flavor of snickerdoodles in a substantial bar form.
Ingredients
- 1 cup (2 sticks / 226g) unsalted butter, softened
- 1 cup (200g) granulated sugar (for dough)
- 2 ½ cups (315g) all-purpose flour
- 1 tsp baking powder
- ½ tsp fine sea salt
- 2 large eggs, room temperature
- 1 tsp pure vanilla extract
- 8 oz (225g) full-fat brick cream cheese, softened
- ¼ cup (50g) granulated sugar (for cream cheese layer)
- ½ tsp vanilla extract (for cream cheese layer)
- ½ cup (100g) granulated sugar (for topping)
- 2 tsp ground cinnamon (for topping)
Instructions
- Preheat oven to 350°F (175°C). Line a 9×13 inch baking dish with parchment paper, leaving an overhang on the sides, and grease lightly.
- In a large bowl, beat the softened butter and 1 cup granulated sugar together until light and fluffy, about 2-3 minutes.
- Add the eggs one at a time, beating well after each addition. Mix in 1 tsp vanilla extract and salt until just combined.
- Reduce mixer speed to low. Gradually add the flour and baking powder, mixing only until just combined. Do not overmix.
- Transfer the dough to the prepared baking dish. Use wet hands or a spatula to press it evenly into the pan to form a uniform base layer.
- In a separate bowl, beat the softened cream cheese, ¼ cup sugar, 1 egg, and ½ tsp vanilla until smooth and creamy. Spread this layer evenly over the dough base.
- Mix the remaining ½ cup sugar with 2 tsp cinnamon. Sprinkle evenly over the cream cheese layer. Use a knife or skewer to gently drag through the layers in a zigzag pattern to create swirls.
- Bake for 30-35 minutes, until edges are golden brown and the center is set but slightly jiggly.
- Let the bars cool in the pan for at least 20 minutes before cutting. For clean cuts, chill in the fridge for 30 minutes before slicing.
Notes
Ensure all ingredients (butter, cream cheese, eggs) are at room temperature for the best texture. Do not overmix the flour to avoid dense bars. The cream cheese layer should be thick but spreadable; if too runny, your cream cheese may be too warm. For clean cuts, chill the bars before slicing. These can be stored in the fridge for up to 5 days or frozen for up to 3 months.
- Prep Time: 15 minutes
- Cook Time: 35 minutes
- Category: Dessert
- Cuisine: American
Nutrition
- Serving Size: 1 bar
- Calories: 320
- Sugar: 26
- Sodium: 180
- Fat: 18
- Saturated Fat: 11
- Carbohydrates: 38
- Fiber: 1
- Protein: 4
Keywords: snickerdoodle bars, sheet pan dessert, fall baking, cream cheese bars, easy dessert, cinnamon sugar, cozy recipes, 5-ingredient dessert


