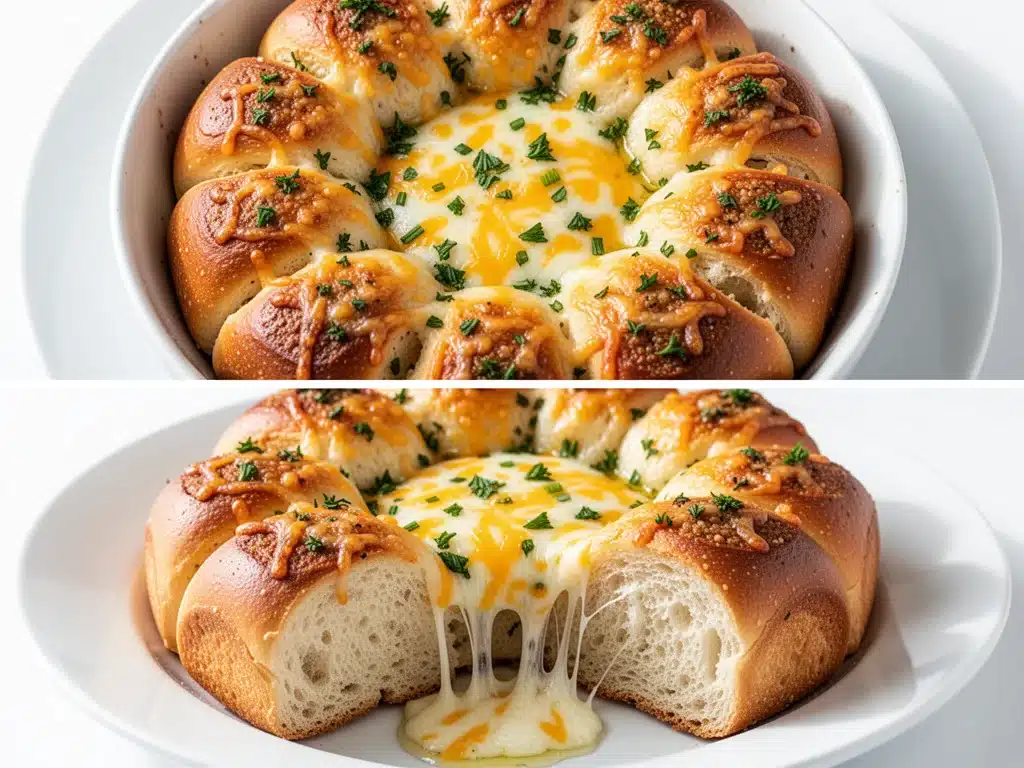
I still remember the exact moment I realized these cheesy garlic bread pull-apart rolls were going to take over our family gatherings. It was a rainy Sunday in November, and I had invited my entire extended family over for an early dinner. You know how it is—there’s always that one dish everyone pretends they don’t want but actually fights over. Usually, it’s the potato salad or the last slice of pie. But that day? It was the bread.
I had just bought a loaf of soft, slightly stale sandwich bread (don’t judge, it works better for this) and decided to turn it into a garlic butter nightmare in the best way possible. I chopped up half a stick of butter, mixed in a mountain of minced garlic, some dried oregano, and a pinch of red pepper flakes for heat. Then came the cheese—lots of it. Mozzarella for the stretch, parmesan for the salty crunch. I sliced the loaf horizontally, layered it all up, wrapped it in foil, and threw it in the oven.
When I pulled it out, the smell hit the living room before I even opened the door. My uncle, who usually complains about everything, walked into the kitchen, grabbed a piece, and said, “I need the recipe. Now.” That’s when I knew I had something special. These aren’t just bread and cheese. They’re a communal experience. They’re warm, gooey, and impossible to eat just one of. And the best part? They’re stupidly easy to make, which means I can whip them up for impromptu guests, game nights, or just because I’m craving comfort food on a Tuesday.
Over the last year, I’ve made this cheesy garlic bread pull-apart rolls recipe probably 30 times. I’ve tweaked the herb blend, experimented with different cheeses, and even tried adding bacon (which, by the way, is a game-changer). But the core recipe stays the same because it just works. It’s reliable, it’s delicious, and it always impresses. If you’ve ever wanted to be the hero of the dinner party without spending hours in the kitchen, this is your ticket.
Why You’ll Love This Recipe
There are a lot of bread recipes out there, but this cheesy garlic bread pull-apart rolls recipe stands out for a few specific reasons. It’s not just about the taste—though that’s huge—it’s about the experience. Here’s why this recipe has earned a permanent spot in my weekly rotation:
- Zero Stress, Maximum Reward — Seriously, if you can spread butter on toast, you can make this. I’ve made these while on FaceTime with my mom, helping my toddler with a craft, and even once while watching the news. The prep is minimal, and the oven does all the heavy lifting. No kneading, no rising, no fancy techniques. Just assemble, bake, and eat.
- Perfect for Any Crowd — I’ve served these to my picky six-year-old, my vegan friend (who asked for extra parmesan and was happy), and my foodie cousin who usually critiques everything. Everyone loves them. They’re versatile enough to be a side dish, a snack, or even a light meal if you pair them with a soup. Plus, they’re naturally vegetarian, which makes meal planning easier.
- Leftovers Are a Dream — Okay, full disclosure: leftovers rarely last more than a day in my house. But if they do, they reheat beautifully. I usually pop them in a toaster oven for five minutes to crisp up the edges, and they taste almost as good as fresh. The garlic flavor actually deepens overnight, making them even better the next day.
- Budget-Friendly Comfort — This recipe uses simple, affordable ingredients. A loaf of bread, some butter, a few herbs, and a bag of shredded cheese. You’re looking at maybe $5-6 total for a huge platter of food. That’s cheaper than ordering takeout and way healthier. It’s the ultimate hack for feeding a crowd without breaking the bank.
- Customizable to Your Taste — Want it spicy? Add red pepper flakes. Want it herby? Throw in fresh basil or thyme. Want it meaty? Add cooked bacon or Italian sausage. This recipe is a blank canvas for your cravings. I’ve made it with sun-dried tomatoes, with jalapeños, and even with pesto mixed into the butter. The possibilities are endless.
This is my go-to when I need something that feels homemade but takes zero effort. It’s warm, it’s cheesy, and it brings people together. Whether you’re hosting a dinner party or just want a cozy snack with your favorite show, these rolls will hit the spot.
Ingredients You’ll Need
Here’s the best part: you probably have most of these ingredients already in your pantry or fridge. I’m not asking for anything exotic or hard to find. This is about using what you have and making it shine. Let’s break down what you need and why each piece matters.
For the Garlic Butter Spread
Unsalted butter (½ cup / 113g) — I use unsalted so I can control the saltiness. If you only have salted butter, reduce the added salt in the recipe. Softened butter is key here; it makes spreading easy and helps the flavors meld together.
Garlic (6-8 cloves, minced / about 3 tablespoons) — Yes, that’s a lot of garlic. But this is *garlic* bread. Don’t skimp. Fresh garlic is a must; jarred garlic has a weird metallic taste that just doesn’t work here. If you’re in a rush, buy pre-minced fresh garlic in a jar, but try to avoid the dry kind.
Dried oregano (1 teaspoon) — This gives that classic Italian bakery flavor. If you don’t have oregano, dried basil or an Italian herb blend works too. Fresh herbs can be used, but they burn easier, so I stick to dried for this recipe.
Red pepper flakes (½ teaspoon, optional) — This adds a tiny kick that cuts through the richness of the cheese and butter. I always include it, but if you’re making this for kids or people who hate spice, you can skip it or use just a pinch.
Salt and black pepper (½ teaspoon each) — To balance the flavors. Taste your garlic butter before spreading it; it should taste slightly too salty because the bread will dilute it a bit.
For the Bread and Cheese
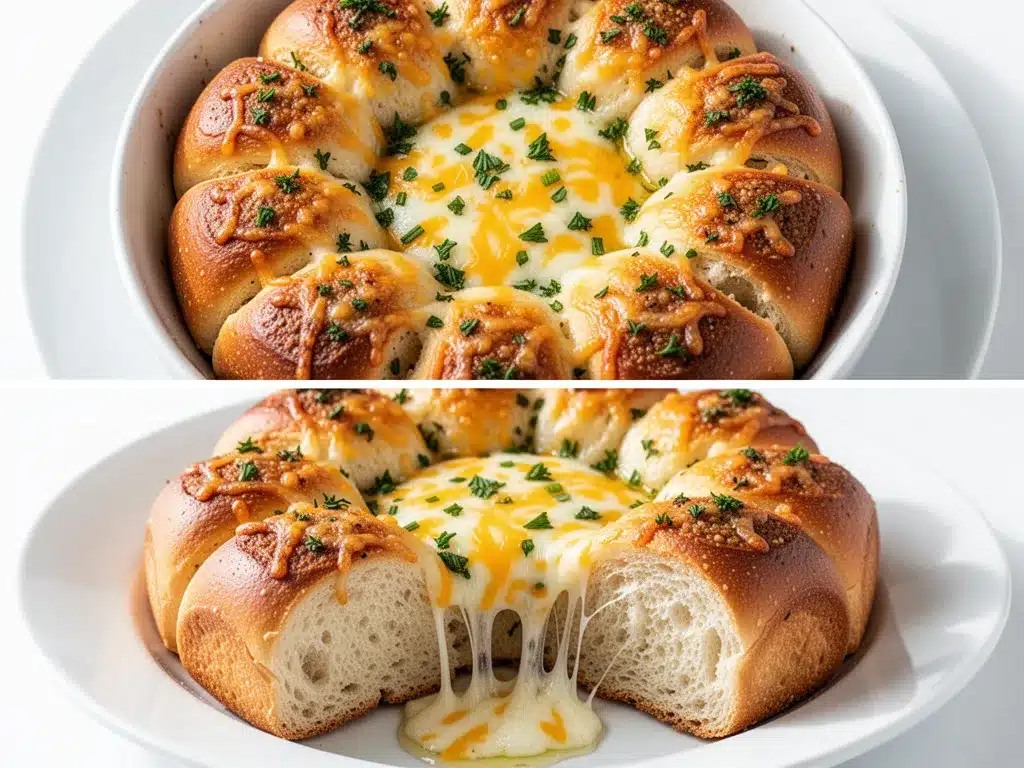
Soft sandwich bread (1 large loaf, about 20-24 slices) — I prefer a soft white or wheat loaf. Sourdough or crusty bread doesn’t work as well because it doesn’t pull apart as easily and can get too hard. Look for something that squishes a little when you press it.
Shredded mozzarella cheese (2 cups / 200g) — Mozzarella is the stretchy, gooey star here. Buy a block and shred it yourself if you can. Pre-shredded cheese has anti-caking agents that prevent it from melting smoothly. If you must use pre-shredded, it’ll still work, just not as perfectly.
Grated Parmesan cheese (½ cup / 50g) — This adds a salty, nutty crunch on top. Again, grate your own from a block for the best results. It melts differently and tastes way better than the pre-grated kind.
Optional Add-Ins
Fresh parsley (2 tablespoons, chopped) — For garnish. It adds a pop of color and freshness that contrasts with the heavy garlic and cheese. I sprinkle it on right before serving.
Cooked bacon bits (½ cup) — If you’re a bacon lover, this is a must. Crumble it up and layer it in with the cheese. It adds a smoky, salty crunch.
Sun-dried tomatoes (¼ cup, chopped) — These add a burst of tangy sweetness. I love them in this recipe, especially when paired with the mozzarella.
Italian sausage (½ cup, cooked and crumbled) — For a heartier version, add some crumbled sausage. It makes the rolls more of a meal than a side.
Shopping Tips
I always buy my bread the day before I make these if possible. Slightly stale bread holds up better during baking and doesn’t get soggy. If your bread is fresh, just leave the loaf out on the counter for a few hours to dry out a bit. For cheese, I usually buy a block of mozzarella and shred it myself. It takes about 5 minutes and makes a huge difference in the final texture. And for garlic, I keep a bag of fresh garlic in my pantry at all times because I use it in everything. If you’re out, you can use garlic powder in a pinch, but fresh is always better.
Equipment Needed
You don’t need any fancy gadgets for this. Here’s what I actually use, along with some alternatives if you don’t have the exact same tools.
Baking sheet or large baking dish — I use a standard 13×9 inch baking dish. It fits the loaf perfectly and catches any cheese that might drip. A rimmed baking sheet works too, but you might need to line it with foil to catch spills.
Sharp knife — For slicing the bread loaf horizontally. A serrated bread knife is ideal because it cuts through soft bread without squishing it. If you don’t have one, a regular sharp knife works, just be gentle.
Small mixing bowl — For combining the garlic butter. Any bowl will do, as long as it’s big enough to hold the butter and garlic.
Measuring spoons — For the garlic, herbs, and spices. I use a standard set, but if you’re feeling lazy, you can eyeball it. This recipe is pretty forgiving.
Aluminum foil — To cover the rolls while they bake. This helps the bread steam and soften before the cheese melts. I keep a roll in my kitchen at all times.
Pastry brush or spoon — To spread the garlic butter. A spoon works fine, but a pastry brush gives a more even coat. I usually just use a spoon because it’s easier to clean.
Optional: Oven-safe skillet — If you want to serve the rolls directly in the pan, an oven-safe skillet is great. It looks rustic and makes serving easier. But a baking dish is totally fine too.
Tool Tips — Don’t stress about having the perfect equipment. I’ve made these on a flimsy baking sheet from the dollar store, and they turned out fine. The most important thing is that your bread is soft and your cheese is shredded. If you’re using a loaf that’s too big, just cut it in half and make two smaller batches. It’s all about what works for your kitchen.
How to Make It: Step-by-Step
Alright, let’s make this! I’m walking you through exactly how I do it, including the little tricks I’ve picked up over the years. This process is straightforward, but there are a few key moments that make all the difference.
Step 1: Prep Your Garlic Butter (5 minutes)
Start by softening your butter. If you’re in a rush, you can microwave it for 10-15 seconds, but don’t melt it completely. You want it soft and spreadable, not liquid. In a small bowl, combine the softened butter, minced garlic, dried oregano, red pepper flakes, salt, and black pepper. Mix it well with a fork or spoon until it’s a uniform paste. Taste it! It should smell amazing and taste like garlic heaven. If it needs more salt or garlic, adjust it now.
Step 2: Slice the Bread (3 minutes)
Take your loaf of bread and slice it horizontally through the middle. You’ll have a top half and a bottom half. If your loaf is particularly thick, you might want to slice it into three layers, but two is usually perfect. Lay the two halves cut-side up on your cutting board. If the bread is fresh and soft, it might squish a bit—just be gentle. If it’s slightly stale, it’ll hold its shape better.
Step 3: Layer the Garlic Butter and Cheese (5 minutes)
Spread a generous layer of the garlic butter on the cut side of the bottom half of the bread. Don’t be shy; you want every bite to be flavorful. Next, sprinkle half of the shredded mozzarella over the butter. If you’re adding bacon, sun-dried tomatoes, or sausage, layer them in now. Then, place the top half of the bread on top, cut-side down. Spread the remaining garlic butter on the very top of the loaf. This ensures the crust gets that golden, garlicky goodness.
Step 4: Add the Parmesan and Wrap (2 minutes)
Sprinkle the grated Parmesan cheese evenly over the top of the loaf. This will create a crunchy, cheesy crust as it bakes. Now, loosely tent the entire loaf with aluminum foil. Don’t wrap it tightly; you just want to cover it to trap the steam. This helps the bread soften and the cheese melt without burning the top. If you don’t have foil, you can use a baking lid or another baking dish, but foil is easiest.
Step 5: Bake Covered (15 minutes)
Preheat your oven to 375°F (190°C). Place the foil-covered loaf on your baking sheet or in your baking dish. Bake for 15 minutes. During this time, the bread will steam and soften, and the cheese will start to melt. You’ll know it’s ready when the kitchen smells like a bakery and the bread looks warm and inviting.
Step 6: Bake Uncovered (5-10 minutes)
Remove the foil carefully. You’ll see the cheese is melted and the bread is soft. Now, place the loaf back in the oven uncovered for 5-10 minutes. This step is crucial for getting that golden, crispy top. Keep an eye on it; you want the cheese to bubble and the edges to turn golden brown, but not burn. If the top is browning too fast, you can tent it loosely with foil again for the last few minutes.
Step 7: Cool and Pull Apart (5 minutes)
Remove the loaf from the oven and let it cool for 5 minutes. This allows the cheese to set slightly so it doesn’t slide off when you pull the pieces apart. Then, slice the loaf into individual rolls or squares, depending on your preference. I usually cut it into 8-12 pieces. Sprinkle with fresh parsley if you’re using it. Serve warm and enjoy!
Visual Cues: You’ll know the rolls are done when the cheese is bubbly and golden, and the bread edges are slightly crisp. The smell should be intensely garlicky and comforting. If the top isn’t brown enough, give it another 2-3 minutes. If it’s too brown, just eat it quickly—it’s still delicious!
Expert Tips & Tricks
Here’s everything I’ve learned from making these cheesy garlic bread pull-apart rolls dozens of times. These tips will save you from my mistakes and ensure your rolls turn out perfect every time.
Use Slightly Stale Bread
Fresh bread can get too soggy when you add the butter and cheese. If your bread is fresh, leave the loaf out on the counter for a few hours to dry out slightly. Or, toast the bread halves in the oven for 5 minutes before assembling. This creates a barrier that keeps the bread from getting mushy.
Don’t Skimp on Garlic
This is garlic bread, after all. Use more garlic than you think you need. If you’re worried about the smell, just make sure you ventilate your kitchen. The garlic flavor mellows out during baking, so fresh, strong garlic is key. Minced garlic is best, but if you’re in a rush, finely chopped works too.
Shred Your Own Cheese
Pre-shredded cheese contains cellulose to prevent clumping, which stops it from melting smoothly. Buy a block of mozzarella and shred it yourself. It takes 5 minutes and makes a huge difference in the texture. The cheese will be silkier and more stretchy.
Control the Heat
375°F is the sweet spot. If you go higher, the cheese burns before the bread heats through. If you go lower, the bread gets dry. Stick to this temperature for consistent results. Also, keep an eye on the last few minutes of baking to prevent burning.
Make It Ahead
You can assemble the rolls up to 4 hours ahead of time. Cover them tightly with plastic wrap and refrigerate. When you’re ready to bake, let them sit at room temperature for 20 minutes, then bake as directed. Add a few extra minutes to the baking time if they’re cold from the fridge.
Common Mistakes
Mistake: Soggy bread. Fix: Use slightly stale bread or toast it first. Make sure you’re not using too much butter.
Mistake: Burnt cheese. Fix: Lower the oven temperature or remove the foil earlier. Keep a close eye on the last 5 minutes.
Mistake: Bland flavor. Fix: Taste your garlic butter before spreading. It should taste strong. Adjust salt and garlic to your liking.
Variations & Substitutions
Once you’ve nailed the basic version, here’s how you can mix it up. I’ve tried all of these, and they’re all delicious.
Bacon & Cheddar
Swap the mozzarella for sharp cheddar and add cooked, crumbled bacon. This version is smoky, salty, and incredibly satisfying. It’s like a loaded baked potato in bread form.
Spinach & Feta
Use crumbled feta instead of mozzarella and add chopped spinach. This version is lighter and tangier. It’s great for a Mediterranean-inspired twist. Add a little sun-dried tomato for extra flavor.
Jalapeño & Cheddar
Add diced jalapeños and use pepper jack cheese. This version is spicy and cheesy. Perfect for game day or if you like a kick. Reduce the red pepper flakes in the butter if you add jalapeños.
Pesto & Mozzarella
Mix 2 tablespoons of pesto into the garlic butter. This adds a fresh, herbal flavor that pairs perfectly with the mozzarella. It’s a bit more sophisticated but still easy.
Vegetarian Protein Boost
Add cooked white beans or lentils to the layers. They add protein and make the rolls more filling. This is a great way to sneak in extra nutrition without changing the flavor profile much.
Dietary Modifications
Gluten-Free: Use a gluten-free sandwich loaf. Make sure it’s soft and not too crumbly. The rest of the recipe is naturally gluten-free.
Dairy-Free: Use dairy-free butter and shredded cheese. There are many good brands out there now. The flavor won’t be exactly the same, but it’ll still be tasty.
Lower-Carb: This is tricky because bread is the main ingredient. You can try using low-carb bread, but it often doesn’t pull apart as well. Alternatively, use zucchini boats or cauliflower bread as a base, but that’s a whole different recipe.
Serving & Storage
How to Serve:
I usually serve these straight from the baking dish, letting everyone pull apart the pieces they want. It’s interactive and fun. Pair them with a simple salad, a bowl of tomato soup, or even a hearty chili. They’re great for brunch too, especially with the bacon variation.
Side Dishes:
- Tomato basil soup
- Caesar salad
- Roasted vegetables
- Grilled chicken or fish
Storage Instructions:
Refrigerator: Store leftovers in an airtight container for up to 3 days. The bread will firm up, but it reheats well.
Reheating: The best way to reheat is in the oven or toaster oven at 350°F for 5-10 minutes. This crisps up the edges and melts the cheese again. Microwave works but can make the bread chewy. If you microwave, do it in short bursts and cover with a damp paper towel.
Freezing: You can freeze the assembled but unbaked rolls. Wrap them tightly in plastic wrap and then foil. Freeze for up to 1 month. Thaw in the fridge overnight, then bake as directed, adding 5-10 minutes to the baking time.
Pro Tip: If the rolls seem dry after reheating, brush them with a little melted butter before heating. This brings back the moisture and flavor.
Nutrition Information
I’m not a nutritionist, but here’s the breakdown if you’re tracking. Keep in mind that this is a rich, comforting dish, so it’s higher in calories and fat.
Per Serving (based on 8 pieces):
- Calories: 280
- Protein: 10g
- Carbs: 28g
- Fiber: 1g
- Sugar: 2g
- Fat: 15g
- Saturated Fat: 8g
- Cholesterol: 35mg
- Sodium: 450mg
What’s Good:
- Good source of calcium from the cheese
- Provides energy from carbs
- Can be customized with veggies for added nutrients
What to Know:
- High in saturated fat and sodium due to cheese and butter
- Contains gluten and dairy
- Best enjoyed as an occasional treat or side dish
My Take:
Look, these are cheesy garlic bread rolls. They’re not a health food. But they’re homemade, so you know exactly what’s in them. When I make them, I try to balance them out with a big salad or some veggies. But usually? I just enjoy them and move on. Life’s too short to stress over every calorie.
Final Thoughts
So that’s my go-to cheesy garlic bread pull-apart rolls! I’ve talked a lot about these, but when you make a recipe this often, you have a lot to say about it. These rolls have saved me more times than I can count. They’re my answer to “what can I bring to the party?” or “what’s a quick snack?” or even “what’s a cozy dinner?” They’re versatile, delicious, and always a hit.
I love that they’re customizable. You can make them spicy, savory, cheesy, or even healthy-ish (if you’re into that). They bring people together, and they’re so easy to make that you’ll never want to buy store-bought bread again. If you make these, I’d love to hear how they turn out. Try different variations, add your favorite ingredients, and make them your own.
If you try this recipe, drop a comment and let me know what you think! I love hearing how recipes turn out in your kitchen. And if something doesn’t work, tell me that too—I’m here to help troubleshoot. Happy cooking, and I hope your kitchen smells amazing!
Frequently Asked Questions
Can I use a different type of bread?
You can, but soft sandwich bread works best for the pull-apart effect. Crusty bread like baguettes or sourdough won’t pull apart as easily and can get too hard. If you want to use sourdough, try to find a soft, fresh loaf and slice it thinly. But for the classic experience, stick with sandwich bread.
Why did my cheese turn out grainy?
This usually happens if the cheese was pre-shredded or if the oven was too hot. Pre-shredded cheese has anti-caking agents that prevent smooth melting. Always shred your own cheese from a block. Also, make sure your oven is at the correct temperature. If the cheese burns or separates, it’s likely too hot.
Can I make this ahead of time?
Yes! You can assemble the rolls up to 4 hours ahead and refrigerate them. Just let them sit at room temperature for 20 minutes before baking. You can also freeze the assembled but unbaked rolls for up to 1 month. Thaw in the fridge overnight before baking.
How do I reheat leftovers without them getting dry?
The best way is to reheat them in the oven or toaster oven at 350°F for 5-10 minutes. This crisps up the edges. If you microwave them, cover them with a damp paper towel to add moisture. You can also brush them with a little melted butter before reheating to keep them soft.
Can I add meat to this recipe?
Absolutely! Cooked bacon, Italian sausage, or ham all work great. Just make sure the meat is cooked and cooled before adding it to the layers. If you’re using sausage, crumble it and drain any excess grease. This adds a smoky, salty flavor that pairs well with the garlic and cheese.
Why is my bread soggy?
This usually happens if the bread is too fresh or if you used too much butter. Use slightly stale bread, or toast it briefly before assembling. Also, make sure you’re not oversaturating the bread with butter. A thin, even layer is all you need.
Can I make this gluten-free?
Yes, just use a gluten-free sandwich loaf. Make sure it’s soft and not too crumbly. The rest of the ingredients are naturally gluten-free. Gluten-free bread can sometimes be drier, so you might want to add a little extra butter to keep it moist.
Pin This Recipe!
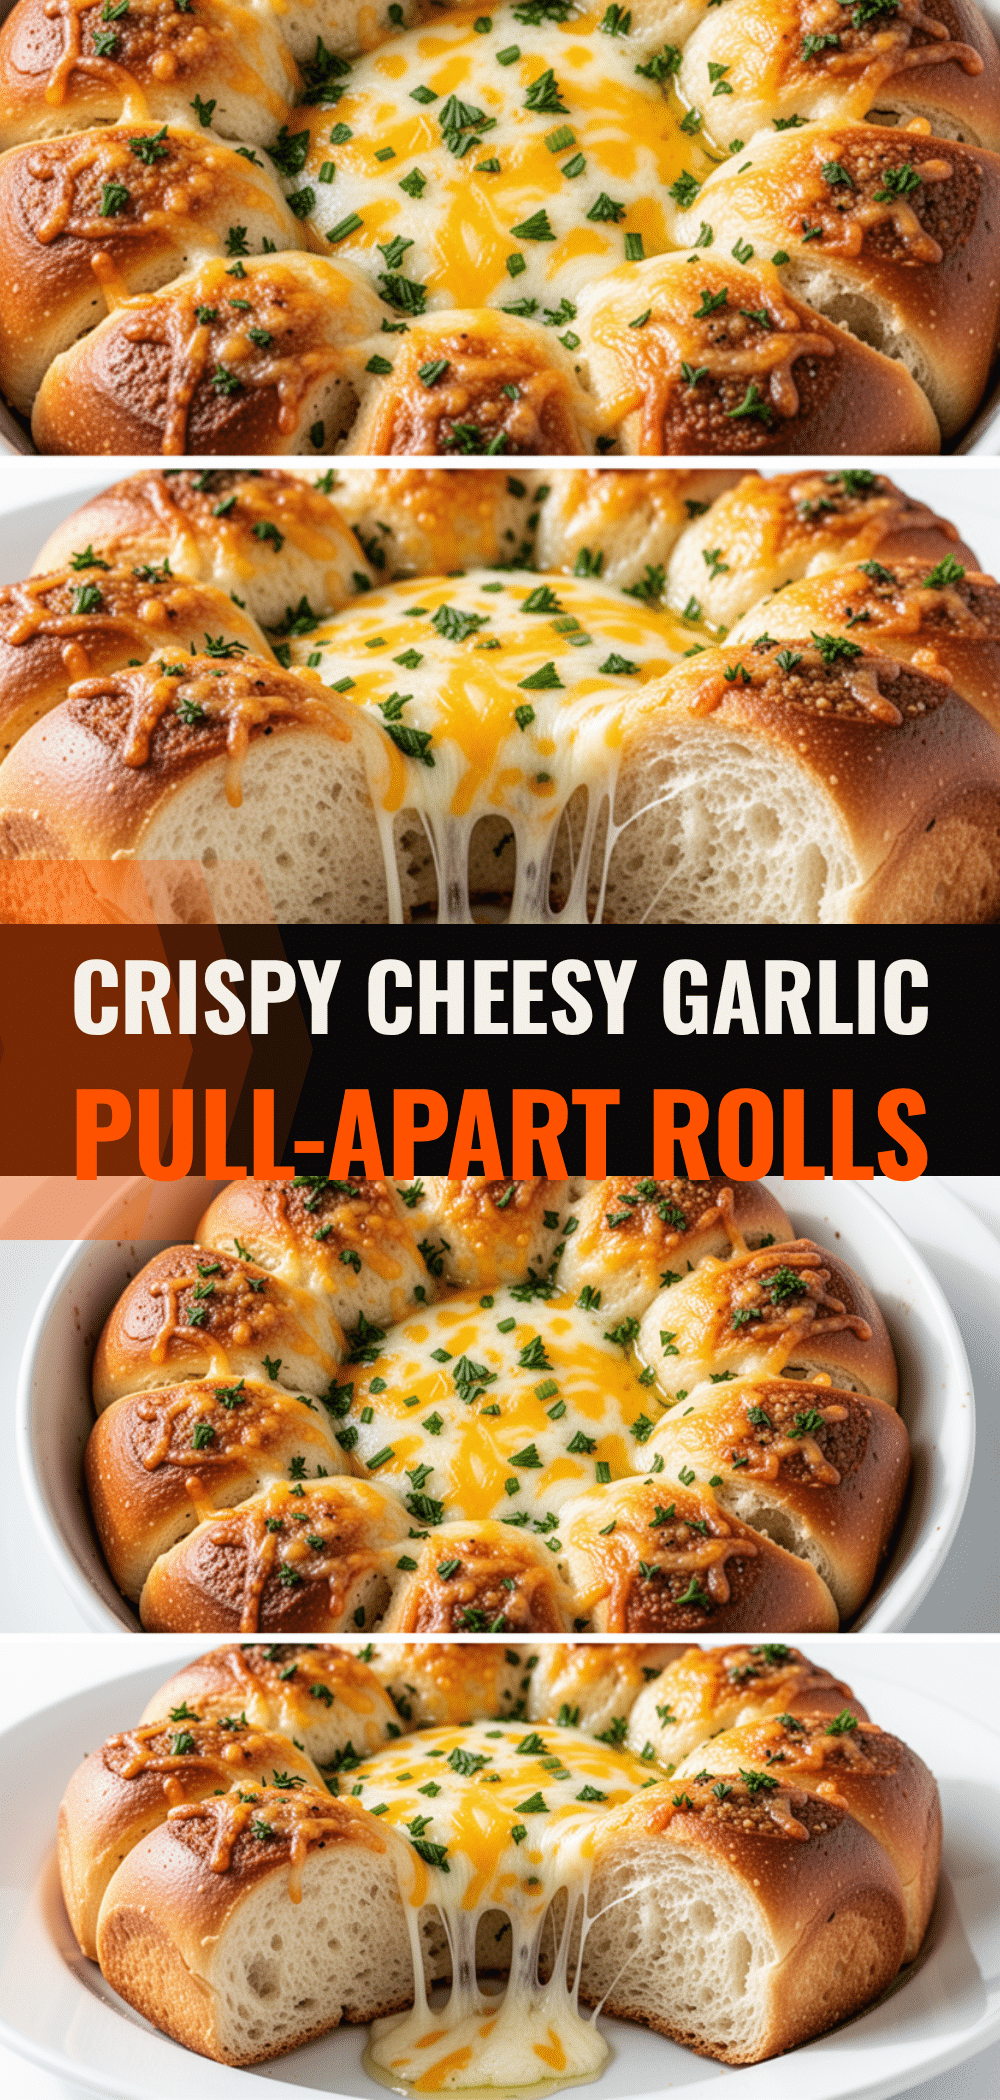
Cheesy Garlic Bread Pull-Apart Rolls: 10-Min Easy Recipe
- Total Time: 33-38 minutes
- Yield: 8 servings 1x
Description
These warm, gooey, and cheesy garlic bread pull-apart rolls are incredibly easy to make and perfect for any crowd. Using simple ingredients like soft sandwich bread, mozzarella, and parmesan, this recipe delivers maximum flavor with minimal effort.
Ingredients
- 1/2 cup (113g) unsalted butter, softened
- 6–8 cloves garlic, minced (about 3 tablespoons)
- 1 teaspoon dried oregano
- 1/2 teaspoon red pepper flakes (optional)
- 1/2 teaspoon salt
- 1/2 teaspoon black pepper
- 1 large loaf (20–24 slices) soft sandwich bread
- 2 cups (200g) shredded mozzarella cheese
- 1/2 cup (50g) grated Parmesan cheese
- 2 tablespoons fresh parsley, chopped (optional, for garnish)
- 1/2 cup cooked bacon bits (optional)
- 1/4 cup sun-dried tomatoes, chopped (optional)
- 1/2 cup cooked Italian sausage, crumbled (optional)
Instructions
- Preheat oven to 375°F (190°C).
- In a small bowl, mix softened butter, minced garlic, dried oregano, red pepper flakes, salt, and black pepper until a uniform paste forms.
- Slice the loaf of bread horizontally through the middle to create a top and bottom half.
- Spread half of the garlic butter on the cut side of the bottom bread half.
- Sprinkle half of the mozzarella cheese over the butter. Add optional ingredients like bacon or sausage if desired.
- Place the top half of the bread on top, cut-side down.
- Spread the remaining garlic butter on the very top of the loaf.
- Sprinkle the grated Parmesan cheese evenly over the top.
- Loosely tent the entire loaf with aluminum foil to trap steam.
- Bake covered for 15 minutes until the bread softens and cheese begins to melt.
- Remove foil and bake uncovered for 5-10 minutes until the top is golden brown and cheese is bubbly.
- Remove from oven and let cool for 5 minutes to allow cheese to set.
- Slice into 8-12 pieces and sprinkle with fresh parsley before serving.
Notes
Use slightly stale bread to prevent sogginess. Shred your own cheese for better melting. The garlic butter should taste slightly too salty before spreading as the bread will dilute it. For leftovers, reheat in the oven or toaster oven at 350°F for 5-10 minutes to crisp up edges.
- Prep Time: 13 minutes
- Cook Time: 20-25 minutes
- Category: Side Dish
- Cuisine: American
Nutrition
- Serving Size: 1 piece (approx. 1/8
- Calories: 280
- Sugar: 2
- Sodium: 450
- Fat: 15
- Saturated Fat: 8
- Carbohydrates: 28
- Fiber: 1
- Protein: 10
Keywords: garlic bread, pull-apart rolls, cheesy bread, easy recipe, comfort food, party food, vegetarian, homemade bread


