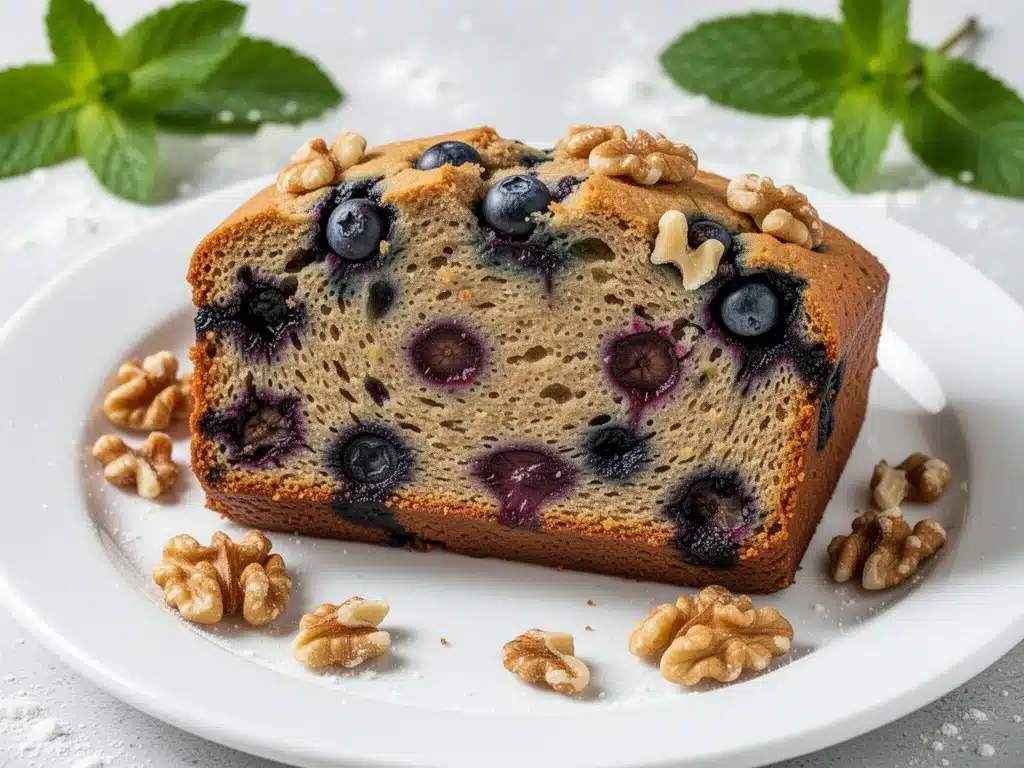
Last Sunday morning, I woke up to the sound of rain hitting the window and a distinct lack of energy for anything complicated. My kitchen counter was a graveyard of overripe bananas—yes, the ones with skin so brown it looked like chocolate, and a pint of blueberries that were starting to whisper, “Use me, or I’m going in the compost.” I wanted something warm, something that smelled like comfort, but I also needed it to be gluten-free because my sister was coming over for brunch, and I refused to serve her a loaf that would leave her bloated and miserable.
So, I threw together what I thought would be a mediocre, dry-looking gluten-free quick bread. I used the standard flour blend I keep in the pantry. I added the walnuts for crunch. I folded in the berries. I baked it. And then, something weird happened. It didn’t crumble. It didn’t taste like cardboard or feel like I was eating a sponge. It was moist, tender, and absolutely packed with flavor. The smell of cinnamon and warm banana filled the entire house, and my sister took one bite and actually stopped talking to look at me.
That was the birth of my obsession. Since that rainy Sunday, I’ve made this gluten-free blueberry banana bread with walnuts at least fifteen times. I’ve tweaked the ratios. I’ve tried different flours. I’ve even accidentally used salted butter once (my bad). And every single time, it turns out better than any bakery version I’ve ever bought. This isn’t just a “diet” bread. It’s the best banana bread, period. And the best part? It’s stupid simple.
Here’s the thing about gluten-free baking: it has a reputation for being finicky. You need xanthan gum, specific starches, and a degree in chemistry. But this gluten-free blueberry banana bread recipe? It uses a simple all-purpose blend you can buy at any grocery store. It’s foolproof. It’s the kind of recipe that saves your brunch when you’re running late, and it’s the kind of loaf that disappears so fast you’ll need to make another one by Tuesday.
Why You’ll Love This Gluten-Free Blueberry Banana Bread with Walnuts
I’ve made this loaf for everyone from my picky teenage nephew to my gluten-free college roommate, and it’s become the go-to gift for neighbors who are watching their wheat intake. But honestly, I keep coming back to it because it just works. Here’s why this gluten-free blueberry banana bread with walnuts deserves a permanent spot in your rotation:
- Zero Dry Crumbs — The #1 fear with gluten-free baked goods is that they’ll fall apart or taste dry. I’ve tested this recipe so many times, and the ratio of wet to dry ingredients is dialed in perfectly. The result is a loaf that holds together beautifully but stays moist and tender for days. It’s not crumbly; it’s cake-like in the best way.
- Uses Overripe Bananas — This is the perfect solution for those bananas hiding in your fruit bowl right now. The riper they are, the sweeter and more flavorful the bread becomes. You don’t need to add much sugar because the bananas do the heavy lifting. It’s basically recycling food into deliciousness.
- Texture Contrast — The walnuts aren’t just an afterthought. They’re essential. They add that necessary crunch that contrasts with the soft, chewy crumb of the bread. Plus, they bring a subtle earthiness that balances the sweetness of the blueberries. If you hate walnuts, you can swap them, but I really recommend sticking with them.
- One-Bowl Simplicity — Seriously, if you can mash a banana with a fork, you can make this. Mix the wet ingredients, mix the dry ingredients, combine them, fold in the berries, and bake. No electric mixer required. No complicated techniques. Just simple, honest cooking.
- Freezes Like a Dream — I make a double batch whenever I have the time. This loaf freezes incredibly well. I slice it, wrap it tight, and pull out a slice for breakfast throughout the week. It tastes just as good fresh from the freezer as it does fresh from the oven.
- Gluten-Free Without the Guilt — This isn’t that dense, heavy bread that sits in your stomach like a rock. Thanks to the right balance of almond flour and starches (or a good store-bought blend), it’s light and airy. My non-gluten-free friends literally cannot tell the difference.
This is my answer to “what’s for breakfast?” when I’m tired. It’s my go-to when I need to bring something to a potluck that everyone can eat. It’s reliable, delicious, and makes your kitchen smell like a bakery. I love it, and I think you will too.
Ingredients You’ll Need for Gluten-Free Blueberry Banana Bread with Walnuts
Before we get into the mixing, let’s talk about what you need. I’m particular about a few things here, but don’t worry—most of this is pantry staples. You probably have half of it right now.
For the Wet Ingredients
Ripe Bananas (3 large, about 1 ½ cups mashed / 340g) — This is non-negotiable. I’m talking about bananas that are black on the outside. The more brown spots, the better. They need to be soft enough to mash easily. If they’re yellow, they won’t be sweet enough, and the bread will taste bland.
Unsalted Butter (½ cup / 113g, melted) — I use butter because it adds that rich, savory depth that oil sometimes misses. Melt it completely and let it cool slightly before mixing. If you need dairy-free, you can swap this for coconut oil, but it will change the flavor slightly.
Granulated Sugar (¾ cup / 150g) — I like the texture granulated sugar gives. Brown sugar works too, and it makes the bread slightly more moist and chewy, but I stick with white for that classic bakery crust. If you’re watching sugar, you can reduce to ½ cup, but it might be less sweet.
Eggs (2 large / 100g) — These bind everything together. Since we’re not using gluten, the eggs are crucial for structure. Room temperature eggs mix in better, so take them out of the fridge 15 minutes before you start.
Vanilla Extract (1 teaspoon / 5ml) — Don’t skip this. It brings out the flavor of the bananas and walnuts. Use pure vanilla, not imitation. It makes a noticeable difference.
For the Dry Ingredients
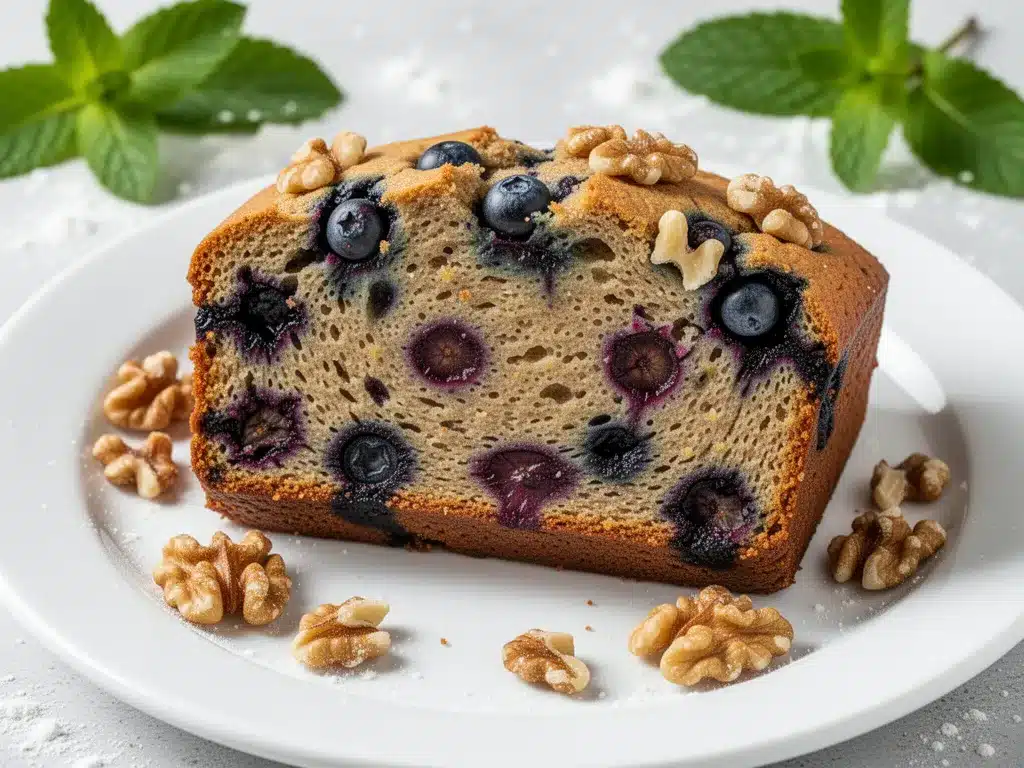
Gluten-Free All-Purpose Flour Blend (1 ½ cups / 180g) — I use a blend that contains xanthan gum. Brands like Bob’s Red Mill or King Arthur Measure for Measure work great. If your blend doesn’t have xanthan gum, add ½ teaspoon of xanthan gum to the dry ingredients. This is what gives the bread its elasticity.
Baking Soda (1 teaspoon / 5g) — This helps the bread rise. Make sure it’s not expired! I keep mine in a cool, dry place, but if it’s been on the shelf for years, swap it out.
Baking Powder (½ teaspoon / 2g) — A little extra lift to ensure that beautiful dome on top.
Sea Salt (½ teaspoon / 3g) — Salt is flavor enhancer. It makes the banana flavor pop. Don’t skip it.
The Mix-Ins
Fresh or Frozen Blueberries (1 ½ cups / 225g) — I love using fresh blueberries in the spring and summer, but frozen work just as well. If you use frozen, do not thaw them before adding. Toss them in a little flour first to prevent them from sinking to the bottom.
Walnuts (½ cup / 60g, chopped) — Toasting the walnuts beforehand is my secret weapon. It brings out their nutty flavor and keeps them crunchy. I usually toast them in a dry pan for 3-4 minutes before chopping.
Optional: Lemon Zest (1 teaspoon) — I add this sometimes. It adds a bright, citrusy note that cuts through the richness of the butter and sugar. It’s not traditional, but I think it’s amazing.
Equipment Needed
You don’t need fancy gadgets for this. Here’s what I actually use:
Large Mixing Bowl — A wide bowl makes it easier to mix everything without splashing. I use a 4-quart stainless steel bowl.
Fork or Potato Masher — For mashing the bananas. A fork works fine if you’re lazy, but a masher is faster.
Medium Mixing Bowl — For whisking the dry ingredients separately. This ensures the baking soda and salt are distributed evenly.
Spatula — A silicone spatula is best for folding in the blueberries and walnuts. You want to be gentle so you don’t crush the berries.
9×5 Inch Loaf Pan — Standard size. Grease it well with butter or spray. I also line the bottom with parchment paper for easy removal.
Wire Cooling Rack — Essential. Letting the bread cool completely prevents it from becoming gummy.
How to Make It: Step-by-Step
Alright, let’s make this! I’m walking you through exactly how I do it, including the little tricks I’ve picked up over the years.
Step 1: Prep Your Oven and Pan
Preheat your oven to 350°F (175°C). Grease your 9×5 loaf pan with butter or non-stick spray. For extra insurance against sticking, line the bottom with parchment paper. This is crucial for gluten-free bread, which can sometimes be sticky.
Step 2: Mash the Bananas
In a large bowl, add your peeled, overripe bananas. Mash them with a fork until they’re mostly smooth with a few small chunks. You want about 1 ½ cups. Don’t worry if it’s not perfectly uniform; a few chunks add texture.
Step 3: Mix the Wet Ingredients
To the mashed bananas, add the melted butter, sugar, eggs, and vanilla extract. Whisk everything together until the sugar is mostly dissolved and the mixture is smooth. It should look glossy and combined.
Step 4: Combine the Dry Ingredients
In a separate medium bowl, whisk together the gluten-free flour blend, baking soda, baking powder, and salt. Make sure there are no clumps of baking soda. If you’re using a flour blend without xanthan gum, add it now.
Step 5: Bring It All Together
Pour the dry ingredients into the wet ingredients. Gently fold them together with a spatula. Stop mixing as soon as you no longer see streaks of flour. Overmixing can make the bread dense. It’s okay if it looks a little thick; gluten-free batter is naturally thicker than wheat-based batter.
Step 6: Fold in the Berries and Walnuts
Gently fold in the blueberries and chopped walnuts. If using frozen blueberries, toss them in a tablespoon of flour first to keep them from sinking. Fold just until they are distributed. Be gentle—don’t crush the berries.
Step 7: Bake
Pour the batter into your prepared loaf pan. Smooth the top with your spatula. Bake for 55-65 minutes. Check at 55 minutes by inserting a toothpick into the center. If it comes out clean or with just a few moist crumbs, it’s done. If it’s wet, bake for another 5-10 minutes.
Step 8: Cool
Let the bread cool in the pan for 10 minutes, then transfer it to a wire rack to cool completely. This step is hard, I know, but slicing it hot will make it gummy. Wait at least 30 minutes before slicing.
Expert Tips & Tricks for Gluten-Free Success
Here’s everything I’ve learned from making this dozens of times. These tips will save you from my mistakes.
Don’t Skimp on Ripe Bananas
The ripeness of the bananas is the most important factor. If they’re not super brown, the bread won’t be sweet enough, and it might taste like plain banana bread. I keep a bag of bananas in the fridge once they’re ripe; the skins turn black, but the fruit inside is perfect.
Toast Your Walnuts
I can’t stress this enough. Toasting walnuts in a dry skillet for 3-4 minutes brings out their essential oils. It makes them taste nuttier and keeps them crunchy even after baking. It takes two minutes and makes a huge difference.
Check Your Flour Blend
Not all gluten-free flours are created equal. Some are heavier, some are lighter. If your bread turns out dense, try a different brand. I’ve found that blends with rice flour and tapioca starch work best for banana bread. Avoid almond flour-heavy blends unless you’re adjusting the liquid.
Let It Cool Completely
I know the smell is driving you crazy. But gluten-free bread continues to cook and set as it cools. If you slice it hot, the inside will be gummy. Patience pays off.
Storage is Key
This bread stays fresh at room temperature for 2-3 days if wrapped tightly. In the fridge, it lasts up to a week. But honestly? It tastes best at room temperature. Take it out of the fridge 30 minutes before serving.
Variations & Substitutions
Once you’ve nailed the basic version, here’s how you can mix it up. I’ve tried all of these.
Dairy-Free Version
Swap the butter for coconut oil or a dairy-free butter alternative. The texture will be slightly different, but it’s still delicious.
Egg-Free Version
You can use flax eggs (1 tablespoon ground flaxseed mixed with 3 tablespoons water per egg) instead of regular eggs. It works, but the bread might be slightly denser.
Chocolate Chip
Skip the blueberries and add 1 cup of dairy-free chocolate chips. It’s like a banana chocolate chip cookie in loaf form.
Peanut Butter Swirl
Add 2 tablespoons of peanut butter to the batter and swirl it in with a knife before baking. It adds a salty, creamy contrast.
Gluten-Free Oats
You can replace ½ cup of the flour with certified gluten-free rolled oats for a heartier texture.
Serving & Storage
How to Serve:
I usually serve this warm, sliced thick. A pat of butter on top melts into the crumb and makes it feel like a treat. It’s great with coffee or tea. I also love it with a dollop of Greek yogurt and a drizzle of honey.
Side Dishes:
This pairs well with a simple green salad if you’re making a brunch spread. It’s also amazing with scrambled eggs or bacon.
Storage Instructions:
Store in an airtight container at room temperature for up to 3 days. In the fridge, up to 1 week. For longer storage, freeze slices in freezer bags for up to 3 months. Thaw at room temperature or microwave for 30 seconds.
Reheating:
Microwave a slice for 20-30 seconds to warm it up. It tastes almost fresh again.
Nutrition Information
I’m not a nutritionist, but here’s the breakdown if you’re tracking. This is per slice (assuming 10 slices).
- Calories: 220
- Protein: 4g
- Carbs: 32g
- Fiber: 2g
- Sugar: 18g
- Fat: 10g
- Saturated Fat: 5g
- Cholesterol: 35mg
- Sodium: 200mg
Look, this is a treat. It’s sweet, it’s buttery, and it’s made with bananas. But it’s also made with real ingredients, and the walnuts add some healthy fats. When I make it, I enjoy a slice with my morning coffee and feel good about it. If you want to make it lighter, reduce the sugar to ½ cup and use less butter, but you’ll lose some of that rich flavor.
Final Thoughts
So that’s my gluten-free blueberry banana bread with walnuts! I’ve probably talked your ear off at this point, but when you make a recipe this often, you have a lot to say about it. This loaf has saved my mornings, my brunches, and my sanity. It’s my answer to “what’s for breakfast?” when I’m tired, and it’s my go-to gift for friends who need something gluten-free.
Make it yours! Try different nuts, add some zest, or swap the berries for raspberries. The best recipes are the ones you adapt to your family’s tastes. If you make this, drop a comment and let me know what you think! I love hearing how recipes turn out in your kitchen. And if something doesn’t work, tell me that too—I’m here to help troubleshoot.
Happy baking! And I hope your kitchen smells half as good as mine does right now.
Frequently Asked Questions
Can I use fresh bananas instead of overripe ones?
You can, but the bread won’t be as sweet or moist. Overripe bananas have more natural sugars and a softer texture, which makes the bread better. If you only have fresh bananas, you can bake them in their skins at 300°F for 30 minutes until the skins turn black, then peel and use them.
Why did my gluten-free bread turn out dense?
This usually happens if you overmix the batter or use a flour blend that’s too heavy. Make sure you’re using a blend with xanthan gum, and don’t overmix when combining the wet and dry ingredients. Also, check your baking soda and powder—they might be expired.
Can I use frozen blueberries?
Yes! Just don’t thaw them before adding. Toss them in a tablespoon of flour first to prevent them from sinking to the bottom. Frozen berries work beautifully in this recipe.
How do I store leftover banana bread?
Store it in an airtight container at room temperature for up to 3 days. In the fridge, it lasts up to a week. For longer storage, freeze slices in freezer bags for up to 3 months.
Can I make this recipe dairy-free?
Yes! Swap the butter for coconut oil or a dairy-free butter alternative. The texture will be slightly different, but it’s still delicious. You can also use plant-based milk if you want to adjust the liquid.
Why did my bread sink in the middle?
This can happen if the bread is underbaked or if the oven temperature is too high. Make sure to test with a toothpick, and if it comes out clean, it’s done. Also, avoid opening the oven door too early in the baking process.
Can I add other mix-ins?
Absolutely! Try chocolate chips, dried cranberries, or even chopped apples. Just keep the total amount of mix-ins to about 1 ½ cups so the batter doesn’t get too heavy.
Pin This Recipe!
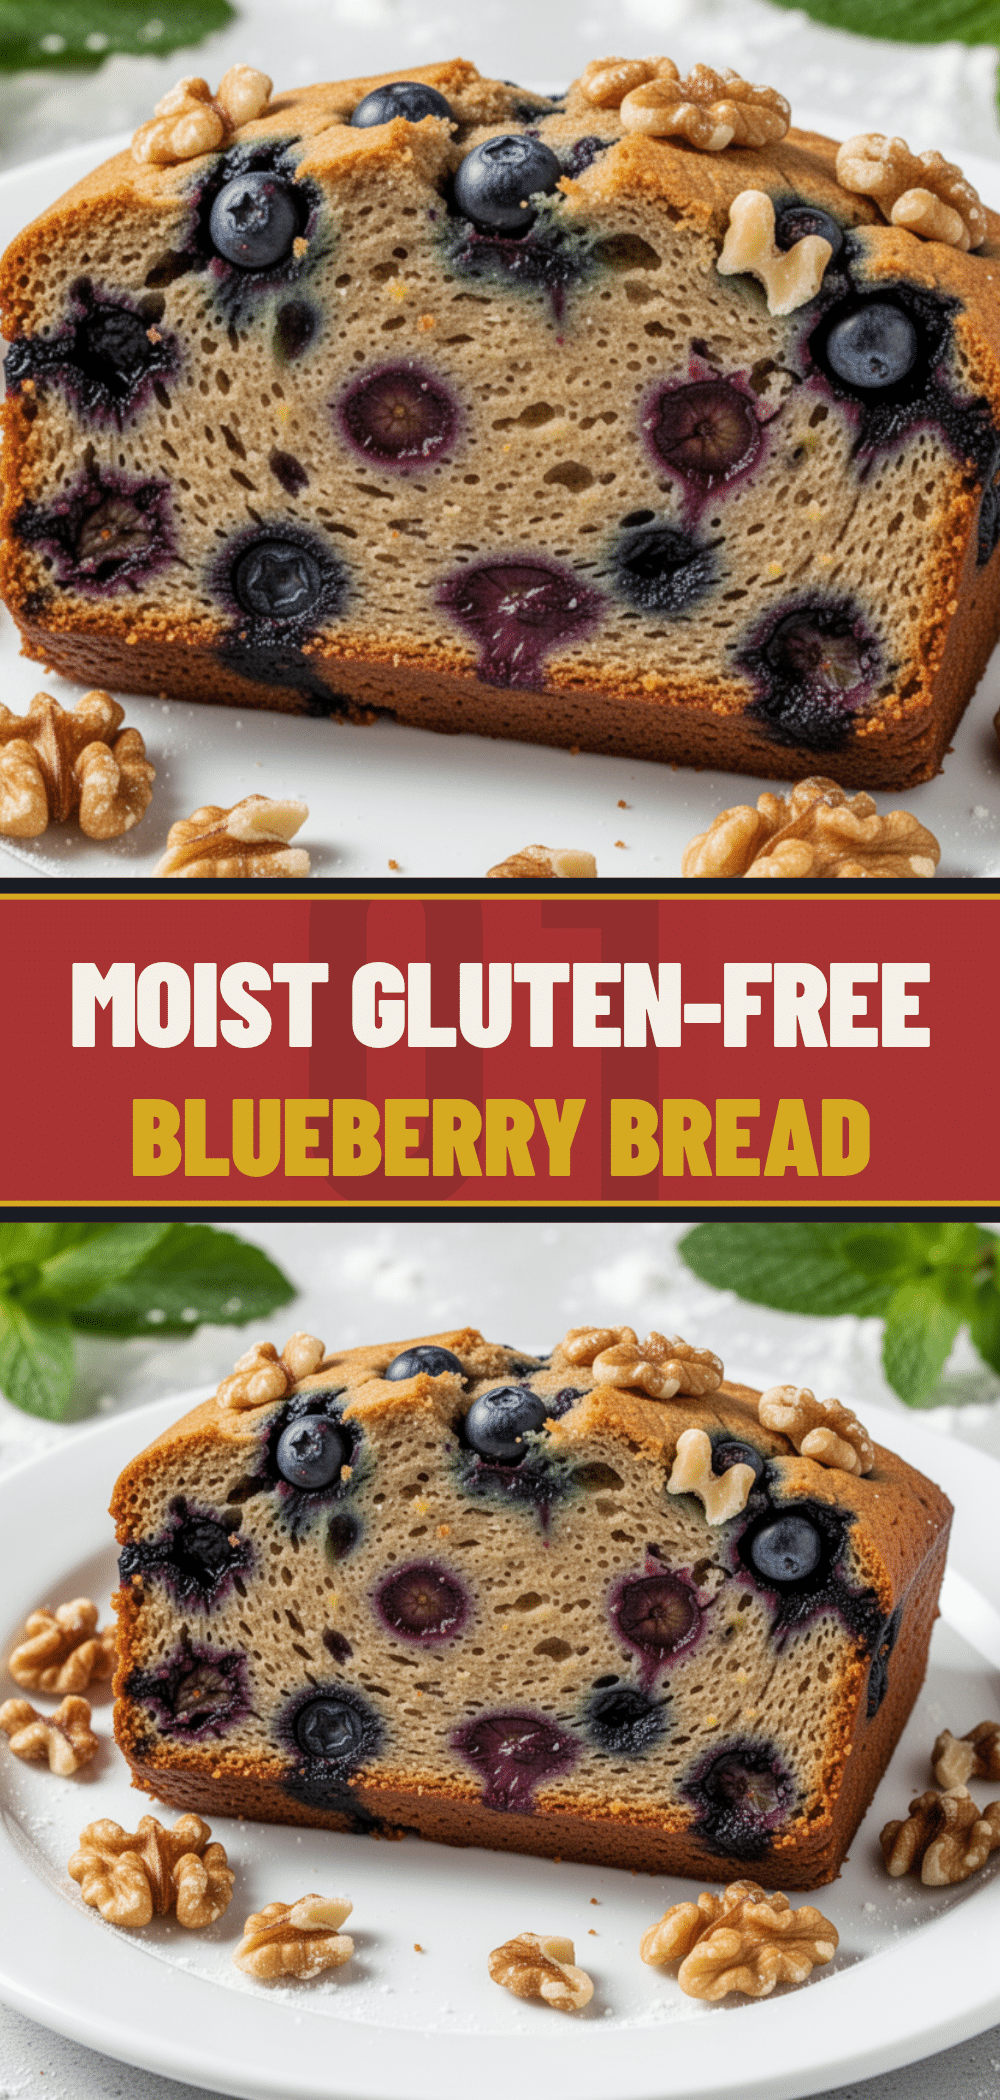
Gluten-Free Blueberry Banana Bread with Walnuts
- Total Time: 75 minutes
- Yield: 10 servings 1x
Description
A moist, tender, and easy-to-make gluten-free banana bread packed with blueberries and crunchy walnuts. This foolproof one-bowl recipe uses a standard gluten-free flour blend and overripe bananas for natural sweetness.
Ingredients
- 3 large ripe bananas (about 1 ½ cups mashed / 340g)
- ½ cup unsalted butter, melted and cooled (113g)
- ¾ cup granulated sugar (150g)
- 2 large eggs, room temperature (100g)
- 1 teaspoon vanilla extract (5ml)
- 1 ½ cups gluten-free all-purpose flour blend with xanthan gum (180g)
- 1 teaspoon baking soda (5g)
- ½ teaspoon baking powder (2g)
- ½ teaspoon sea salt (3g)
- 1 ½ cups fresh or frozen blueberries (225g)
- ½ cup walnuts, chopped and toasted (60g)
- 1 teaspoon lemon zest (optional)
Instructions
- Preheat oven to 350°F (175°C). Grease a 9×5 inch loaf pan with butter or non-stick spray and line the bottom with parchment paper.
- In a large bowl, mash the ripe bananas with a fork until mostly smooth with a few small chunks.
- Add the melted butter, sugar, eggs, and vanilla extract to the bananas. Whisk until the mixture is smooth and glossy.
- In a separate medium bowl, whisk together the gluten-free flour blend, baking soda, baking powder, and salt.
- Pour the dry ingredients into the wet ingredients. Gently fold together with a spatula until just combined; do not overmix.
- Gently fold in the blueberries and chopped walnuts. If using frozen blueberries, toss them in a tablespoon of flour first to prevent sinking.
- Pour batter into the prepared loaf pan and smooth the top.
- Bake for 55-65 minutes, or until a toothpick inserted into the center comes out clean or with moist crumbs.
- Let the bread cool in the pan for 10 minutes, then transfer to a wire rack to cool completely before slicing.
Notes
Ensure bananas are very ripe (black spots) for maximum sweetness and moisture. Toast walnuts in a dry pan for 3-4 minutes before chopping to enhance flavor. Do not overmix the batter to avoid a dense texture. Let the bread cool completely to prevent gumminess. Can be stored at room temperature for 2-3 days, in the fridge for up to a week, or frozen for up to 3 months.
- Prep Time: 15 minutes
- Cook Time: 60 minutes
- Category: Breakfast
- Cuisine: American
Nutrition
- Serving Size: 1 slice
- Calories: 220
- Sugar: 18
- Sodium: 200
- Fat: 10
- Saturated Fat: 5
- Carbohydrates: 32
- Fiber: 2
- Protein: 4
Keywords: gluten-free, banana bread, blueberry, walnuts, quick bread, dairy-free option, easy baking, brunch


