It was 4:30 PM on a Tuesday, and I was staring at my empty fridge with the same expression I usually reserve for unexpected work emails. My husband had just mentioned, casually, that a few coworkers were coming over for dessert after our weekly game night. Just something simple, he said. Maybe some fruit or those cookies from the store?
Simple. Right.
Because we both knew that “simple” in our house usually meant “we order pizza and hope no one asks for sweets.” But this time, I wanted to actually impress them. I had about an hour. I had a mixer. And I had a half-open jar of Nutella that I’d been eyeing for three days.
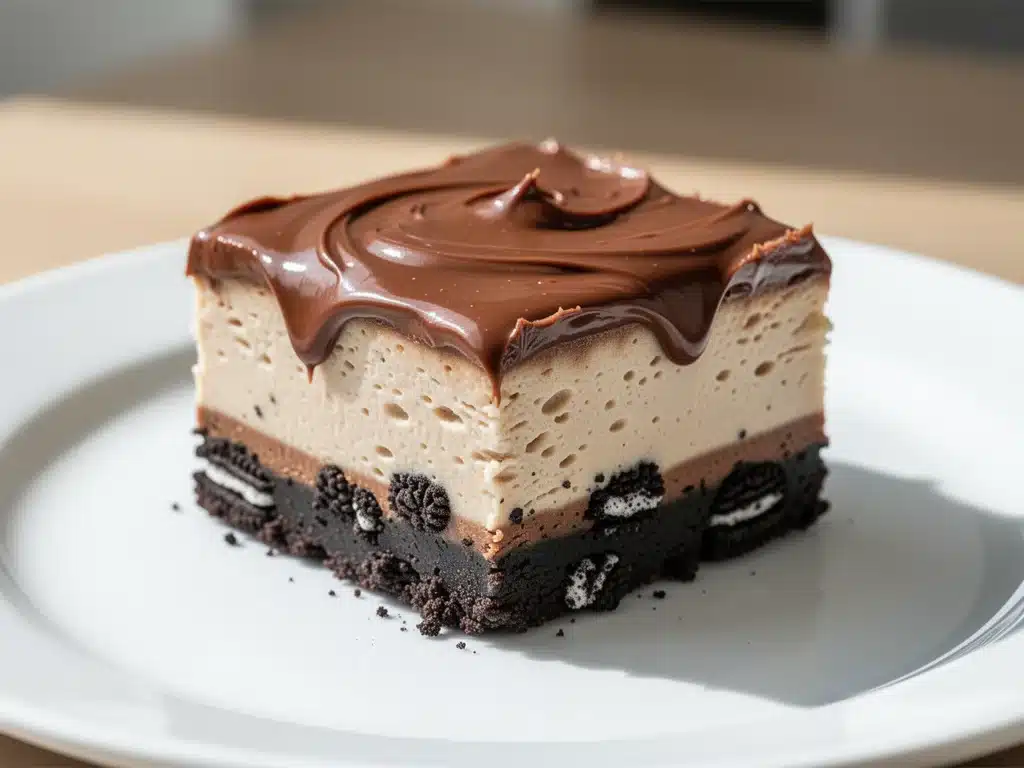
That’s when I remembered this recipe. No-bake Nutella cheesecake bars with an Oreo crust. It’s the kind of dessert that feels like cheating because it’s so easy, but tastes like you spent all day in the kitchen. I threw it together in about 20 minutes of active time, stuck it in the fridge, and walked into the game night with a plate of glossy, chocolatey squares that made my coworkers stop mid-conversation.
One of them, Mark, actually asked if I hired a caterer. I laughed and said, “No, just a jar of hazelnut spread and some Oreos.” He looked at me like I’d just invented fire. And honestly? I wasn’t even embarrassed. I’ve made these bars at least a dozen times since that Tuesday—sometimes for parties, sometimes just because I needed a sugar fix at 10 PM—but they always get the same reaction. People assume it’s complicated. They assume it’s store-bought. And then they take one bite and disappear.
If you’re looking for a dessert that’s foolproof, visually stunning, and requires zero oven time, this is it. It’s rich, it’s creamy, and it’s got that perfect crunch from the cookie crust. Let’s get into why this has become my go-to “I need to impress without stressing” recipe.
Why You’ll Love This Recipe
There are a lot of no-bake cheesecake recipes out there, but this one? It’s different. It’s got depth. It’s got texture. And it’s got that Nutella magic that turns a simple cream cheese filling into something decadent. Here’s why I keep coming back to these bars:
- Zero Oven Required — Seriously. If you can mix ingredients in a bowl, you can make this. No preheating, no water baths, no worrying about cracks in the top. Just mix, press, chill, and slice.
- Make-Ahead Magic — This is the ultimate stress-reliever. I can make these on Sunday, keep them in the fridge for up to 5 days, and pull them out whenever I need them. They actually taste better after sitting for a day or two, as the flavors meld together.
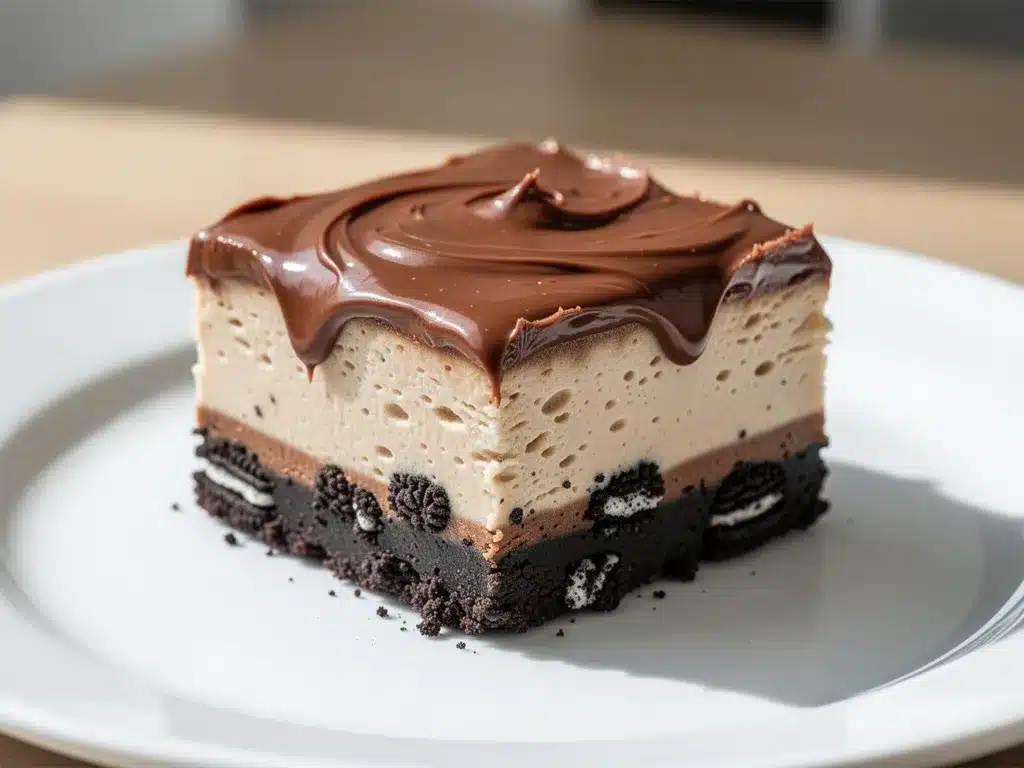
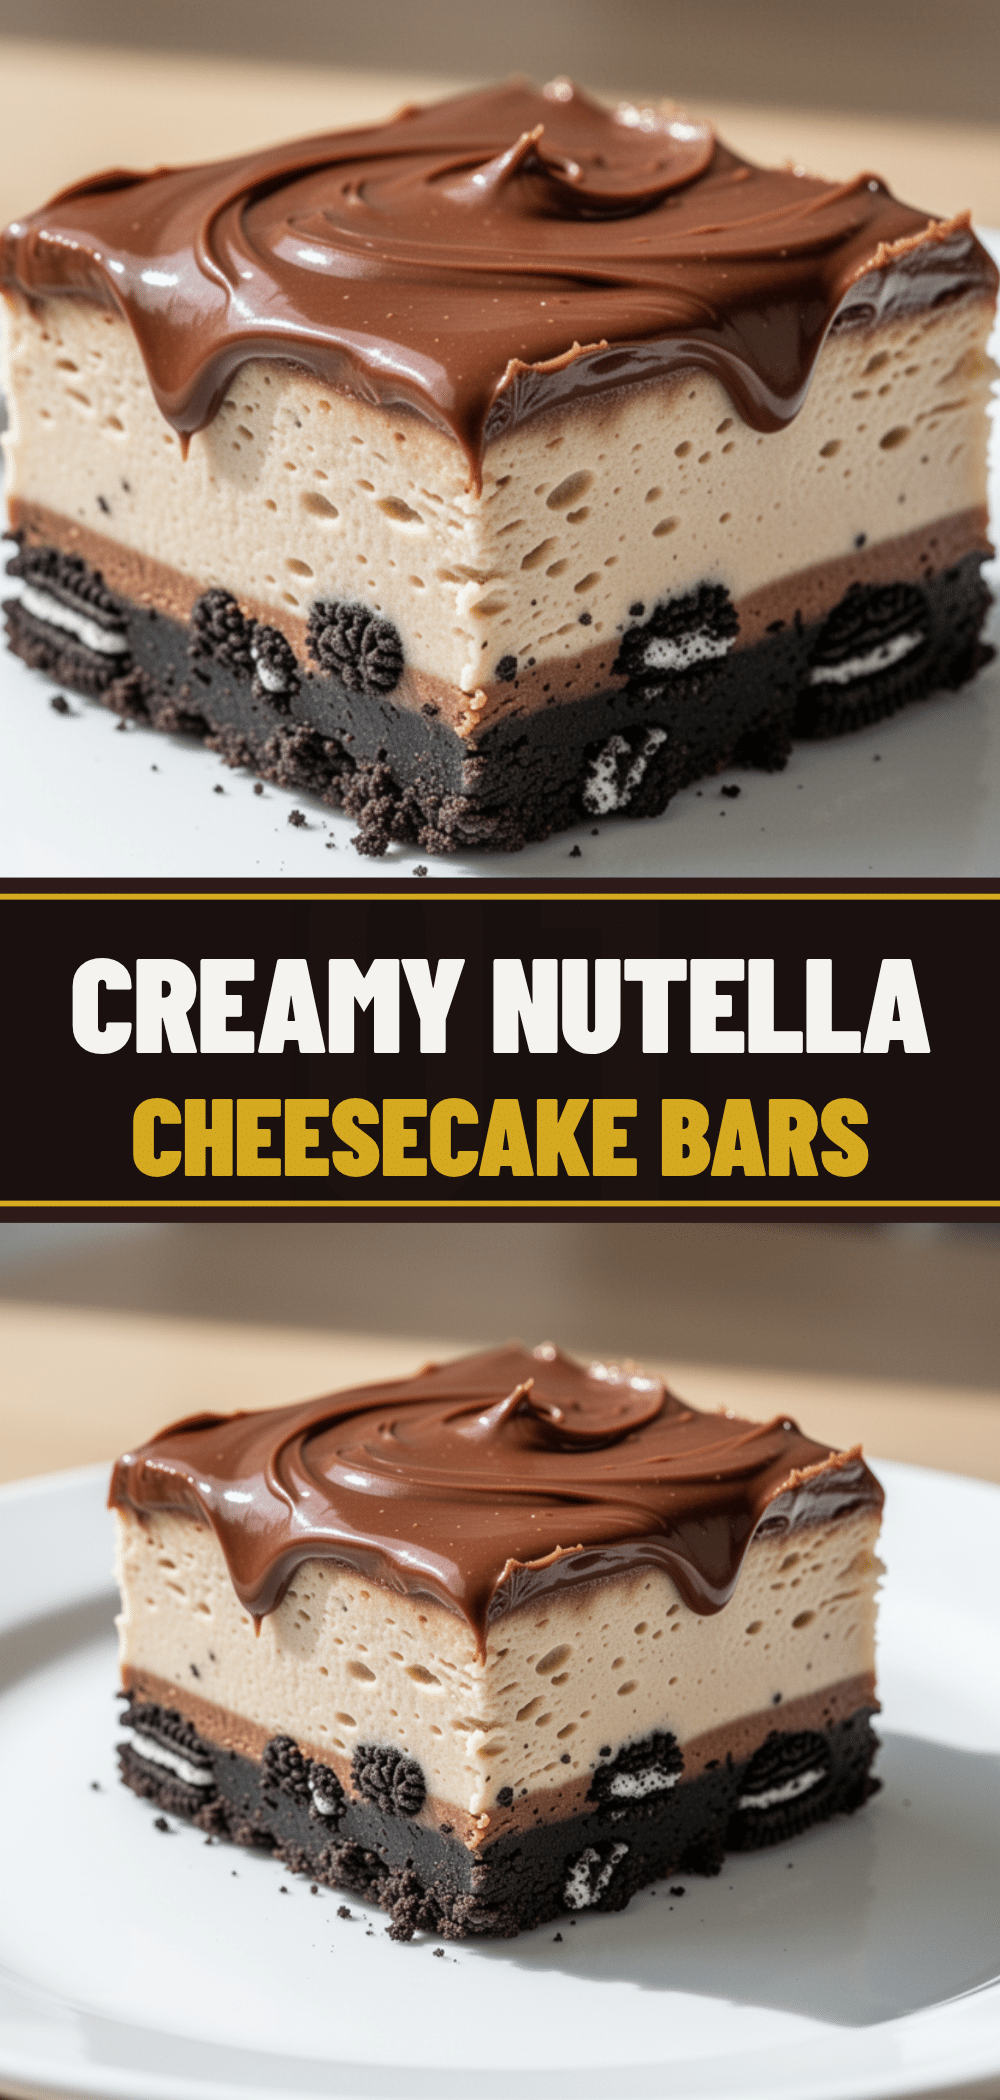
- Restaurant-Quality Look — Those glossy layers? The sharp contrast between the dark Oreo crust, the white cream cheese, and the Nutella drizzle? It looks like something you’d buy at a fancy patisserie. But it costs less than $10 to make.
- Crunch Meets Cream — The texture is everything here. You’ve got the buttery, chocolatey crunch of the crust, the smooth, airy cheesecake layer, and the rich, nutty hazelnut swirl. It’s not just one-note sweetness; it’s complex.
- Customizable for Any Occasion — Need it for a birthday? Add sprinkles. Valentine’s Day? Drizzle with white chocolate. Just because? Eat the whole pan (don’t tell my husband). These bars are a blank canvas for your cravings.
I’ve served these to picky eaters, chocolate snobs, and kids who usually only eat chicken nuggets. Everyone loves them. It’s my secret weapon for any gathering where I want to look like a genius without lifting a finger.
Ingredients You’ll Need
Here’s the best part: you probably have most of this already. This recipe uses pantry staples and a few key ingredients that make a huge difference. I’m particular about the quality of the Nutella and the cream cheese, so pay attention to those.
For the Oreo Crust
Oreo Cookies (24 cookies, about 240g) — Yes, the whole package. I use the regular Oreos, not the reduced-sugar ones. The sugar and fat content matter for the texture. You can also use chocolate sandwich cookies if you want a deeper chocolate flavor.
Unsalted Butter (6 tablespoons / 85g) — Melted. Don’t use salted butter because you want to control the saltiness. If you use salted, reduce any added salt in the recipe.
For the Nutella Cheesecake Filling
Cream Cheese (16 oz / 450g, block style) — This is non-negotiable. Use full-fat block cream cheese, not the tub stuff. The tub stuff has too much moisture and air, and your cheesecake will be watery. Let it sit on the counter for 30 minutes before mixing so it’s soft and easy to whip.
Powdered Sugar (1 cup / 120g) — Sifted. I know it’s annoying, but it prevents lumps in your smooth filling. If you skip this, you’ll get little white chunks in your creamy dessert.
Vanilla Extract (1 teaspoon) — Pure vanilla, not imitation. It adds warmth and balances the sweetness of the Nutella.
Heavy Cream (1 cup / 240ml) — Cold. This is what gives the filling its airy, mousse-like texture. You’ll whip it to stiff peaks.
Nutella (1 cup / 250g) — The star of the show. Use a good quality hazelnut spread. I always keep a jar in the pantry for nights like this. If you can’t find Nutella, a similar brand like Ferrero Rocher hazelnut spread works, but Nutella has the perfect consistency.
For the Topping (Optional but Recommended)
Extra Nutella (2-3 tablespoons) — For drizzling. Warm it up slightly in the microwave for 10 seconds so it pours easily.
Crushed Oreos (2 tablespoons) — For garnish. Adds a nice crunch on top.
Mini Chocolate Chips (1/4 cup) — Optional, but they look cute and add extra chocolatey bits.
Pro Tip: If you’re short on time, you can skip the whipped cream layer and just mix the Nutella directly into the cream cheese. But I highly recommend whipping the cream—it makes the texture light and dreamy instead of dense and heavy.
Equipment Needed
You don’t need fancy gadgets for this. Here’s what I actually use:
9×9 Inch Baking Pan — Or an 8×8 pan if you want thicker bars. Line it with parchment paper, leaving an overhang on the sides. This is crucial for lifting the bars out later. If you don’t have parchment, grease it well with butter.
Food Processor — For crushing the Oreos. It’s fast and gives you even crumbs. If you don’t have one, put the cookies in a zip-top bag and crush them with a rolling pin. It takes longer but works fine.
Electric Mixer — Hand mixer or stand mixer. You need to whip the cream cheese and heavy cream to get that airy texture. Doing this by hand is possible but will take some serious arm strength.
Spatula — A flexible silicone spatula is best for folding the whipped cream into the cream cheese mixture. You want to keep the air in.
Measuring Cups and Spoons — Standard stuff. Accuracy matters a little here because of the balance between sweet and creamy.
How to Make It: Step-by-Step
Alright, let’s make this! It’s straightforward, but there are a few tricks to get it perfect.
Step 1: Prep Your Pan (2 minutes)
Line your 9×9 inch pan with parchment paper. Leave a nice overhang on the sides so you can lift the bars out later. This saves you from having to dig them out with a spoon, which can ruin the layers.
Step 2: Make the Oreo Crust (5 minutes)
Crush the Oreos into fine crumbs. If you’re using a food processor, pulse until you have a texture like wet sand. If you’re using a rolling pin, keep going until there are no big chunks left. Transfer the crumbs to a bowl and mix in the melted butter. It should look like damp sand. Press this mixture firmly into the bottom of your prepared pan. Use the bottom of a measuring cup to pack it down tight. You don’t want a crumbly crust; you want a solid base.
Step 3: Whip the Heavy Cream (3 minutes)
In a large bowl, whip the cold heavy cream to stiff peaks. This means when you lift the beaters, the cream stands up straight. Be careful not to over-whip it into butter, but don’t under-whip it either. It needs to hold its shape.
Step 4: Make the Cream Cheese Base (5 minutes)
In another large bowl, beat the softened cream cheese, powdered sugar, and vanilla extract until smooth and creamy. Scrape down the sides of the bowl to make sure everything is incorporated. This should be smooth and lump-free.
Step 5: Combine and Fold (3 minutes)
Gently fold the whipped cream into the cream cheese mixture. Use your spatula and fold from the bottom up. You want to keep as much air in the mixture as possible. It’s done when there are no more white streaks of cream cheese and the mixture is uniform and fluffy.
Step 6: Add the Nutella Swirl (5 minutes)
Take half of the cream cheese mixture and spread it evenly over the crust. In a small bowl, mix the 1 cup of Nutella with about 2 tablespoons of the remaining cream cheese mixture to loosen it up. Then, dollop this Nutella mixture over the first layer of cheesecake. Use a knife to swirl it around for a marbled effect. Don’t over-mix; you want distinct swirls, not brown mush.
Spread the remaining cream cheese mixture on top. Smooth it out with your spatula.
Step 7: Chill (At least 4 hours, ideally overnight)
Cover the pan with plastic wrap and refrigerate. This is the hardest part—waiting. But it’s necessary for the bars to set. If you cut them too soon, they’ll be messy. I usually make these the night before, so they’re ready when I wake up.
Step 8: Garnish and Slice
Once set, lift the bars out of the pan using the parchment paper. Drizzle with warm Nutella and sprinkle with crushed Oreos or chocolate chips. Slice with a sharp knife. Wipe the knife clean between cuts for clean edges.
Expert Tips & Tricks
Here’s everything I’ve learned from making these dozens of times. These tips will save you from my mistakes.
Soften Your Cream Cheese Properly
If your cream cheese is too cold, you’ll get lumps. If it’s too warm, it’ll be runny. Let it sit on the counter for 30-60 minutes. It should yield to gentle pressure but not be melting. I’ve learned this the hard way with a lumpy batch that took forever to smooth out.
Don’t Skip the Sifting
Powdered sugar has cornstarch in it, which clumps. Sifting it into the cream cheese prevents those annoying white bits in your final product. It takes 30 seconds and makes a huge difference in texture.
Keep Your Cream Cold
The heavy cream needs to be ice-cold to whip properly. If your kitchen is hot, chill your mixing bowl in the fridge for 10 minutes before whipping. This ensures stiff peaks.
Swirl, Don’t Stir
When adding the Nutella, use a knife to create swirls. If you stir it in, you’ll just get a brown cheesecake. The visual appeal is part of the magic here.
Chill Long Enough
4 hours is the minimum, but overnight is best. The longer it chills, the firmer it gets and the better the flavors meld. I’ve cut them after 3 hours, and they were okay, but after 8 hours? Perfection.
Clean Knife Cuts
Use a sharp knife and wipe it with a damp paper towel between each cut. This keeps the edges clean and prevents the layers from sticking together.
Variations & Substitutions
Once you’ve nailed the basic version, here’s how you can mix it up. I’ve tried all of these.
Strawberry Nutella Bars
Add a layer of strawberry jam or fresh sliced strawberries between the crust and the cheesecake. The tartness cuts through the sweetness beautifully. I do this in the summer.
Peanut Butter Swirl
Swap the Nutella for peanut butter. Mix 1 cup of peanut butter with 2 tablespoons of honey and swirl it in. It’s a classic combo for a reason.
White Chocolate Nutella
Drizzle with white chocolate instead of Nutella for a sweeter, milder finish. Great for kids’ parties.
Gluten-Free Version
Use gluten-free Oreos or any gluten-free chocolate sandwich cookies. The rest of the recipe is naturally gluten-free, so it’s easy to adapt.
Dairy-Free Option
Use dairy-free cream cheese (like Miyoko’s), coconut cream instead of heavy cream, and dairy-free Nutella (if you can find it, or use a homemade hazelnut butter). It’s not exactly the same, but it works.
Serving & Storage
How to serve these babies:
I usually serve them chilled, straight from the fridge. They’re best with a cold glass of milk or a cup of coffee. The richness pairs well with something warm and bitter.
Storage:
Keep these in the fridge in an airtight container for up to 5 days. They actually taste better after day 2, as the flavors have time to meld. If you need to freeze them, wrap individual bars in plastic wrap and foil. They’ll last for 2 months. Thaw in the fridge overnight. I don’t recommend freezing the whole pan, as the texture might change slightly.
Pro Tip: If your bars seem a bit soft when you cut them, pop them in the freezer for 15 minutes before slicing. They’ll firm up and give you clean cuts.
Nutrition Information
I’m not a nutritionist, but here’s the breakdown if you’re tracking. This is a rich dessert, so portion control is key.
Per Serving (based on 16 bars):
- Calories: 280
- Protein: 4g
- Carbs: 28g
- Fat: 18g
- Sugar: 22g
- Sodium: 120mg
Look, this is a dessert with cream cheese, butter, sugar, and Nutella. It’s not a health food. But it’s way better than store-bought cakes, and you know exactly what’s in it. Enjoy it in moderation and savor every bite.
Final Thoughts
So that’s my go-to no-bake Nutella cheesecake bars! I’ve probably talked your ear off at this point, but when you make a recipe this often, you have a lot to say about it.
This has saved me more times than I can count. It’s my answer to “what’s for dessert” when I’m tired, don’t want to bake, and still want something that tastes amazing. My husband loves them, my kids beg for them, and my friends are always asking for the recipe.
Make it yours! Try different toppings, swap in your favorite cookies, or adjust the sweetness to your liking. The best recipes are the ones you adapt to your tastes.
If you make this, drop a comment and let me know what you think! I love hearing how recipes turn out in your kitchen. And if something doesn’t work, tell me that too—I’m here to help troubleshoot.
Happy baking! (Or rather, happy no-baking!)
Frequently Asked Questions
Can I use a different cookie for the crust?
Absolutely. You can use chocolate sandwich cookies, vanilla wafers, or even graham crackers. Just adjust the sugar in the filling if the cookie is sweeter. I’ve used chocolate chip cookie dough bits before, and it was delicious.
Why did my cheesecake turn out runny?
Usually, this means the cream cheese wasn’t soft enough, or you didn’t whip the heavy cream to stiff peaks. Make sure your cream is cold and whip it until it holds its shape. Also, don’t skip the chilling time. It needs at least 4 hours to set.
Can I make this ahead of time?
Yes! This is one of its best features. Make it up to 2 days ahead. In fact, it tastes better after sitting for a day. Just keep it covered in the fridge.
Can I freeze these bars?
Yes, but I recommend freezing individual bars rather than the whole pan. Wrap them tightly in plastic wrap and foil. They’ll last for 2 months. Thaw in the fridge overnight. The texture might be slightly softer after thawing, but they’re still good.
Do I have to drizzle Nutella on top?
No, it’s optional. But it adds a nice visual appeal and extra flavor. If you’re short on Nutella, you can skip it or use chocolate syrup. It’s still delicious without the drizzle.
Can I use whipped cream instead of heavy cream?
You can use pre-whipped cream, but it might be less stable. Freshly whipped heavy cream gives the best texture. If you use pre-whipped, fold it in gently and chill longer to ensure it sets.
What size pan should I use?
A 9×9 inch pan is ideal. If you use an 8×8 pan, the bars will be thicker and you’ll have fewer of them. If you use a 10×10 pan, they’ll be thinner. Adjust the chilling time accordingly.
Pin This Recipe!
No-Bake Nutella Cheesecake Bars: Easy Oreo Dessert
- Total Time: 4 hours 20 minutes
- Yield: 16 servings 1x
Description
A rich, creamy no-bake cheesecake bar featuring a crunchy Oreo cookie crust, a light Nutella-swirled cream cheese filling, and a glossy chocolate drizzle. This foolproof dessert requires zero oven time and can be made ahead for parties or weeknight treats.
Ingredients
- 24 Oreo cookies (about 240g)
- 6 tablespoons unsalted butter (85g), melted
- 16 oz (450g) full-fat block cream cheese, softened
- 1 cup (120g) powdered sugar, sifted
- 1 teaspoon pure vanilla extract
- 1 cup (240ml) heavy cream, cold
- 1 cup (250g) Nutella
- 2–3 tablespoons Nutella (for drizzling)
- 2 tablespoons crushed Oreos (for garnish)
- 1/4 cup mini chocolate chips (optional)
Instructions
- Line a 9×9 inch baking pan with parchment paper, leaving an overhang on the sides for easy removal.
- Crush the Oreo cookies into fine crumbs using a food processor or rolling pin. Mix the crumbs with the melted butter until the texture resembles wet sand.
- Press the cookie mixture firmly into the bottom of the prepared pan to create a solid crust. Use the bottom of a measuring cup to pack it down tightly.
- In a large bowl, whip the cold heavy cream to stiff peaks. Be careful not to over-whip it into butter.
- In a separate large bowl, beat the softened cream cheese, sifted powdered sugar, and vanilla extract until smooth and creamy.
- Gently fold the whipped cream into the cream cheese mixture using a spatula, folding from the bottom up to maintain airiness. Continue until no white streaks remain.
- Spread half of the cream cheese mixture evenly over the crust.
- In a small bowl, mix 1 cup of Nutella with 2 tablespoons of the remaining cream cheese mixture to loosen it. Dollop this mixture over the first layer of cheesecake.
- Use a knife to swirl the Nutella into the cream cheese for a marbled effect. Do not over-mix.
- Spread the remaining cream cheese mixture on top and smooth it out.
- Cover the pan with plastic wrap and refrigerate for at least 4 hours, ideally overnight, until set.
- Lift the bars out of the pan using the parchment paper overhang.
- Drizzle with warm Nutella and sprinkle with crushed Oreos or chocolate chips.
- Slice with a sharp knife, wiping the blade clean between cuts for clean edges.
Notes
Ensure cream cheese is softened but not melted to avoid lumps. Sift powdered sugar to prevent chunks. Keep heavy cream ice-cold for proper whipping. Chill for at least 4 hours, but overnight yields the best texture and flavor melding. For clean cuts, use a sharp knife and wipe it between slices. Can be stored in the fridge for up to 5 days or frozen individually for 2 months.
- Prep Time: 20 minutes
- Cook Time: 0 minutes
- Category: Dessert
- Cuisine: American
Nutrition
- Serving Size: 1 bar
- Calories: 280
- Sugar: 22
- Sodium: 120
- Fat: 18
- Saturated Fat: 10
- Carbohydrates: 28
- Fiber: 1
- Protein: 4
Keywords: no-bake, Nutella, cheesecake bars, Oreo crust, easy dessert, make-ahead, chocolate dessert, hazelnut spread


