I have a confession to make. For years, I was a “good enough” pancake person. You know the type. I’d throw together some flour, milk, an egg, and a scoop of baking powder, flip them on the griddle, and call it a morning. They were fine. Edible. But they were dense, flat, and tasted like breakfast food you ate because you had to, not because you wanted to.
That changed last Sunday morning when I was hosting a brunch for my sister’s family. My niece, who is seven and has the palate of a food critic, looked at the stack of pancakes I put in front of her and said, “These taste like the ones at that fancy hotel downtown. Can you teach me how to make them?”
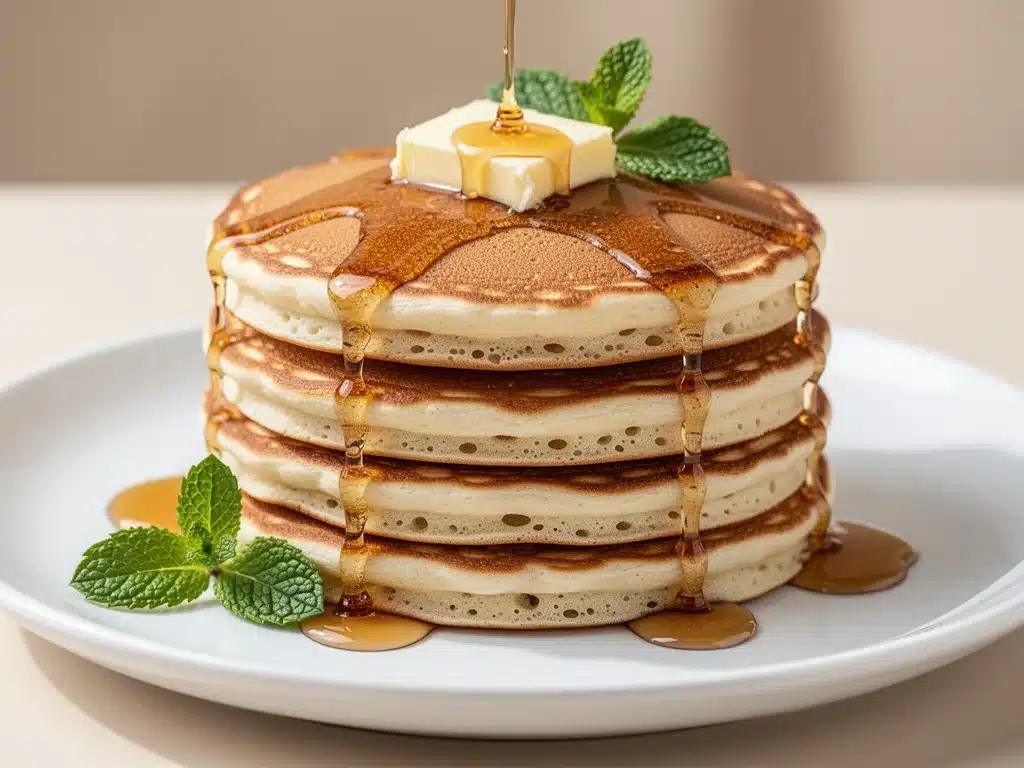
I was stunned. I hadn’t bought the hotel syrup or the fancy mix. I had used the same basic ingredients I always used. The difference? I finally stopped overmixing the batter and actually respected the chemistry of buttermilk. That one realization turned my sad, flat discs into what I can only describe as edible clouds. These are the Fluffy Buttermilk Pancakes with Maple Syrup better than takeout. They are lighter than air, crisp at the edges, and so good that my husband now asks for them on weeknights (which is a nightmare because they take 20 minutes, but worth it).
I’ve tested this recipe at least a dozen times since that Sunday. I’ve adjusted the flour ratios, played with the acidity levels, and even tried different brands of buttermilk. This is the final, perfected version. It’s simple, it uses ingredients you likely have, and it delivers that legendary diner-quality fluffiness without the wait. If you’ve ever felt like your pancakes are too heavy or too cakey, this recipe is your answer.
Why You’ll Love This Recipe
There are about ten reasons I keep making these, but here are the big ones that keep them in my regular rotation.
Stupid Simple Ingredients — Seriously, if you can boil water and crack an egg, you can make this. I’m talking five main ingredients. Flour, sugar, baking powder, salt, buttermilk, egg, butter, and vanilla. No weird flours, no fancy powders you have to order online. Just pantry staples that work together.
Lightning Fast — 15 minutes from start to finish. I know, I said 20 earlier, but that includes eating time. The actual cooking is fast. I make these on Sunday mornings when I have an hour to spare, but I’ve also whipped them up on busy weekdays when I need to beat the clock to get the kids to school.
Texture Perfection — This is the game-changer. Most pancake recipes give you something that’s chewy or dense. These are tender and fluffy. The buttermilk reacts with the baking powder to create little air pockets that expand in the pan, giving you that signature height and soft interior.
Make-Ahead Friendly — I know, I know, pancakes are best fresh. But if you’re cooking for a crowd, you can make the batter ahead and store it in the fridge for up to 24 hours. It actually thickens slightly, which makes it easier to pour. Just give it a gentle stir before cooking.
Crowd-Pleaser — I’ve served these to my gluten-sensitive friends (using a 1:1 GF flour blend) and my sugar-conscious dad (who just doesn’t like syrup). Everyone loves them. The flavor is neutral enough to let your toppings shine but rich enough to stand on its own.
This is my go-to when I need breakfast to just work. No complicated techniques, no weird ingredients, just reliable, delicious food that makes everyone happy. And honestly? It saves me money compared to taking the family out for diner breakfast.
Ingredients You’ll Need
Here’s the best part: you probably have most of this already. I’m particular about two ingredients here—the buttermilk and the butter—and I’ll tell you exactly why.
For the Batter
All-Purpose Flour (1 ½ cups / 190g) — This is your base. Don’t use self-rising flour unless you want to mess with the baking powder ratio. All-purpose gives the best structure. If you’re using whole wheat, substitute up to half the flour, but note it will be denser.
Sugar (2 tablespoons / 25g) — Just a little bit. It helps with browning and adds a hint of sweetness so the pancakes aren’t bland. You don’t need much because you’re adding syrup later.
Baking Powder (2 teaspoons) — This is the leavening agent. Make sure yours isn’t old! If it’s been in your cabinet for over six months, throw it out and get new. Old baking powder = flat pancakes. I keep a fresh can in my baking drawer.
Salt (½ teaspoon) — Essential. It balances the sweetness and enhances the flavor of the butter. Don’t skip it.
Buttermilk (1 ¼ cups / 300ml) — This is the secret weapon. The acidity in buttermilk tenderizes the gluten in the flour, which is why these pancakes are so soft. If you don’t have buttermilk, you can make a “quick buttermilk” by adding 1 tablespoon of white vinegar or lemon juice to 1 ¼ cups of milk and letting it sit for 10 minutes. It works, but real buttermilk is better.
Egg (1 large) — This binds the batter and adds richness. Room temperature eggs mix in better, but cold ones work fine if you’re in a hurry.
Unsalted Butter (3 tablespoons / 45g), melted — This adds flavor and helps with browning. Let it cool slightly before adding so you don’t cook the egg. I use unsalted so I can control the salt level.
Vanilla Extract (1 teaspoon) — Pure vanilla, please. I’m not a fan of imitation vanilla in breakfast foods. It adds that cozy, comforting aroma.
For Cooking
Butter or Oil — For greasing the pan. I prefer butter for flavor, but oil works if you’re watching dairy. I use a paper towel to dab a tiny amount of butter on the pan between batches.
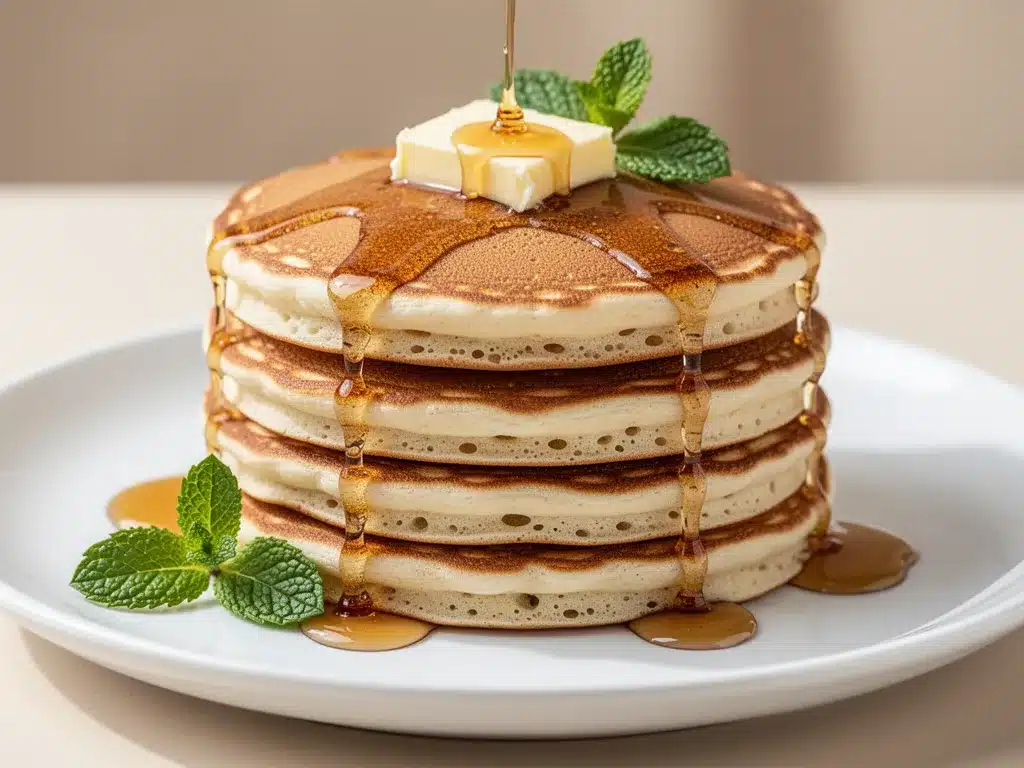
Maple Syrup — Real maple syrup (Grade A or B), not “pancake syrup” which is mostly corn syrup. The flavor difference is night and day. I keep a bottle of real maple syrup in the fridge so it’s always ready.
Optional Toppings — Fresh blueberries, sliced bananas, whipped cream, or a dusting of powdered sugar. I usually keep it simple with just syrup, but sometimes I go wild.
Equipment Needed
You don’t need fancy equipment for this. Here’s what I actually use.
Large Mixing Bowl — I use a 4-quart bowl. It needs to be big enough to hold all the ingredients without spilling when you stir. A glass bowl is nice because you can see the consistency.
Whisk — A standard wire whisk works perfectly. I use it to combine the dry ingredients and then the wet ingredients separately before mixing them together.
Non-Stick Skillet or Griddle — This is crucial. I use a 12-inch non-stick skillet. It heats evenly and prevents sticking. If you have a flat electric griddle, even better. I prefer stainless steel for other things, but for pancakes, non-stick is king.
Spatula — A thin, flexible spatula is best for flipping. I use a silicone one because it doesn’t scratch my pan. A metal spatula works too, but be gentle.
Measuring Cups and Spoons — Pretty standard stuff. Dollar store versions work fine. Just make sure your measuring cup for flour is level, not packed.
Serving Plate — I keep a large platter in the oven at 200°F (95°C) to keep the pancakes warm while I cook the rest. This is a pro move that keeps breakfast hot.
Optional but nice:
– Batter Dispenser — Like a soap dispenser. It makes pouring consistent pancakes super easy. I use a regular spoon if I’m being lazy.
– Kitchen Thermometer — If you’re obsessed with perfect heat, aim for 350°F (175°C) on your griddle. But honestly, eyeballing it works fine.
How to Make It: Step-by-Step
Alright, let’s make this! I’m walking you through exactly how I do it, including the little tricks I’ve picked up.
Step 1: Whisk the Dry Ingredients (2 minutes)
In your large mixing bowl, whisk together the flour, sugar, baking powder, and salt. I do this first because it ensures the leavening agent is evenly distributed. If you don’t whisk the baking powder in well, you’ll get pockets of bitter powder in your finished pancakes. Whisk for about 30 seconds until there are no lumps.
Step 2: Mix the Wet Ingredients (1 minute)
In a separate bowl or large measuring cup, whisk the buttermilk, egg, melted butter, and vanilla extract. The butter should be warm but not hot. If it’s too hot, it will scramble the egg. Whisk until everything is smooth and combined. The mixture might look a little curdled—that’s normal.
Step 3: Combine Wet and Dry (1 minute)
Make a well in the center of the dry ingredients and pour the wet mixture into it. Using your whisk or a spatula, gently fold the ingredients together. STOP WHEN THERE ARE STILL A FEW LUMPS. This is the most important step. Overmixing develops gluten, which makes pancakes tough and chewy. Lumpy batter = fluffy pancakes. I’ve ruined batches by trying to make the batter smooth. Don’t be me.
Step 4: Heat the Pan (2 minutes)
Place your non-stick skillet or griddle over medium heat. Let it heat up for 2-3 minutes. To test if it’s ready, flick a few drops of water onto the surface. If they sizzle and evaporate immediately, it’s ready. If they dance around like little puddles, it’s perfect. If they just sit there, it’s not hot enough yet. Lightly grease the pan with butter or oil.
Step 5: Cook the Pancakes (3-4 minutes per batch)
Pour about ¼ cup of batter onto the pan for each pancake. Don’t crowd the pan—cook 2 or 3 at a time depending on your skillet size. Cook until you see bubbles forming on the surface and the edges look set and dry. This usually takes 2-3 minutes. Do not flip yet! Wait for those bubbles to pop and leave little holes.
Step 6: Flip and Finish (1-2 minutes)
Flip the pancake carefully with your spatula. Cook the other side for about 1-2 minutes until golden brown. The second side cooks faster. If your pancakes are browning too quickly, your heat is too high. Lower it to medium-low. If they’re pale and take forever, turn the heat up slightly.
Step 7: Serve and Repeat
Transfer cooked pancakes to your warm serving plate. Repeat with the remaining batter. Keep the heat consistent. If your pan gets too hot, turn it off for a minute before pouring the next batch. Serve immediately with warm maple syrup.
Total Time: About 20 minutes (5 minutes prep, 15 minutes cooking)
Troubleshooting:
– Pancakes are burning outside but raw inside? Your heat is too high. Lower it.
– Pancakes are flat? Your baking powder is old, or you overmixed the batter.
– Pancakes are sticking? Your pan isn’t hot enough, or you didn’t grease it enough.
Expert Tips & Tricks
Here’s everything I’ve learned from making this dozens of times. These tips will save you from my mistakes.
Don’t Overmix the Batter
This cannot be stressed enough. Lumpy batter is good. Smooth batter is bad. Mix until the flour is just moistened. It’s okay if you see streaks of flour. They will cook out. If you mix until smooth, your pancakes will be rubbery. I learned this the hard way with a batch that tasted like sponge cake.
Rest the Batter (Optional but Good)
If you have time, let the batter sit for 5-10 minutes after mixing. This allows the flour to hydrate and the baking powder to start working. It makes the pancakes even fluffier. I usually do this on weekends when I’m not rushing.
Use Medium Heat
Most people cook pancakes on high heat because they’re impatient. Don’t. Medium heat gives you time for the inside to cook before the outside burns. If you rush, you’ll get burnt edges and raw centers. Patience pays off.
Keep Pancakes Warm
If you’re feeding a family, the first pancakes will get cold by the time the last ones are done. Keep them in a single layer on a baking sheet in a 200°F (95°C) oven. Don’t stack them while they’re warm, or they’ll get soggy. Stack them only when you’re ready to eat.
Test Your Pan Temperature
The water droplet test is your friend. If the water evaporates instantly, the pan is ready. If it sizzles violently, it’s too hot. Adjust accordingly.
Use Room Temperature Ingredients
Cold ingredients don’t mix as well. Take your eggs and buttermilk out of the fridge 15 minutes before you start. It makes a smoother batter and more even cooking.
Variations & Substitutions
Once you’ve nailed the basic version, here’s how you can mix it up. I’ve tried all of these.
Banana Pancakes
Mash 1 ripe banana and fold it into the batter. Add ½ teaspoon of cinnamon. My kids love these. It adds natural sweetness and moisture.
Blueberry Pancakes
Fold ½ cup of fresh or frozen blueberries into the batter just before cooking. Don’t overmix. If using frozen berries, don’t thaw them first, or they’ll bleed color into the batter.
Chocolate Chip Pancakes
Add ¼ cup of chocolate chips to the batter. I use semi-sweet chips. They melt into little pockets of chocolate goodness. You can also drizzle chocolate syrup on top.
Whole Wheat Pancakes
Substitute half of the all-purpose flour with whole wheat flour. The pancakes will be denser and nuttier. I add an extra tablespoon of buttermilk to compensate for the dryness.
Gluten-Free Pancakes
Use a 1:1 gluten-free flour blend (like Bob’s Red Mill or King Arthur). The texture is slightly different but still fluffy. Make sure your baking powder is gluten-free.
Dairy-Free Pancakes
Use dairy-free milk (almond, oat, soy) and dairy-free butter or oil. The “quick buttermilk” method works with any milk. I use oat milk because it’s creamy and neutral.
Vegan Pancakes
Replace the egg with a “flax egg” (1 tablespoon ground flaxseed mixed with 3 tablespoons water, let sit for 5 minutes). Use dairy-free milk and butter. They’re still delicious, though slightly less rich.
Protein Pancakes
Add 1 scoop of vanilla protein powder. You’ll need to add extra liquid (maybe ¼ cup more buttermilk) because protein powder absorbs moisture. They’re denser but higher in protein.
Serving & Storage
How to Serve:
I usually serve these straight from the skillet at the dinner table—it looks rustic and stays warm. But here are other ways I’ve enjoyed them:
Classic Toppings:
– Real maple syrup (the best)
– Whipped cream
– Fresh berries (strawberries, blueberries, raspberries)
– Sliced bananas
– A pat of butter
Fun Toppings:
– Nutella and strawberries
– Peanut butter and banana
– Lemon juice and powdered sugar
– Bacon bits (yes, really. Sweet and savory combo)
Wine Pairing:
Not a wine expert, but my wine-snob friend says a crisp Pinot Grigio or a light Chardonnay works great with this. For coffee, a medium roast pairs nicely.
Storage Instructions:
Refrigerator:
Store leftover pancakes in an airtight container for up to 3 days. They’re best eaten cold or reheated. I sometimes eat them cold for a snack.
Reheating:
Best method: Toast them in a toaster or toaster oven. It restores the crispness.
Second best: Microwave them for 30 seconds with a damp paper towel over them. This keeps them soft.
Avoid: Reheating in a dry pan—they’ll get tough.
Freezing:
Yes, you can freeze pancakes! Cook them, let them cool completely, then stack them with parchment paper between each one. Place in a freezer bag for up to 2 months. Toast directly from frozen. They’re great for quick breakfasts.
Pro tip:
If you’re meal prepping, make a big batch of batter and freeze it in portions. Just thaw in the fridge overnight and cook as needed. It saves time on busy mornings.
Nutrition Information
I’m not a nutritionist, but here’s the breakdown if you’re tracking. This is per pancake (makes about 8-10 pancakes).
| Nutrient | Amount |
|---|---|
| Calories | 180 |
| Protein | 5g |
| Carbs | 25g |
| Fiber | 1g |
| Sugar | 4g |
| Fat | 7g |
| Saturated Fat | 4g |
| Cholesterol | 45mg |
| Sodium | 250mg |
What’s Good:
– Decent protein from the egg and buttermilk
– Easy to modify for dietary needs
– Can add fruit for vitamins and fiber
What to Know:
– Higher in carbs due to flour
– Contains dairy and gluten
– Moderate calories (add syrup on top!)
My Take:
“Look, this is breakfast comfort food. It’s not a diet recipe. But it’s way better than takeout, costs less, and I know exactly what’s in it. When I want to make it lighter, I use the whole wheat version and load up on berries. But usually? I just eat two or three and enjoy it.”
Final Thoughts
So that’s my go-to fluffy buttermilk pancake recipe! I’ve probably talked your ear off at this point, but when you make a recipe this often, you have a lot to say about it.
This has saved breakfast mornings more times than I can count. It’s my answer to “what’s for breakfast” when I want to treat my family to something special without the stress. My kids are happy, my husband’s happy, and I’m happy because I’m not stressed about cooking.
Make it yours! Try different add-ins, swap in your favorite fruits, adjust the sweetness. The best recipes are the ones you adapt to your family’s tastes. And don’t be afraid to experiment with toppings. Banana bread is great, but these pancakes are a different beast entirely.
If you make this, drop a comment and let me know what you think! I love hearing how recipes turn out in your kitchen. And if something doesn’t work, tell me that too—I’m here to help troubleshoot.
Happy cooking! And I hope your kitchen smells half as good as mine does right now.
Frequently Asked Questions
Q: Can I use milk instead of buttermilk?
A: You can, but the pancakes won’t be as fluffy or tender. The acidity in buttermilk is key for reacting with the baking powder. If you must use milk, add 1 tablespoon of white vinegar or lemon juice per cup of milk and let it sit for 10 minutes to create “quick buttermilk.” It’s a decent substitute, but real buttermilk is better.
Q: Why are my pancakes flat?
A: Usually, this means your baking powder is old, or you overmixed the batter. Check the expiration date on your baking powder. Also, stop mixing as soon as the flour is moistened. Lumpy batter is good!
Q: Can I make the batter ahead of time?
A: Yes, but not for too long. You can store the batter in the fridge for up to 24 hours. It will thicken slightly, so you may need to add a splash of milk before cooking. However, the baking powder will lose some potency over time, so they might not be quite as fluffy as fresh batter.
Q: How do I keep pancakes warm while I cook the rest?
A: Place them on a baking sheet in a 200°F (95°C) oven. Don’t stack them while they’re warm, or they’ll get soggy. Stack them only when you’re ready to eat.
Q: Can I freeze pancakes?
A: Absolutely! Cook them, let them cool completely, then freeze in a single layer on a baking sheet. Once frozen, transfer to a freezer bag. They’ll last up to 2 months. Toast directly from frozen for the best texture.
Q: Why do my pancakes stick to the pan?
A: Your pan isn’t hot enough, or you didn’t grease it enough. Make sure to test the pan temperature with water droplets. Also, use a non-stick skillet and a little butter or oil for each batch.
Q: Can I double this recipe?
A: Yes, double everything and use a larger bowl. The cooking times stay the same. Just make sure your skillet is big enough or cook in batches. I double this recipe when I have guests.
Pin This Recipe!

Fluffy Buttermilk Pancakes: 5-Ingredient Easy Breakfast
- Total Time: 20 minutes
- Yield: 8-10 pancakes 1x
Description
Lighter than air, crisp at the edges, and tender inside, these fluffy buttermilk pancakes are made with simple pantry staples. They deliver legendary diner-quality fluffiness in just 20 minutes.
Ingredients
- 1 ½ cups (190g) All-Purpose Flour
- 2 tablespoons (25g) Sugar
- 2 teaspoons Baking Powder
- ½ teaspoon Salt
- 1 ¼ cups (300ml) Buttermilk
- 1 large Egg
- 3 tablespoons (45g) Unsalted Butter, melted
- 1 teaspoon Vanilla Extract
- Butter or Oil for greasing the pan
- Maple Syrup for serving
Instructions
- Whisk together the flour, sugar, baking powder, and salt in a large mixing bowl until no lumps remain.
- In a separate bowl or measuring cup, whisk the buttermilk, egg, melted butter, and vanilla extract until smooth.
- Make a well in the dry ingredients and pour in the wet mixture. Gently fold together until just combined; stop when a few lumps remain. Do not overmix.
- Heat a non-stick skillet or griddle over medium heat. Test readiness by flicking water drops onto the surface; they should sizzle and evaporate.
- Lightly grease the pan with butter or oil. Pour about ¼ cup of batter per pancake, cooking 2-3 at a time.
- Cook until bubbles form on the surface and edges look set (2-3 minutes). Flip carefully.
- Cook the second side for 1-2 minutes until golden brown.
- Transfer to a warm plate and repeat with remaining batter. Serve immediately with maple syrup.
Notes
Do not overmix the batter; lumps are okay and ensure fluffiness. Let batter rest for 5-10 minutes for extra fluffiness. Keep cooked pancakes warm in a 200°F oven. Use real maple syrup for best flavor. If using whole wheat flour, substitute up to half and add extra buttermilk.
- Prep Time: 5 minutes
- Cook Time: 15 minutes
- Category: Breakfast
- Cuisine: American
Nutrition
- Serving Size: 1 pancake
- Calories: 180
- Sugar: 4
- Sodium: 250
- Fat: 7
- Saturated Fat: 4
- Carbohydrates: 25
- Fiber: 1
- Protein: 5
Keywords: fluffy pancakes, buttermilk pancakes, easy breakfast, diner style pancakes, quick breakfast, homemade pancakes


